In-Depth: Restoring and Recasing a Vintage Patek Philippe Movement
Building a case for a homeless calibre.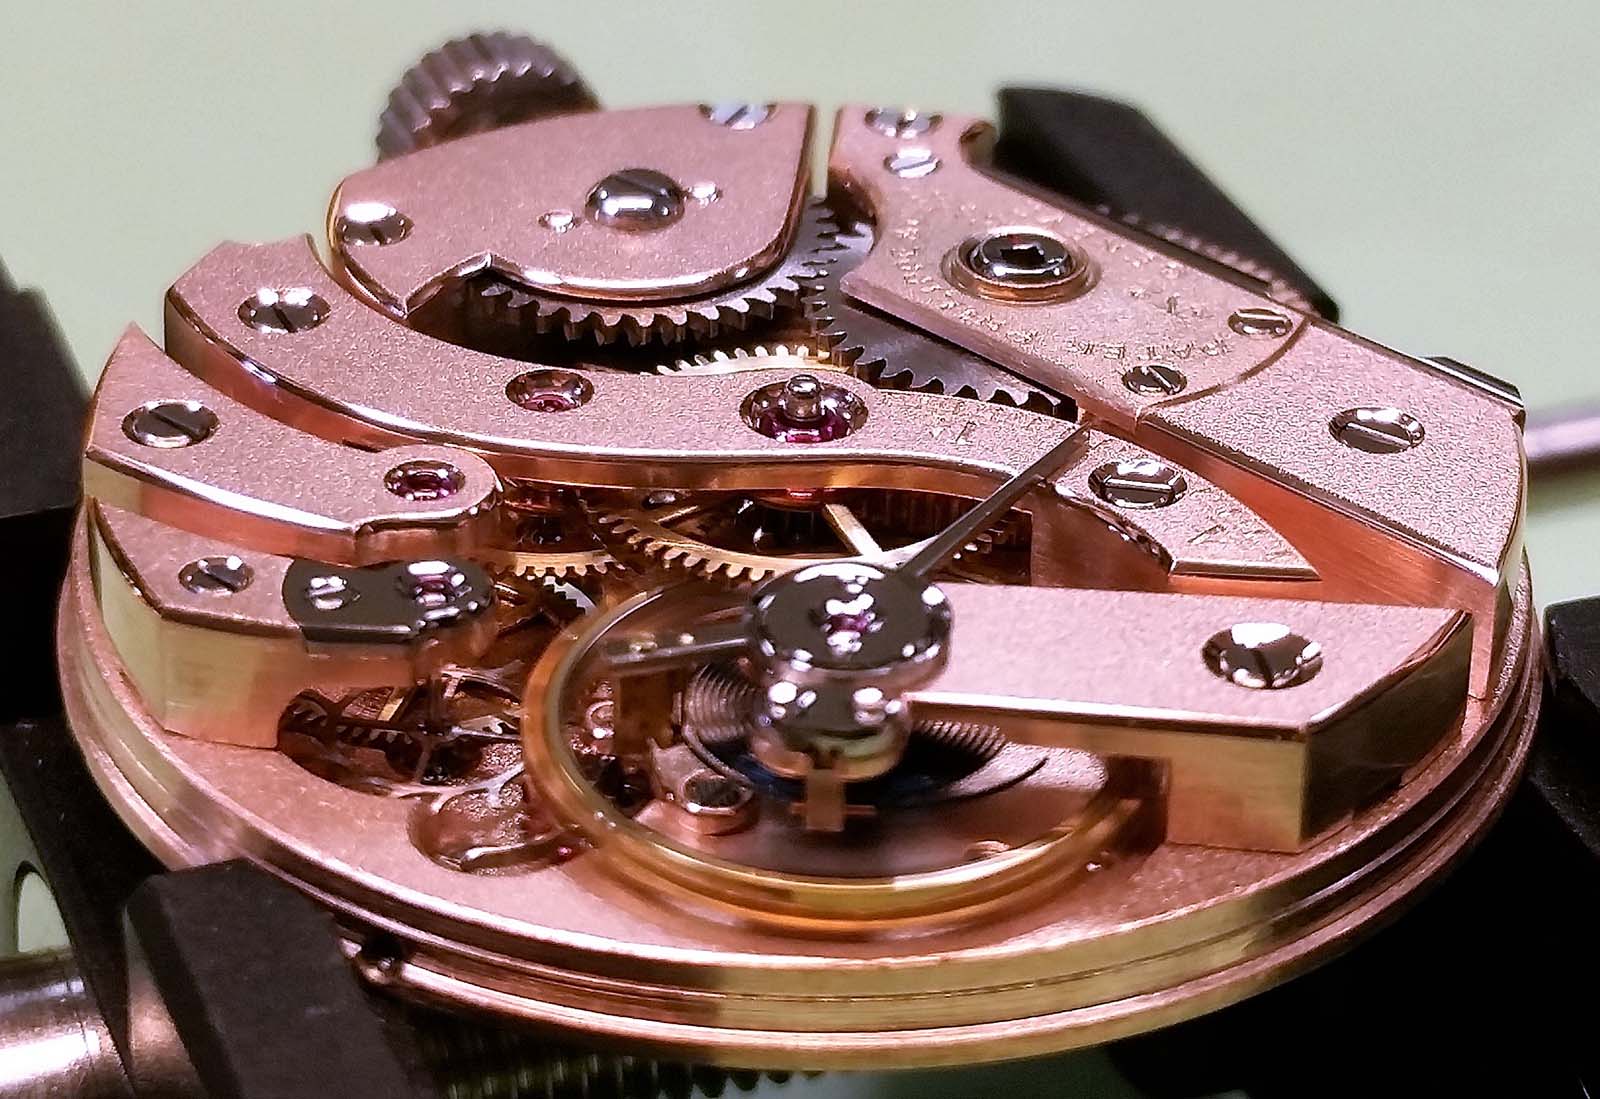
In this article we will take a look at a special watch produced for a client in Singapore, which also happened to be a way to give new life to a loose movement that had long lost its case.
Although this watch was recently finished, the project actually started many years ago. When searching for interesting movements to restore I came across a vintage Patek Philippe movement in Australia. It was probably produced between 1905 and 1910 for a pendant watch.
I liked the style, shape and size; it reminded me a lot of the great pocket watches Patek Philippe used to do, but in wristwatch size. I thought it could one day make a nice wristwatch for someone appreciates its good old-fashioned quality. But the movement was missing the case – probably melted down in the past for the scrap value – while the dial and hands were beyond repair. So a potential customer would have to design those parts from scratch. Because the movement was in relatively bad shape and not running, I could even afford to buy it before finding a potential client.
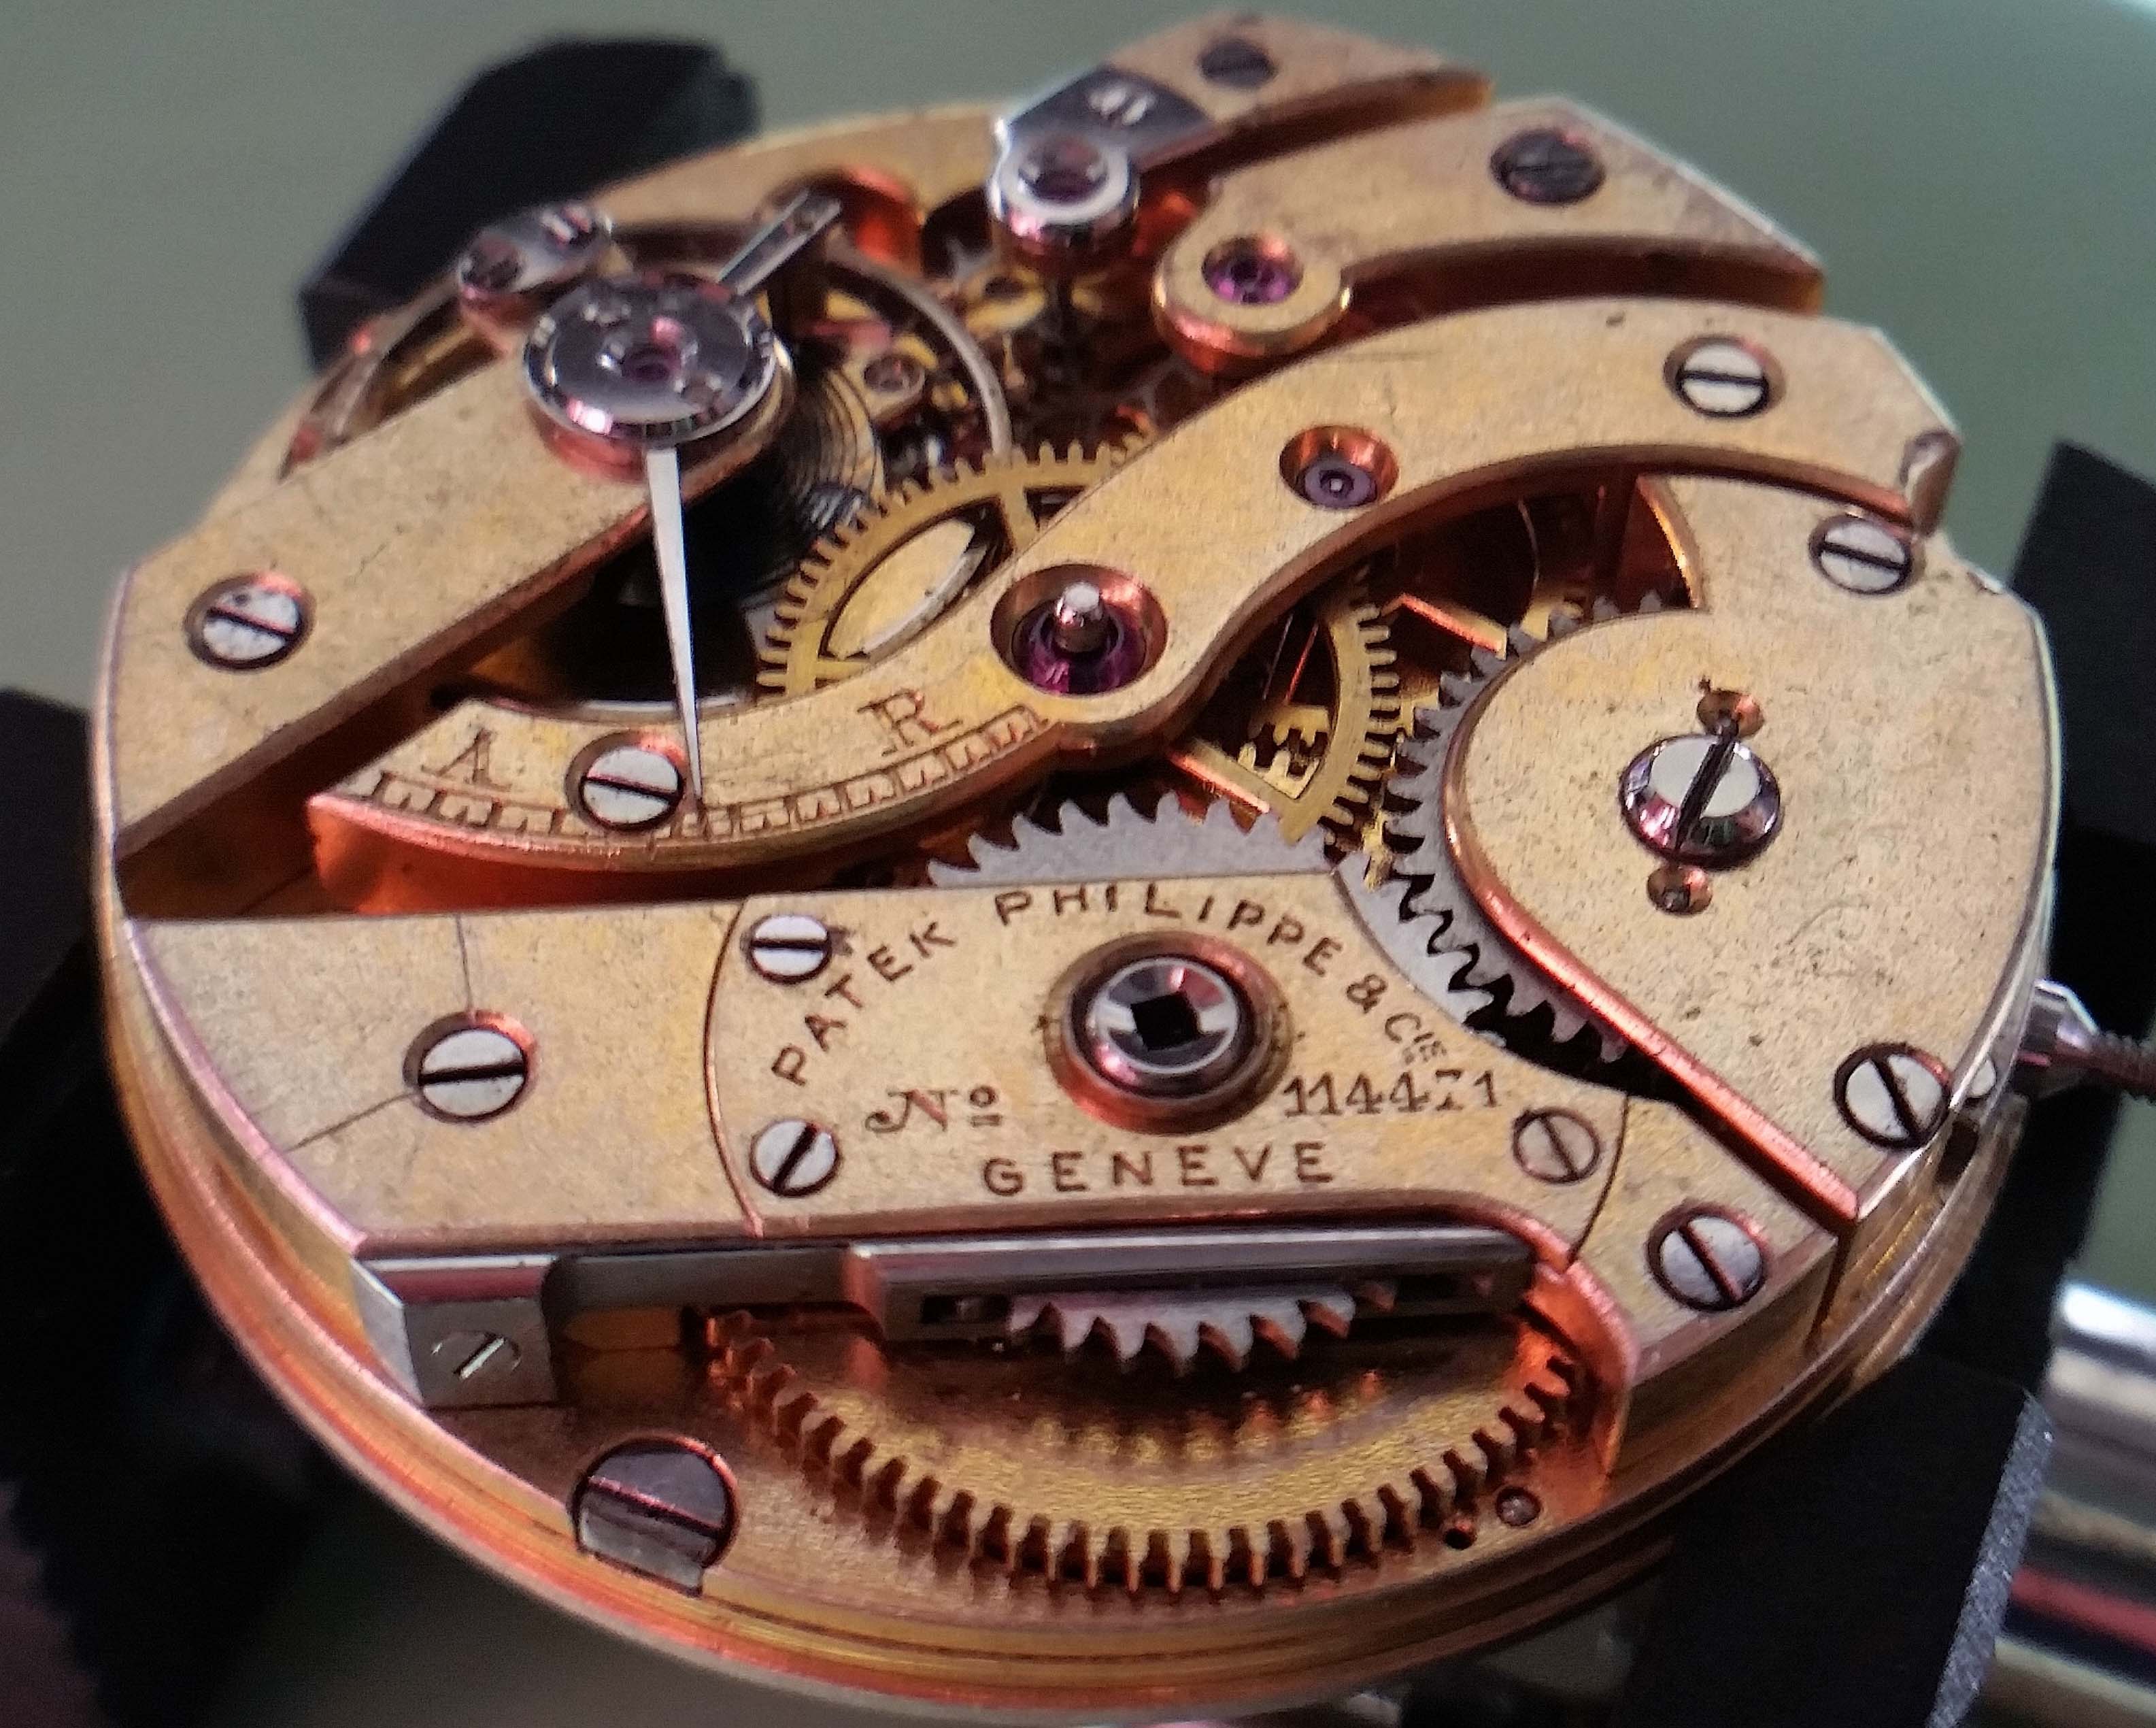
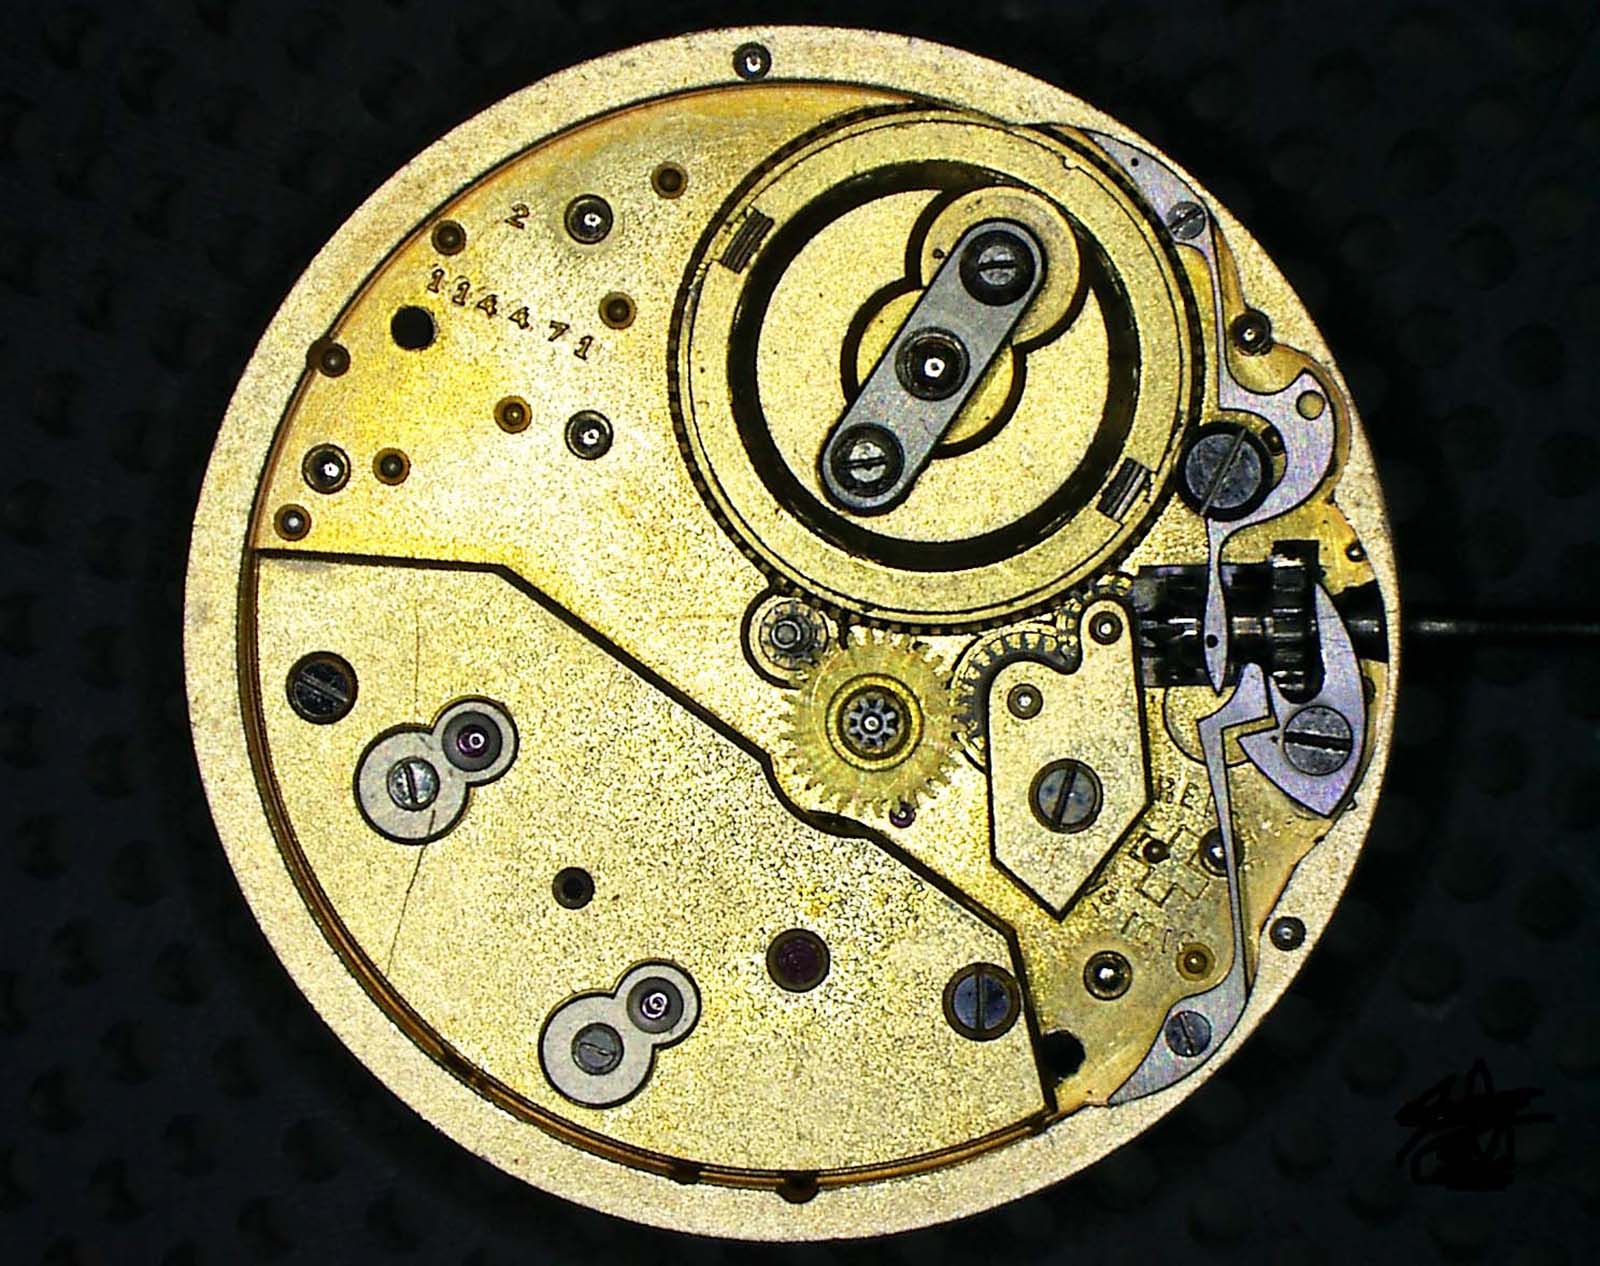
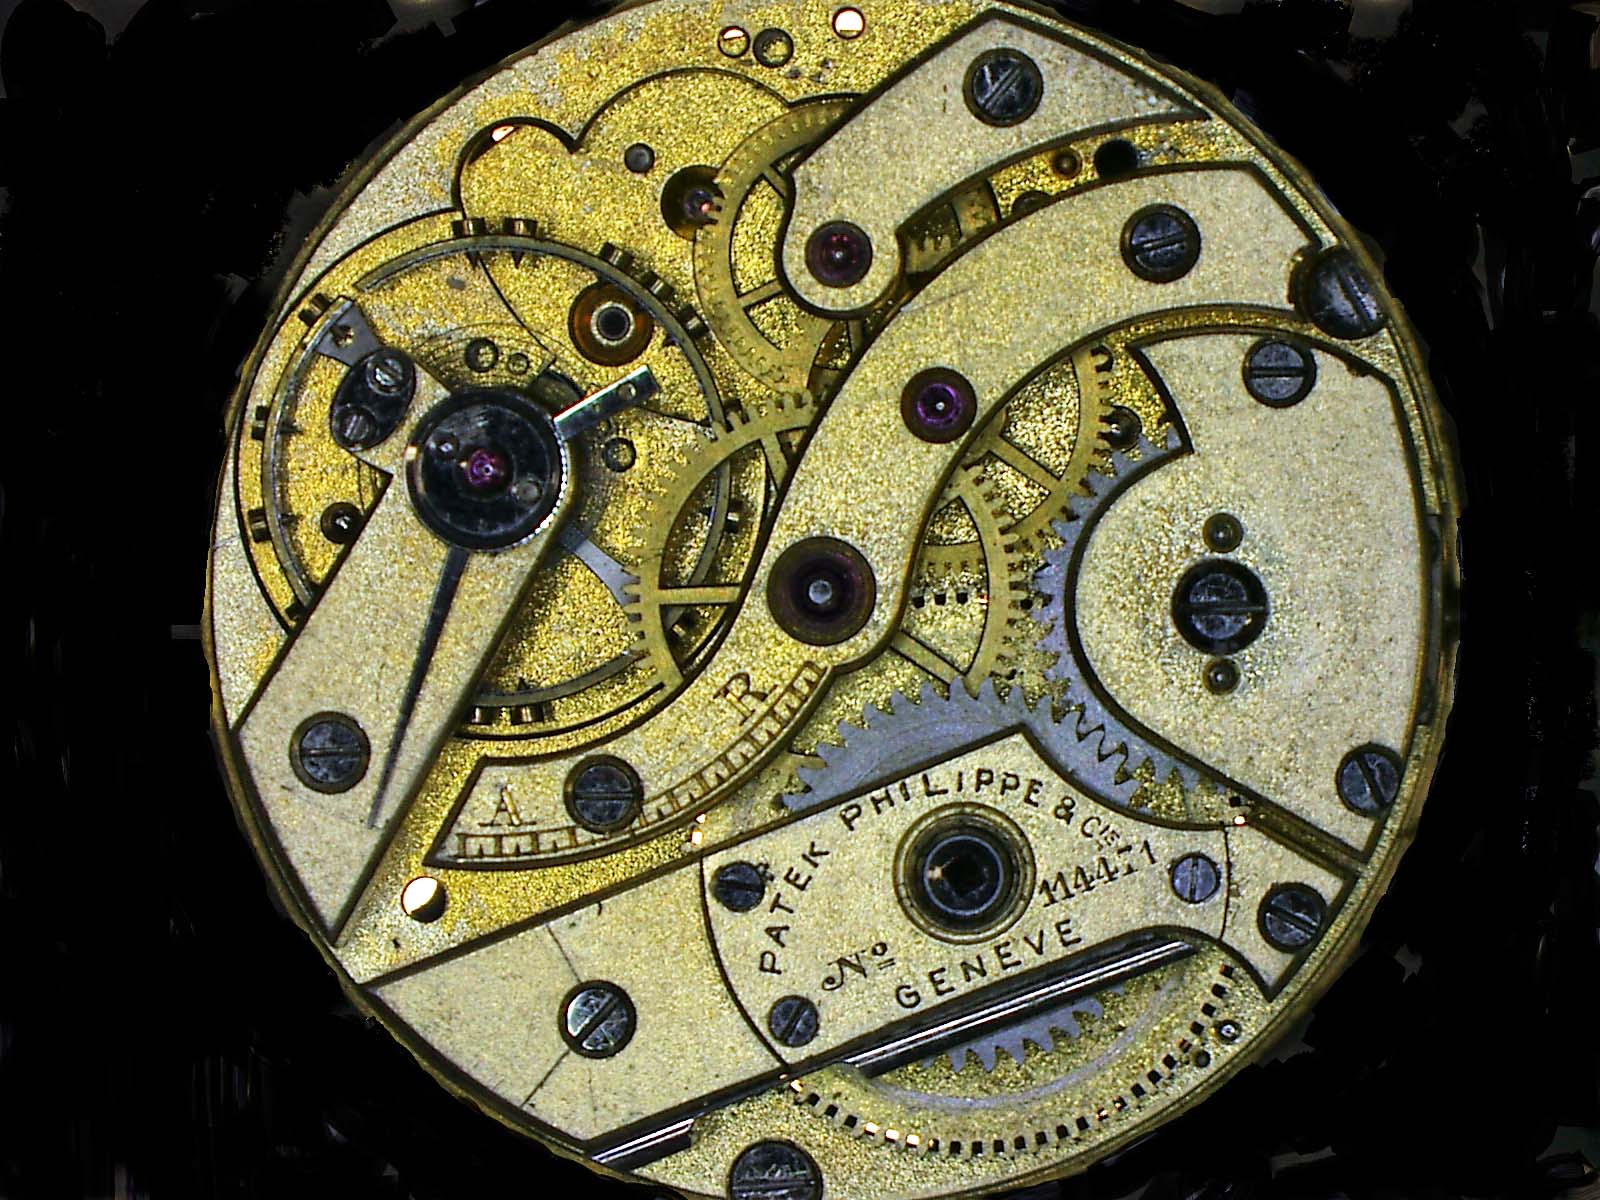
The beautifully classical movement looking for a home
But several years later, a client came along. It was a husband and wife who had previously ordered another watch, a pocket watch conversion with an old Moser movement in a hand-made silver case with a sapphire dial featuring gold indexes and hand-made hands. The pocket watch was commissioned by the wife both as a wedding anniversary gift for the husband and as an heirloom to be passed down to their daughter.
Since it was destined to be a family heirloom, the story behind the design of the watch was important, and every single component was made by highly skilled artisans in Switzerland. My former student Robert Michelsen took great care of that project.
When the husband returned and decided to order the watch with the Patek Philippe movement, he gave us a hand-drawn sketch of what he wanted. It was to have a pink mother of pearl dial with white gold case and matching white gold bracelet.
The watch was meant to be a 50th birthday gift for his wife. While the husband had a fairly good idea of his wife’s taste, my business partner spoke to the wife under the guise of a survey for a new line of women’s watches. They went through watch ads in magazines to figure out what she liked and did not like, and arrived at a general idea of what her ideal watch would look like.
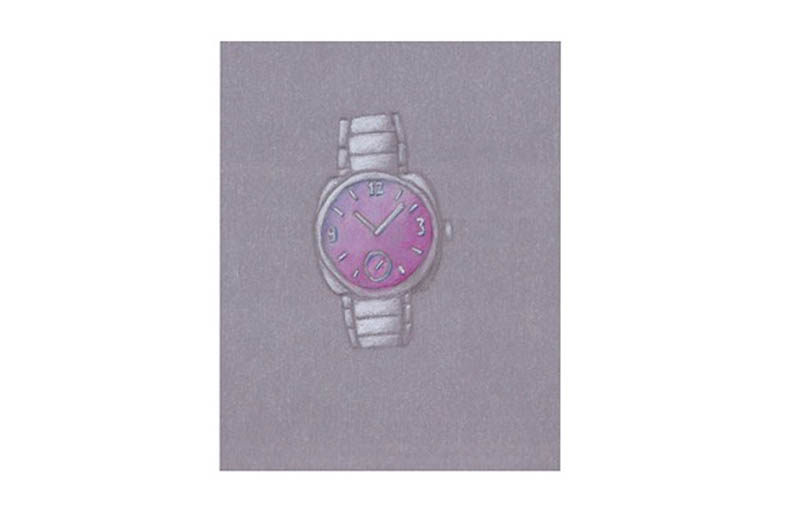
The husband’s sketch
[Editor’s note: Henrik Korpela is the founder of K&H Watchmaking Competence Centre (KHWCC), a watchmaking school in Le Locle, Switzerland. He also restores vintage watches as well as creates custom watches like the one detailed below to support the school. He can be reached via khwcc.ch.]
Lining up the suppliers
While I did the restoration of the movement, the external components, like the case and crystal, had to be sourced from specialist suppliers. Once the specs were decided, the parts had to be ordered before starting on the movement, since production of such components usually takes a long time.
To showcase the movement, it was decided the case back would have a sapphire crystal, while the crystal on the front was to be slightly domed to suit the design. Both crystals were made by a sapphire specialist in Movelier, a Swiss town near the border with France, who is capable of making crystals one by one to the client’s specifications.
The main plate of the movement was then sent to the dial maker in La Chaux-de-Fonds for measurements, in order to position the dial feet and hole for the canon pinion, and to ensure the design came as close as possible to the client’s sketch.
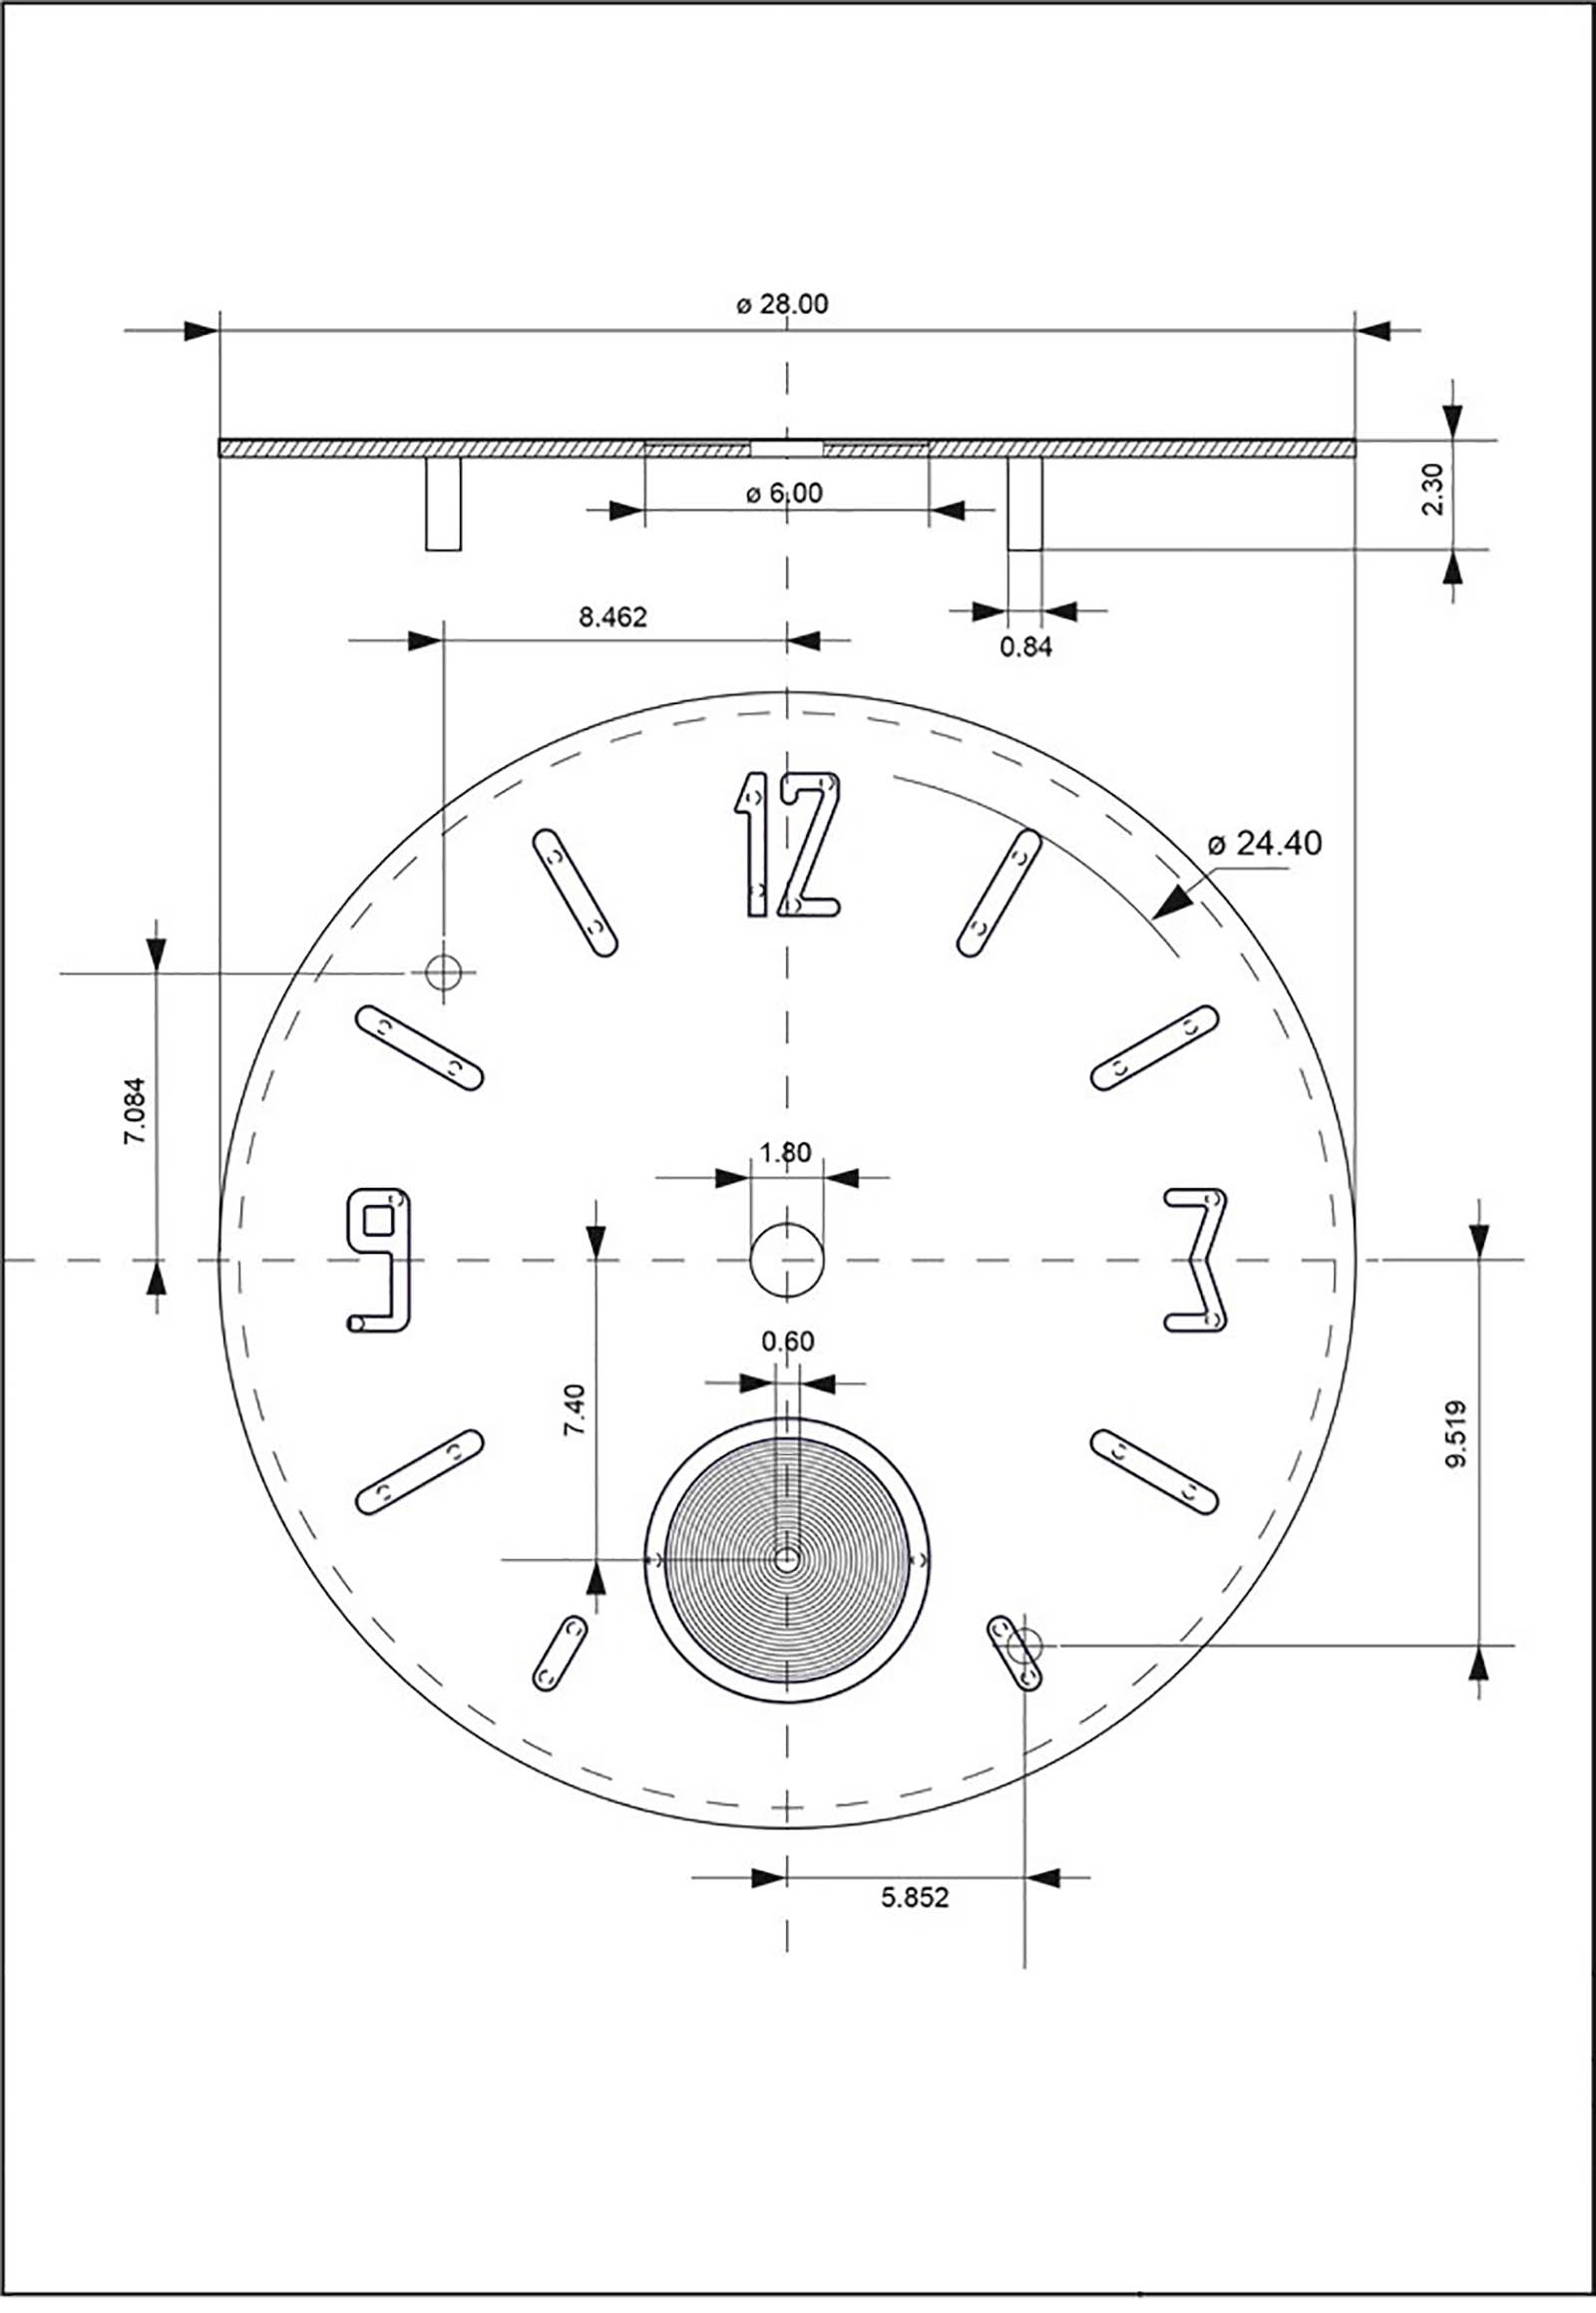
The design by the dial maker
After a final discussion with the dial maker, he finished recording the dimensions of the base plate and I got it back. Then I went to see case maker Jean-Luc Mora, who is based in the outskirts of La Chaux-de-fonds. He had moved there from the centre of the city a few years ago, and set up his workshop in a typical Swiss farmhouse.
He works in a very neat workshop, doing prototyping and case-making. Jean-Luc is one of the very rare craftsmen who can make almost anything watch-related by hand, whether it’s a one-off, custom piece or production in a small series. I am very fortunate to know him and have always been impressed by his attention to detail and precise work.
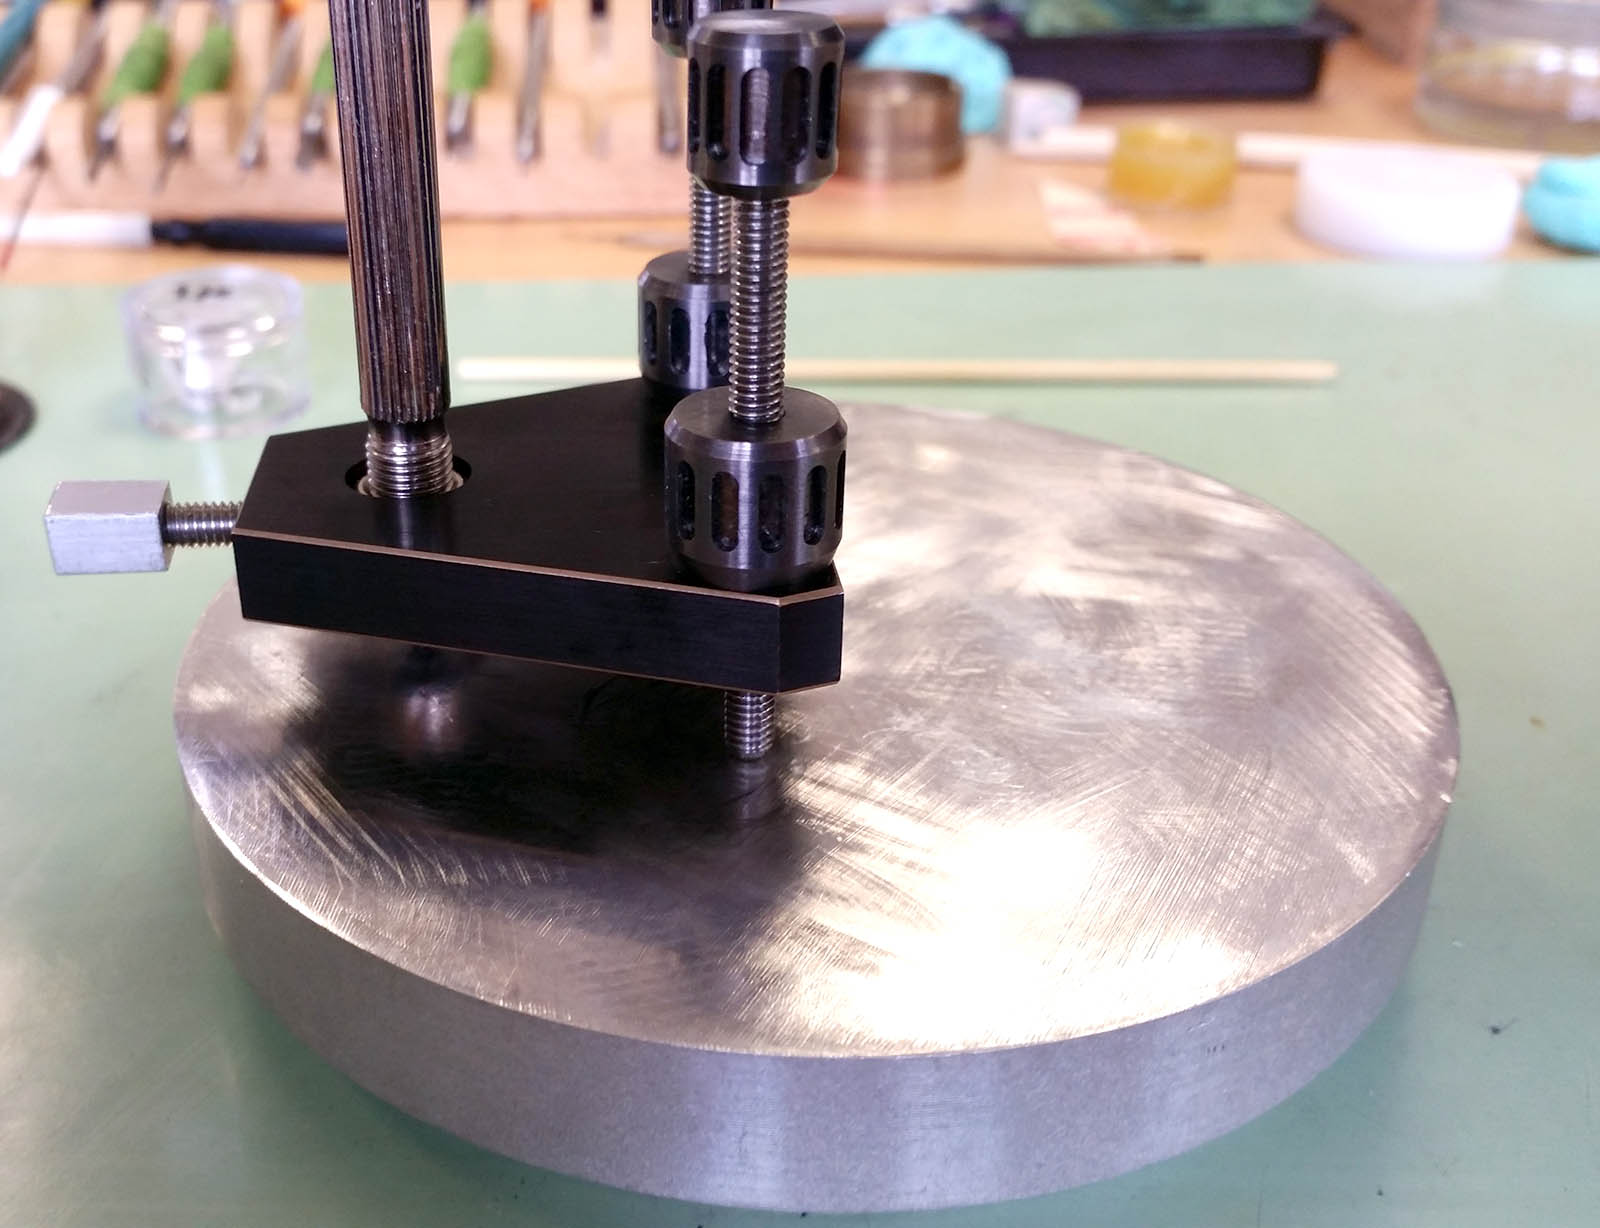
I brought with me the main plate, with the bridges as well as winding and setting mechanism assembled, for Jean-Luc to do the interior measurements for the case. We discussed at length the shape of the case and how to create the look that the client wanted. It’s surprising how the smallest detail can change the overall look of a case, therefore it is always necessary to first make a prototype. Ones we all agreed on the design, Jean-Luc went on to make a prototype case in brass.
Jean-Luc Mora in his workshop
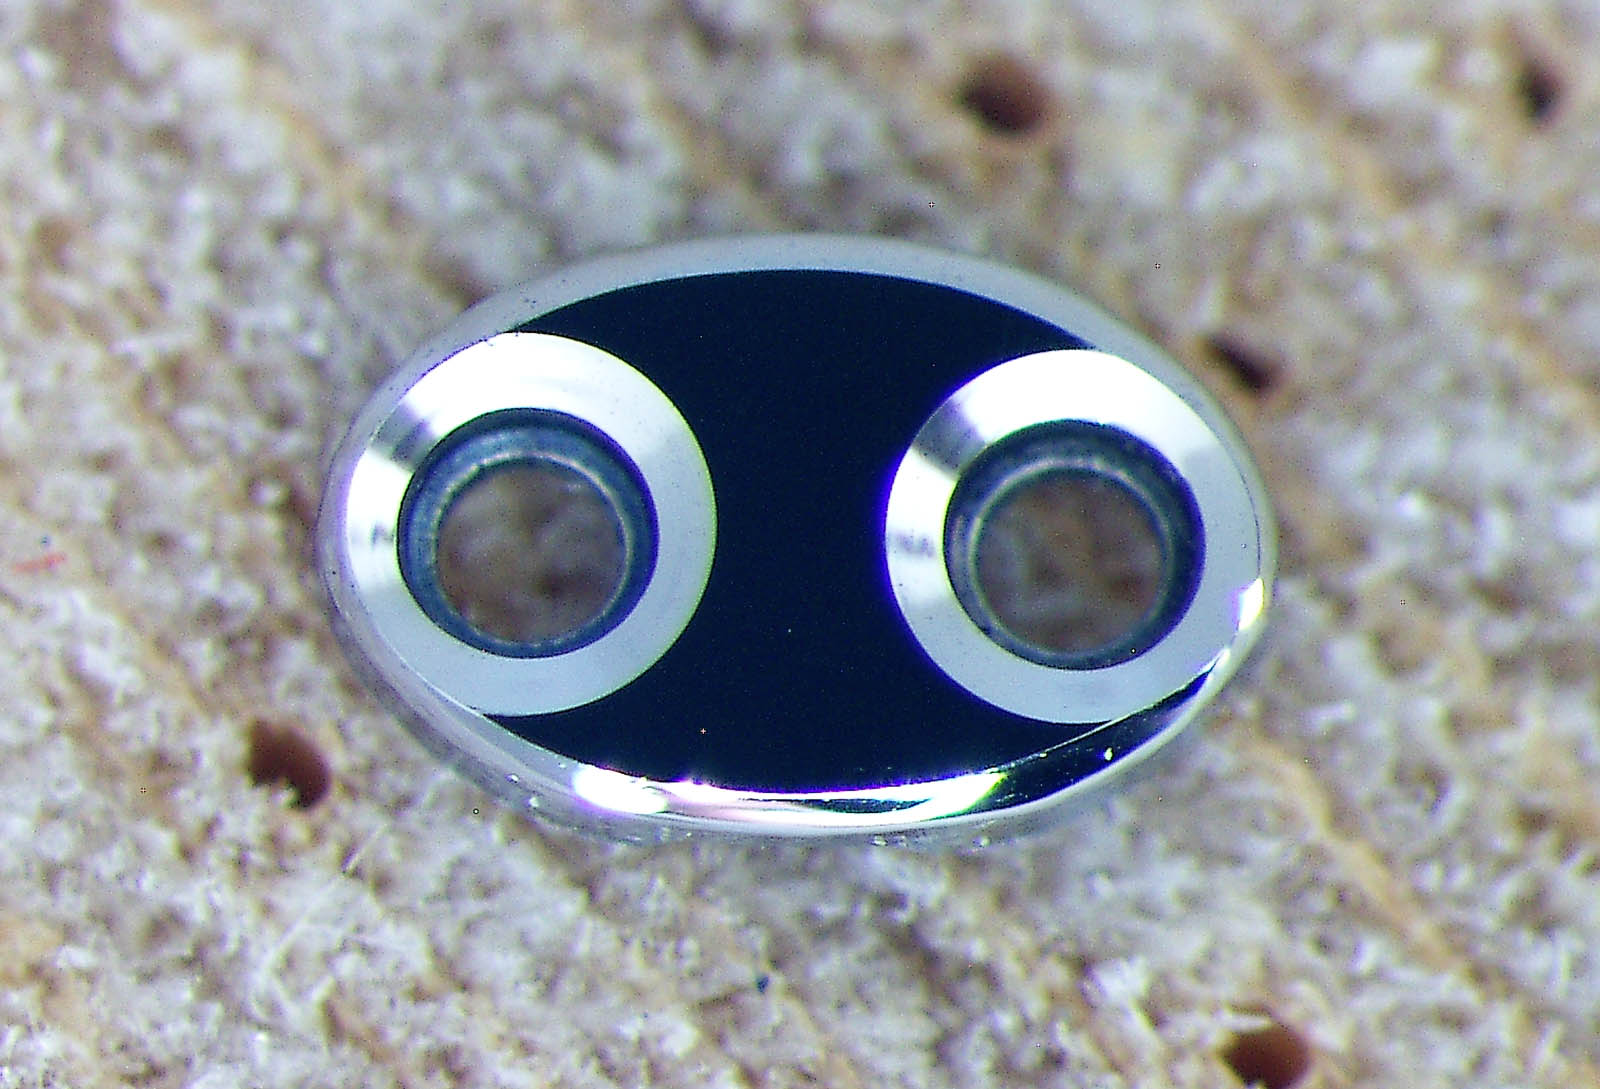
Ensuring the shape and fit of the sapphire crystal against the prototype brass case
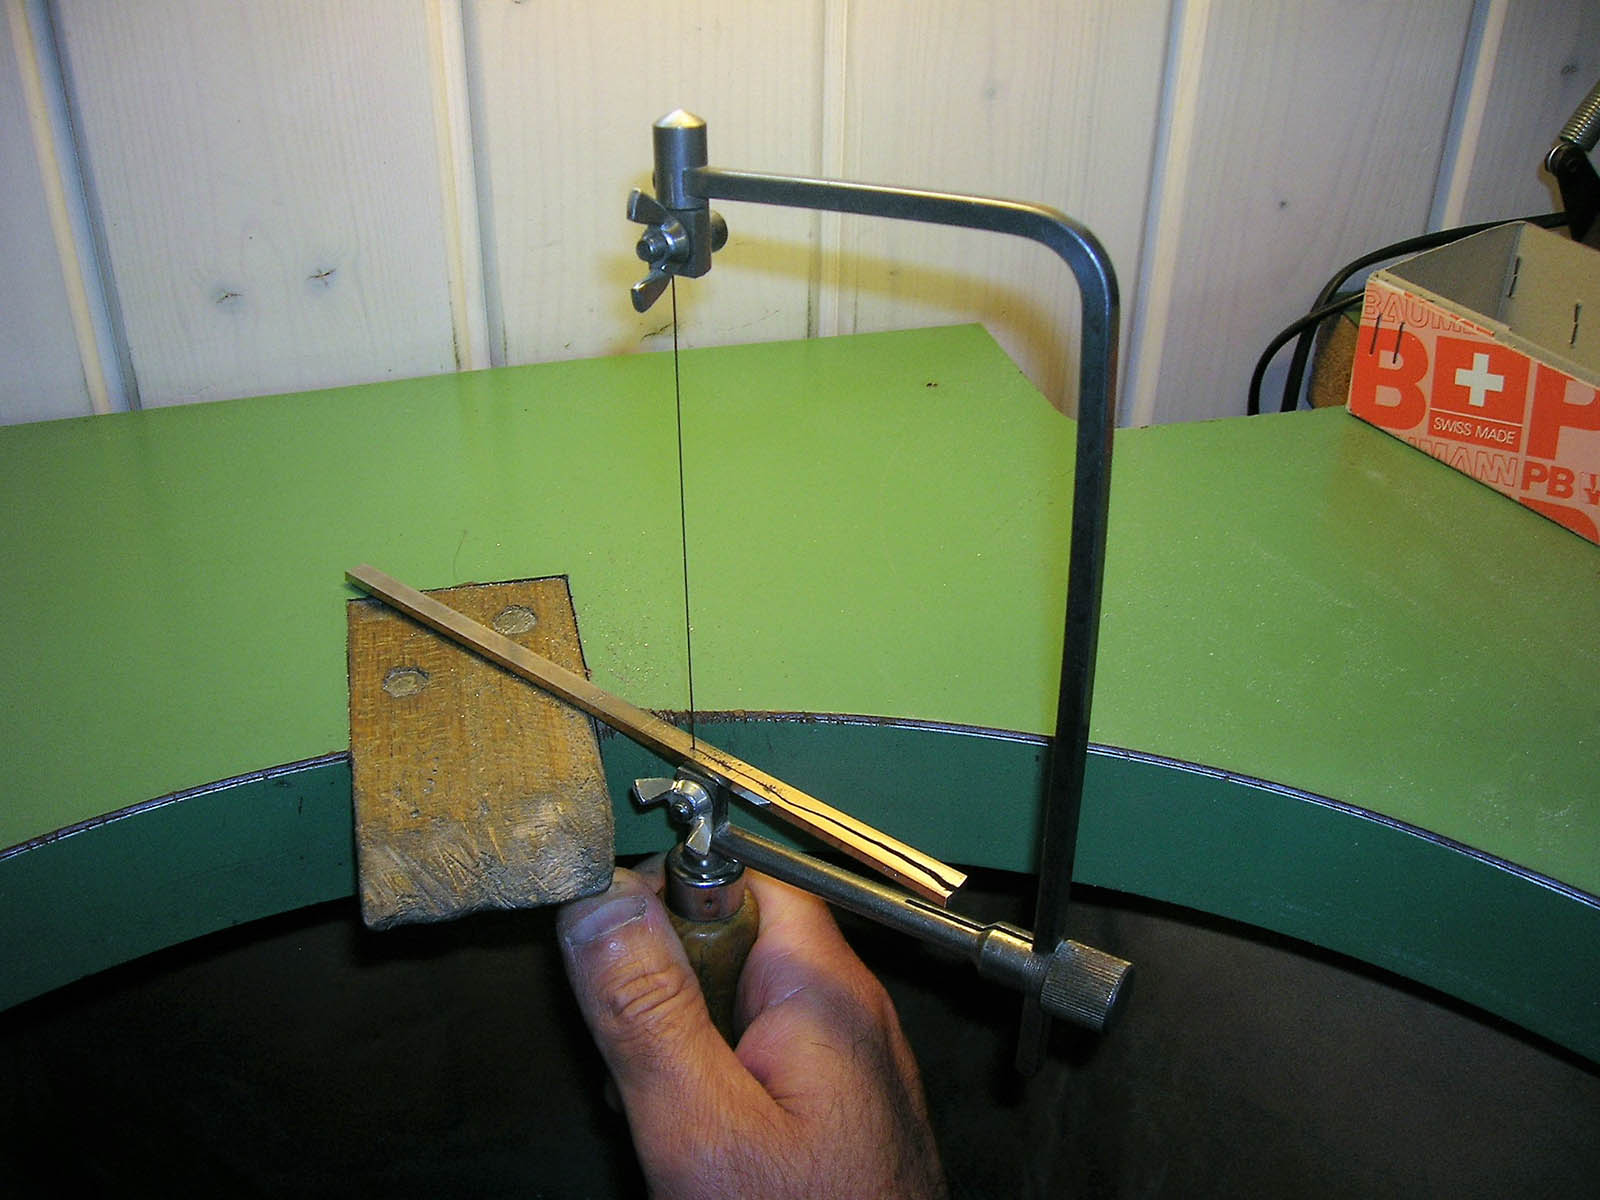
Steps in case and bracelet production. Above is the hand-sawing gold for the bracelet links
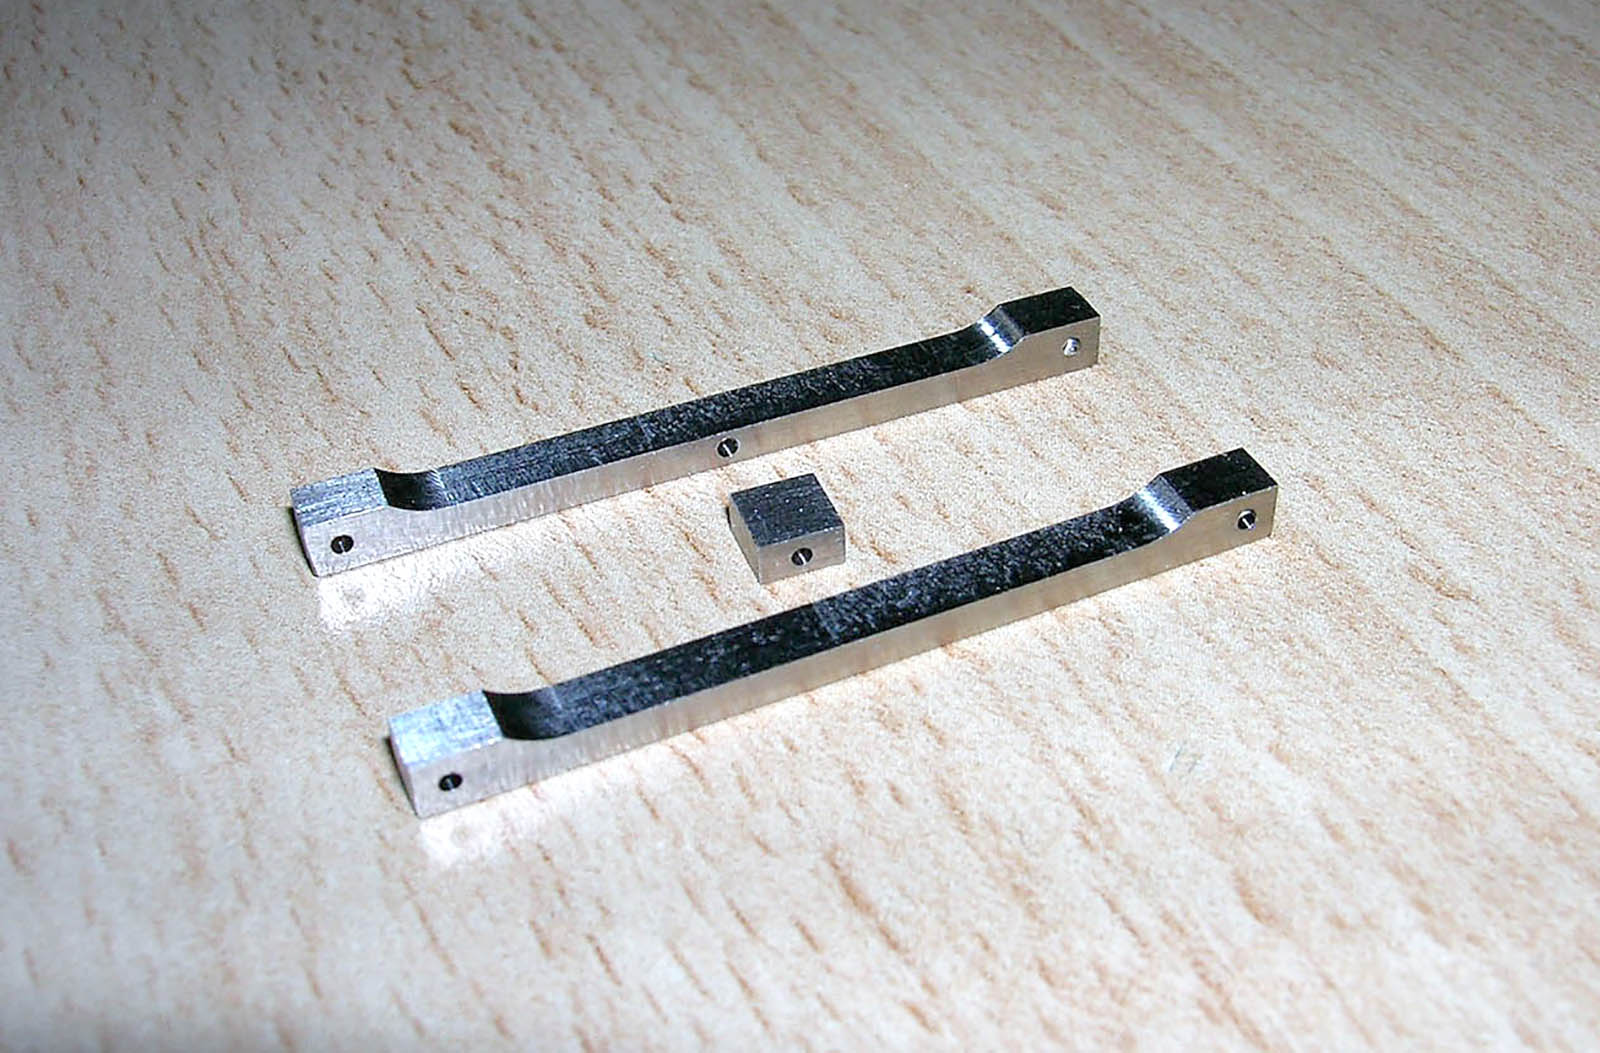
Raw blanks ready to be turned into the bracelet links
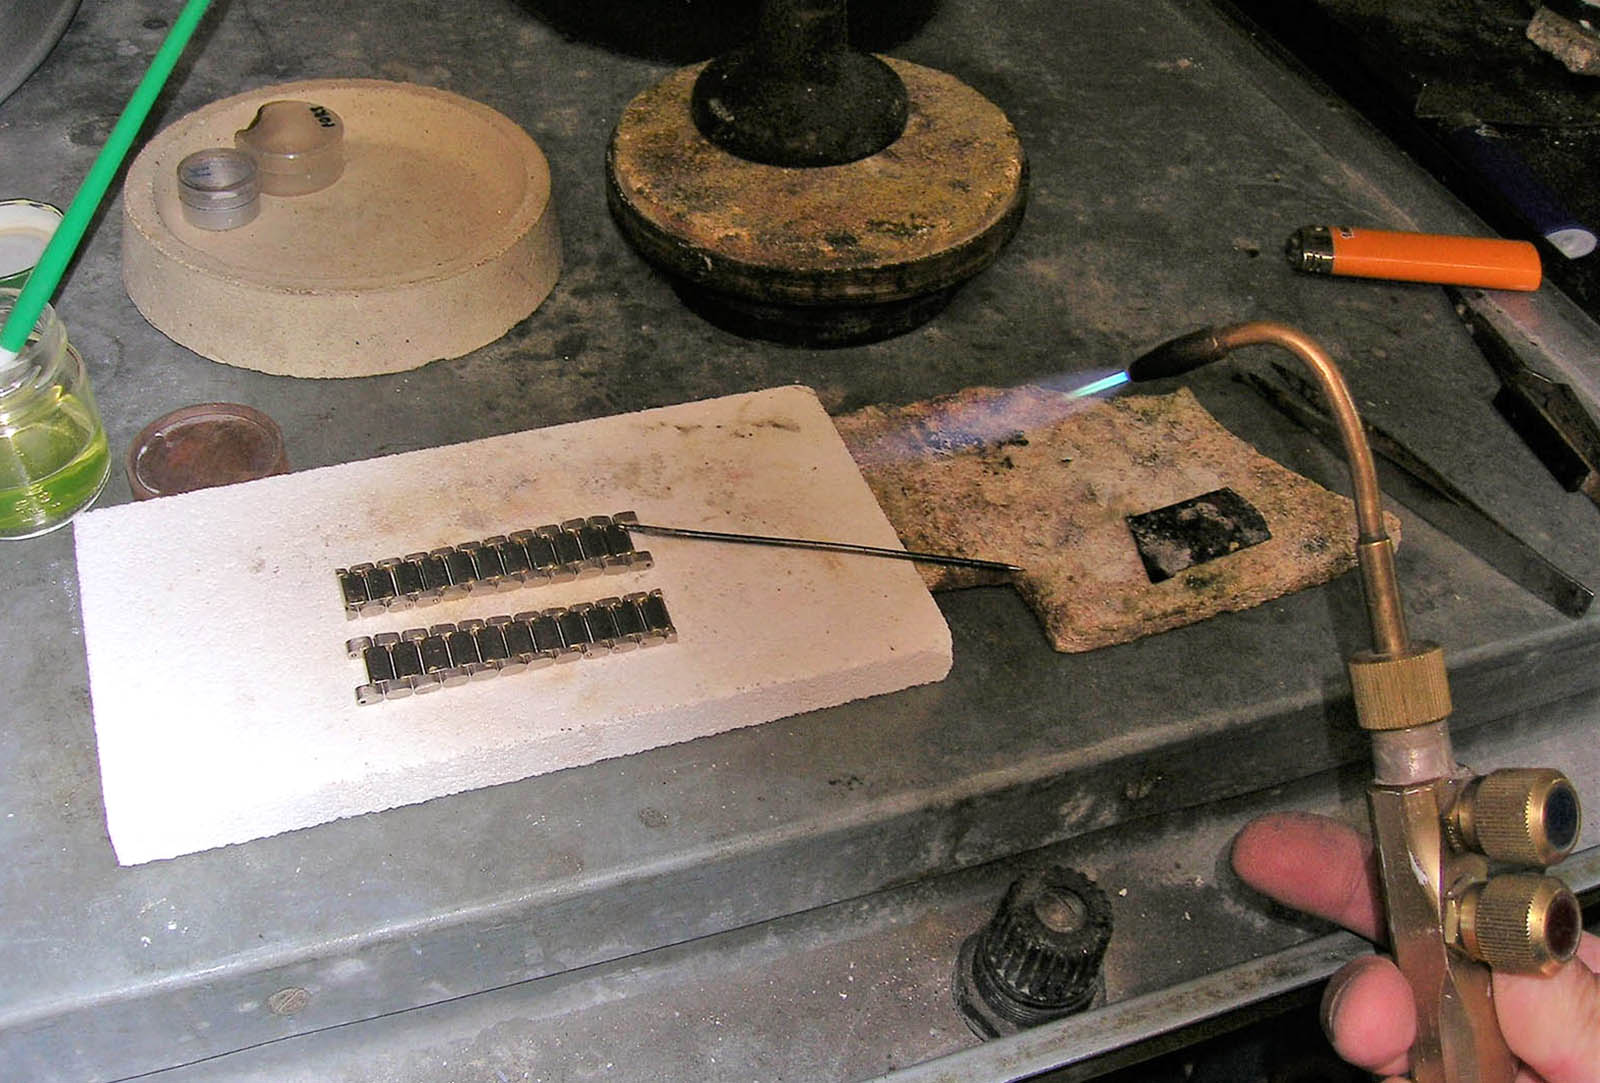
Soldering the parts of the bracelet
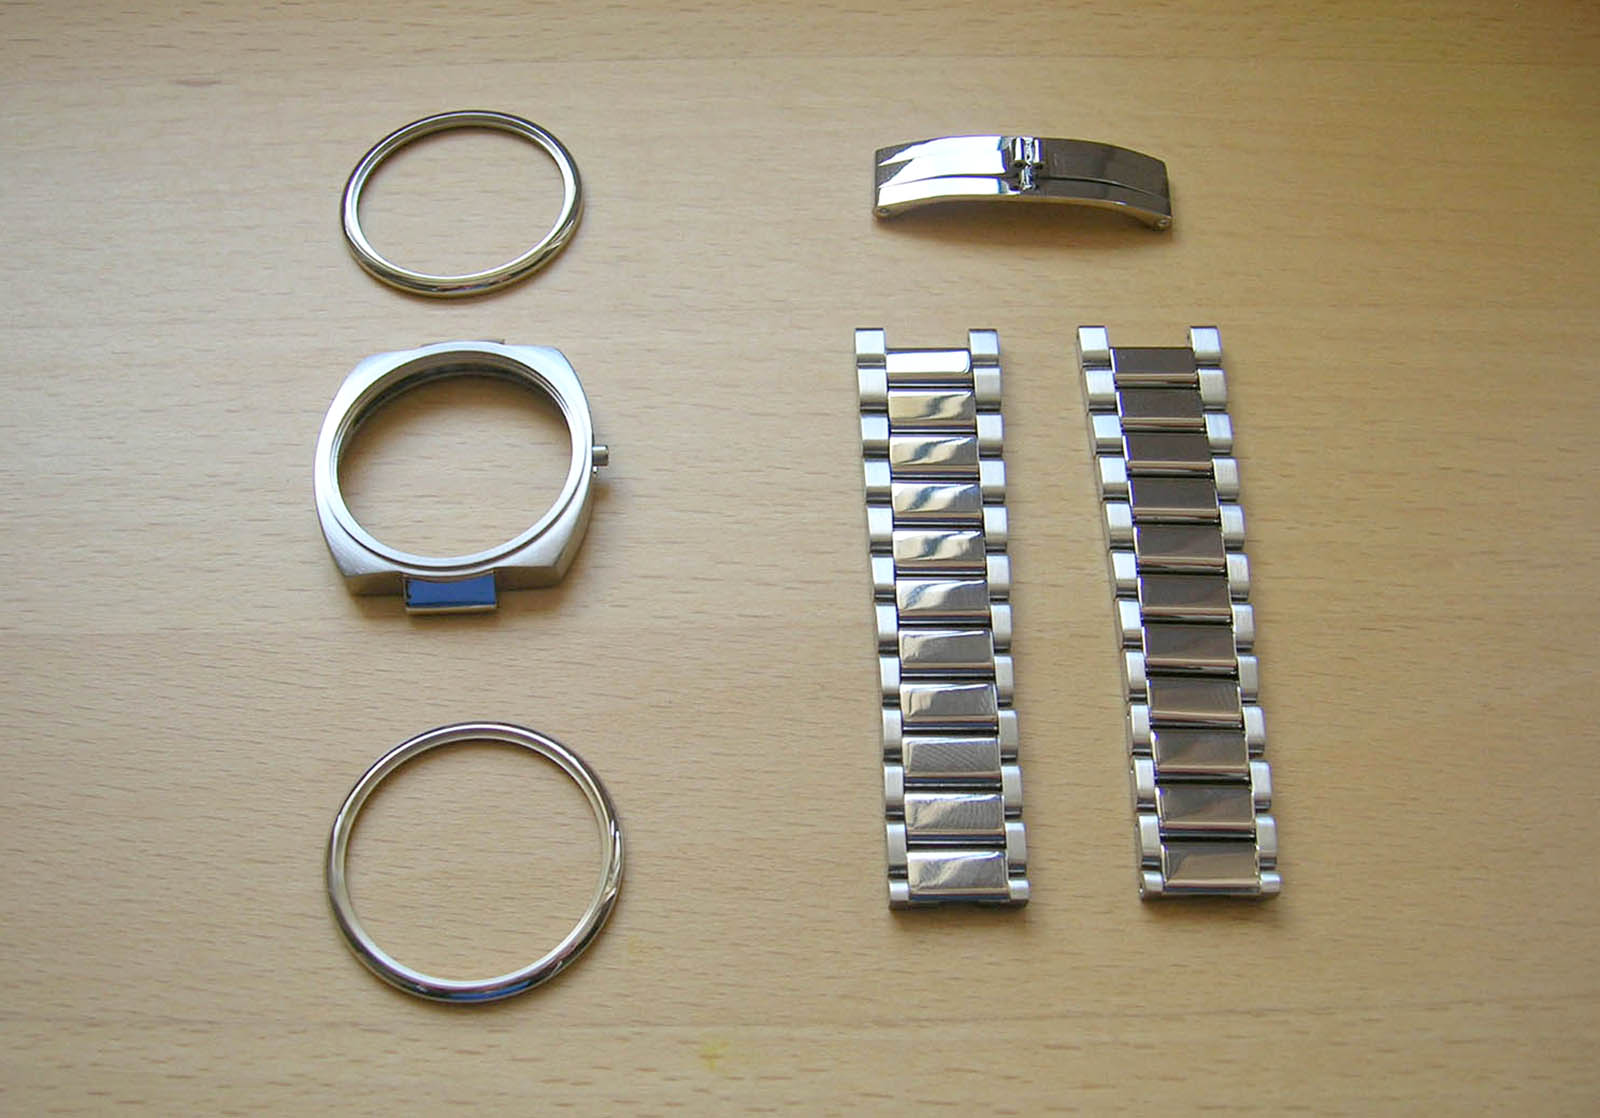
The finished case and bracelet in 18k white gold
The mechanical restoration
While the dial and case prototype were in progress, I started working on the movement. I knew the dial would most likely take more than a year to finish, while Jean-Luc Mora would take 2-3 weeks to complete the case prototype, giving me time to work on the movement and make it functional once again.
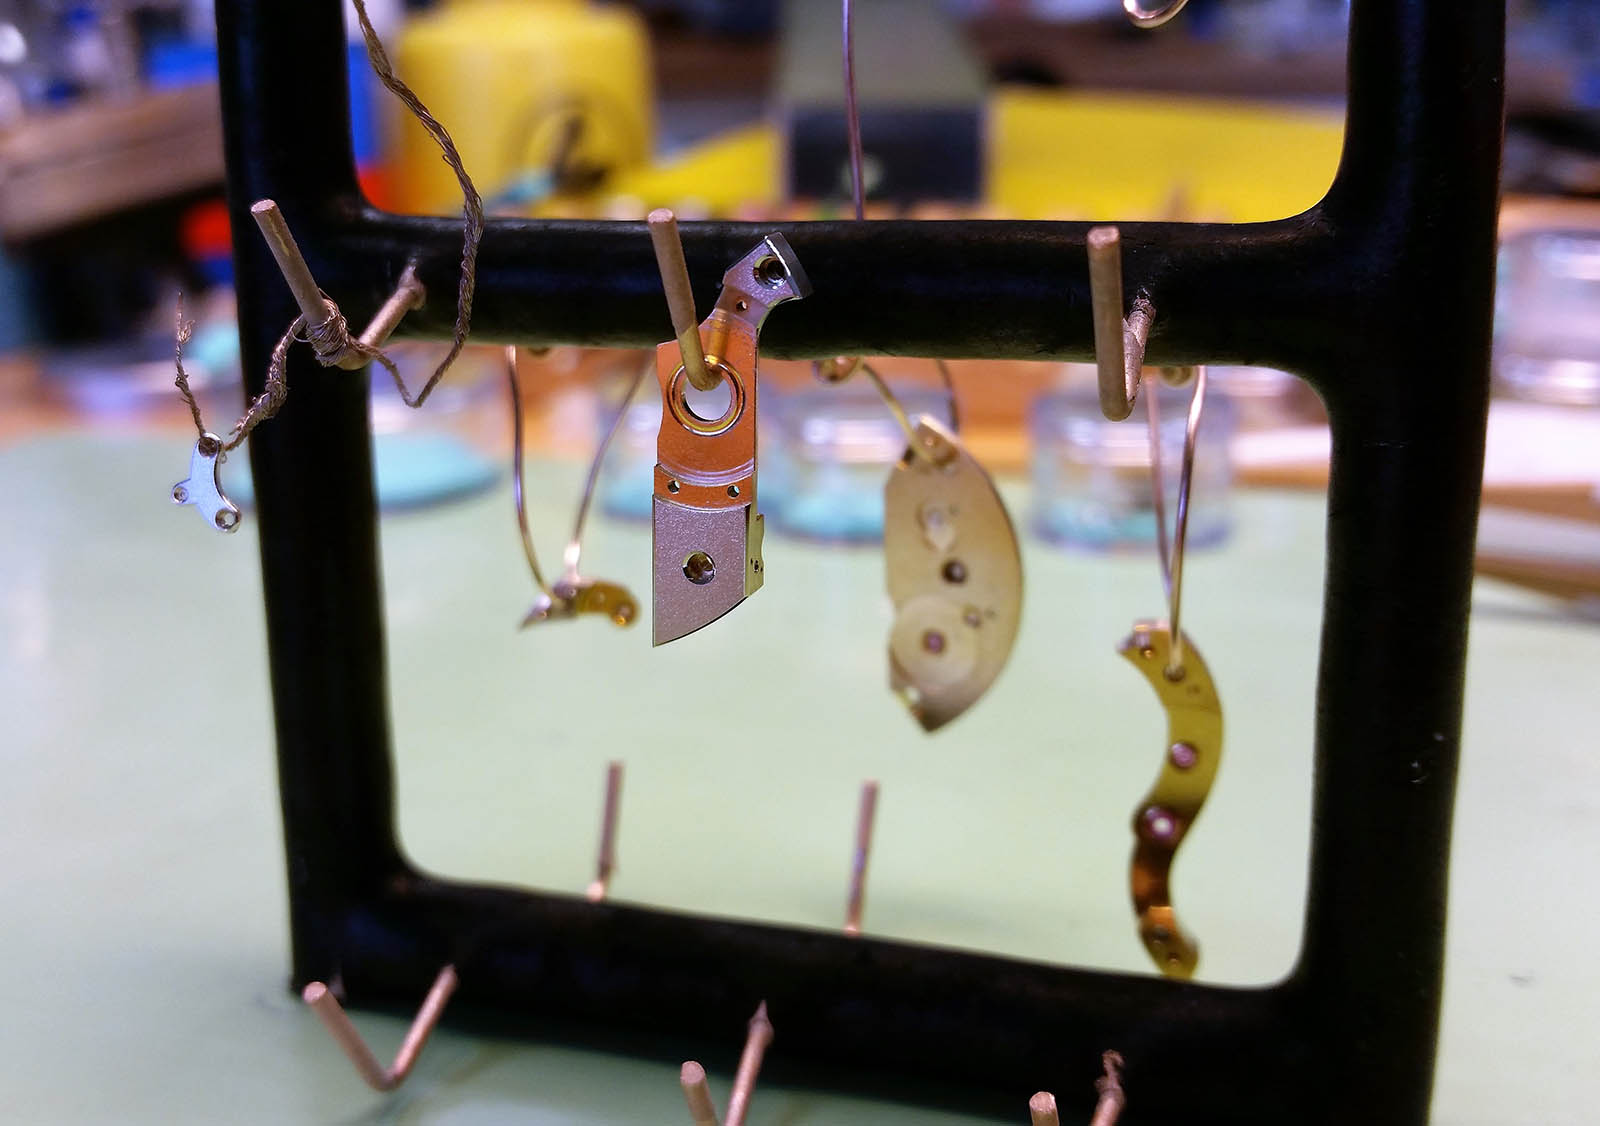
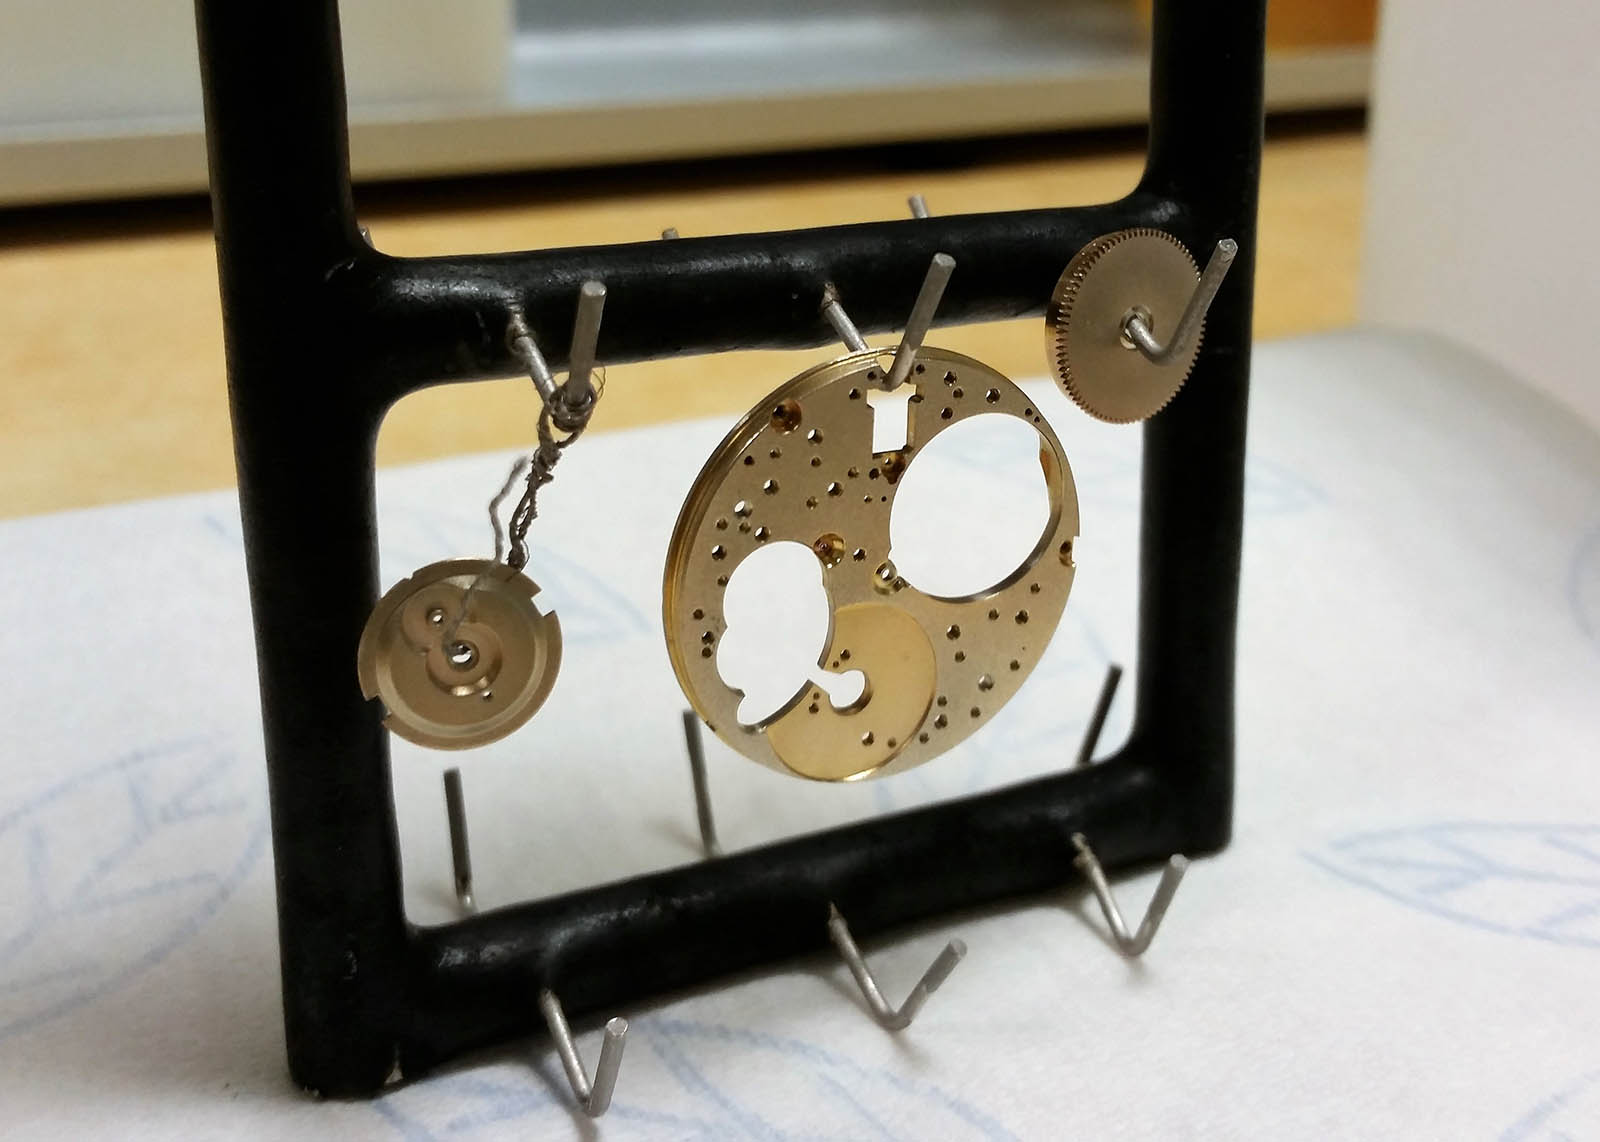
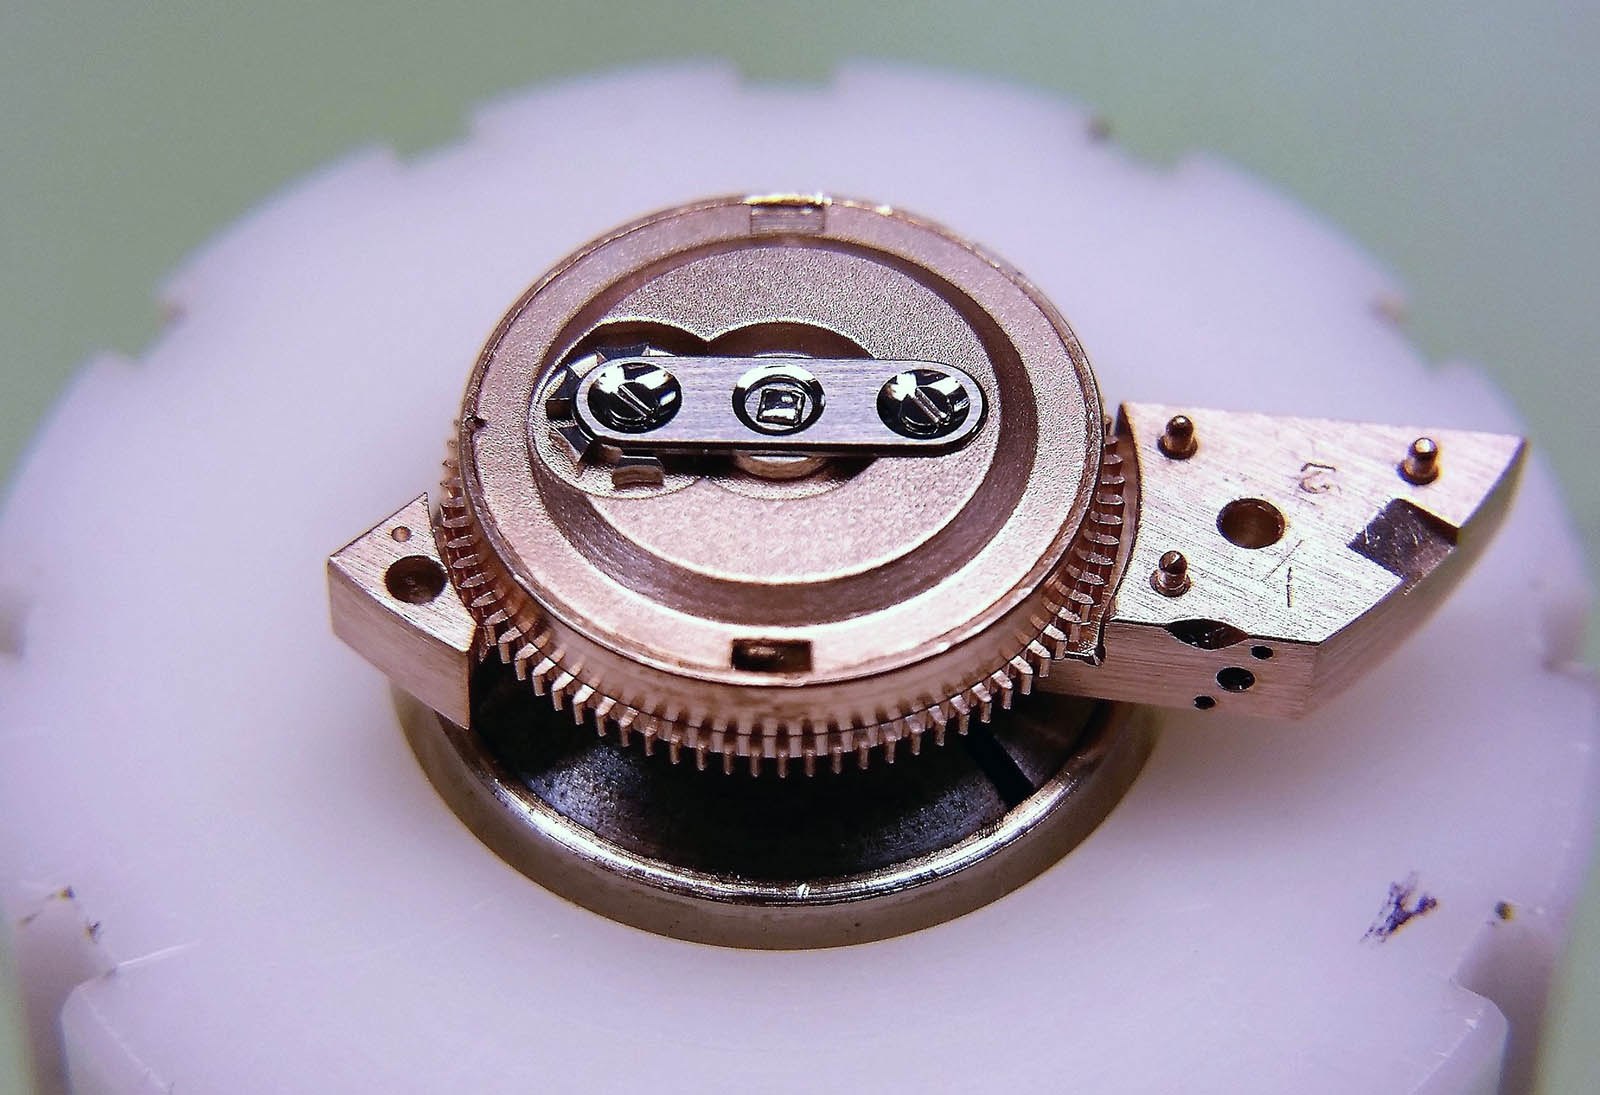
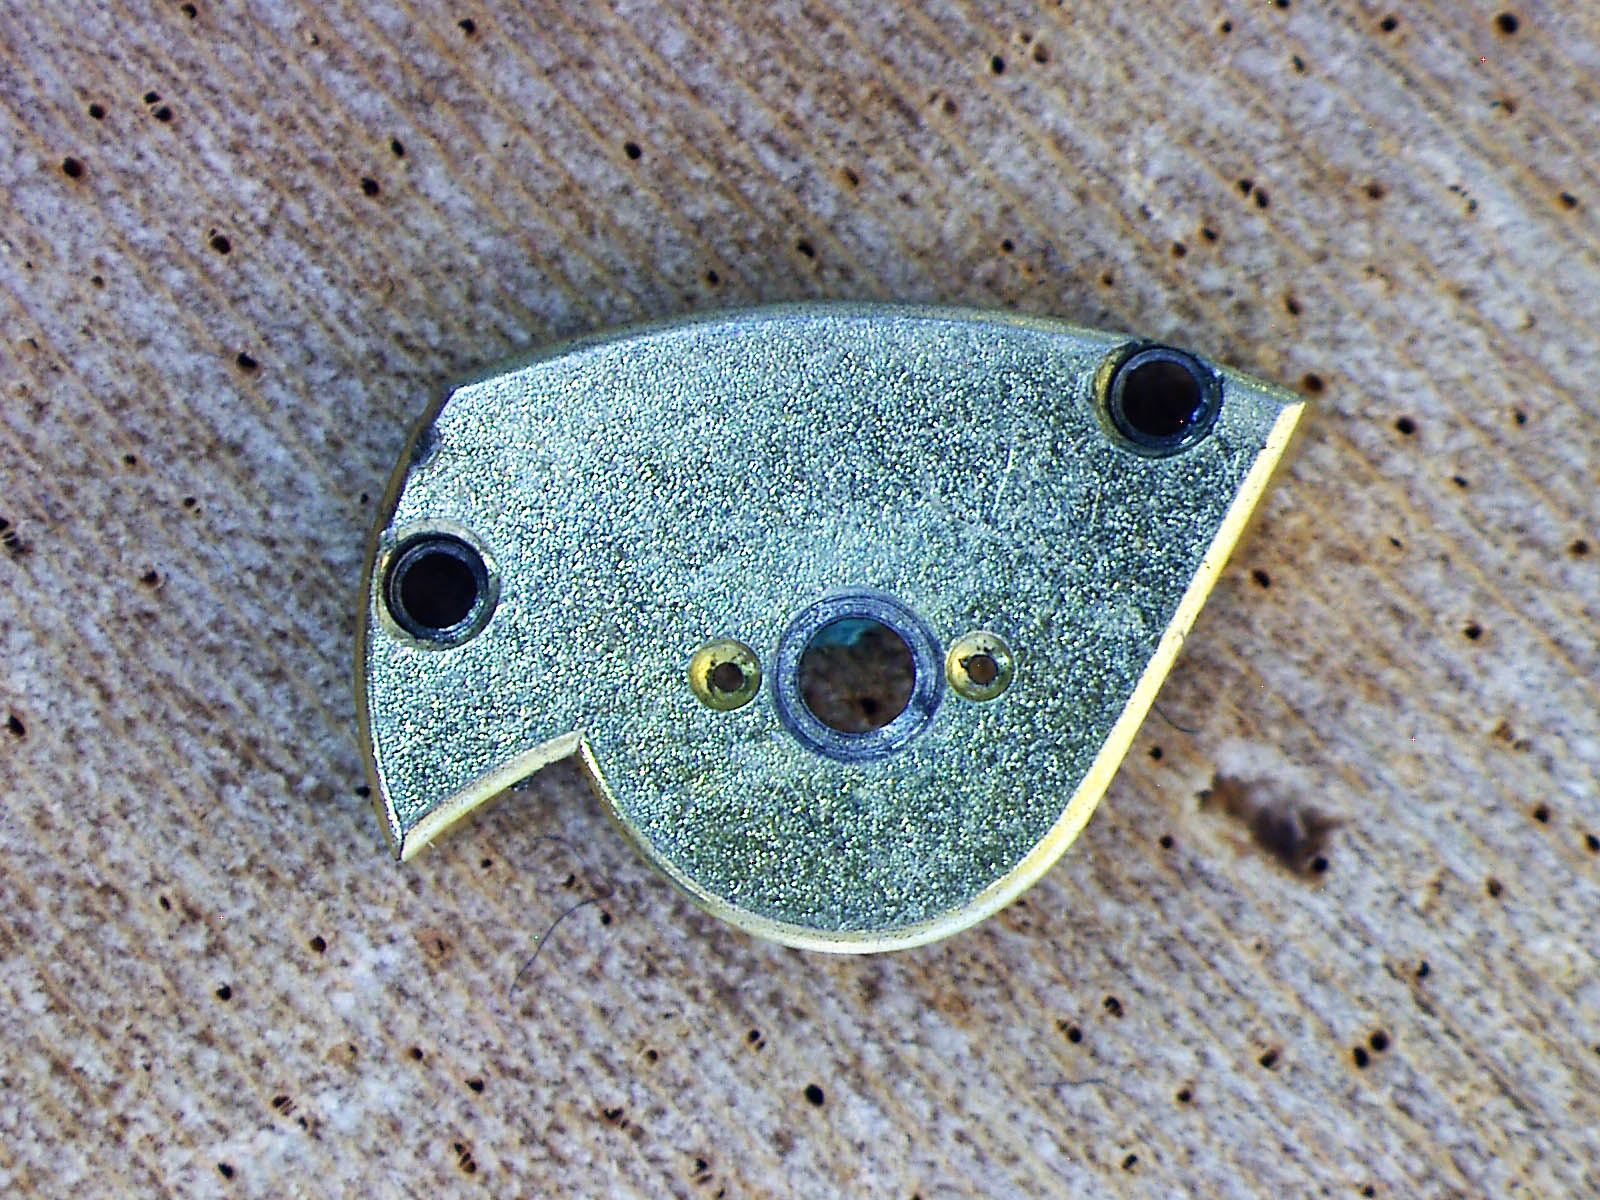
I disassembled the movement and organised the parts into a working box, grouping the components in a local way. Upon inspection of the parts I found that some missing and others broken.
Amongst other things, both the finger and cross of the Maltese cross stop work were missing, so I needed to design and make new ones, while the escape wheel was missing several teeth so a new one needed to be made. The escape pinion pivot was broken and needed re-pivoting, and one screw hole in the barrel bridge was also stripped and needed re-bushing. The winding stem was in terrible shape so I would need to make one from scratch.
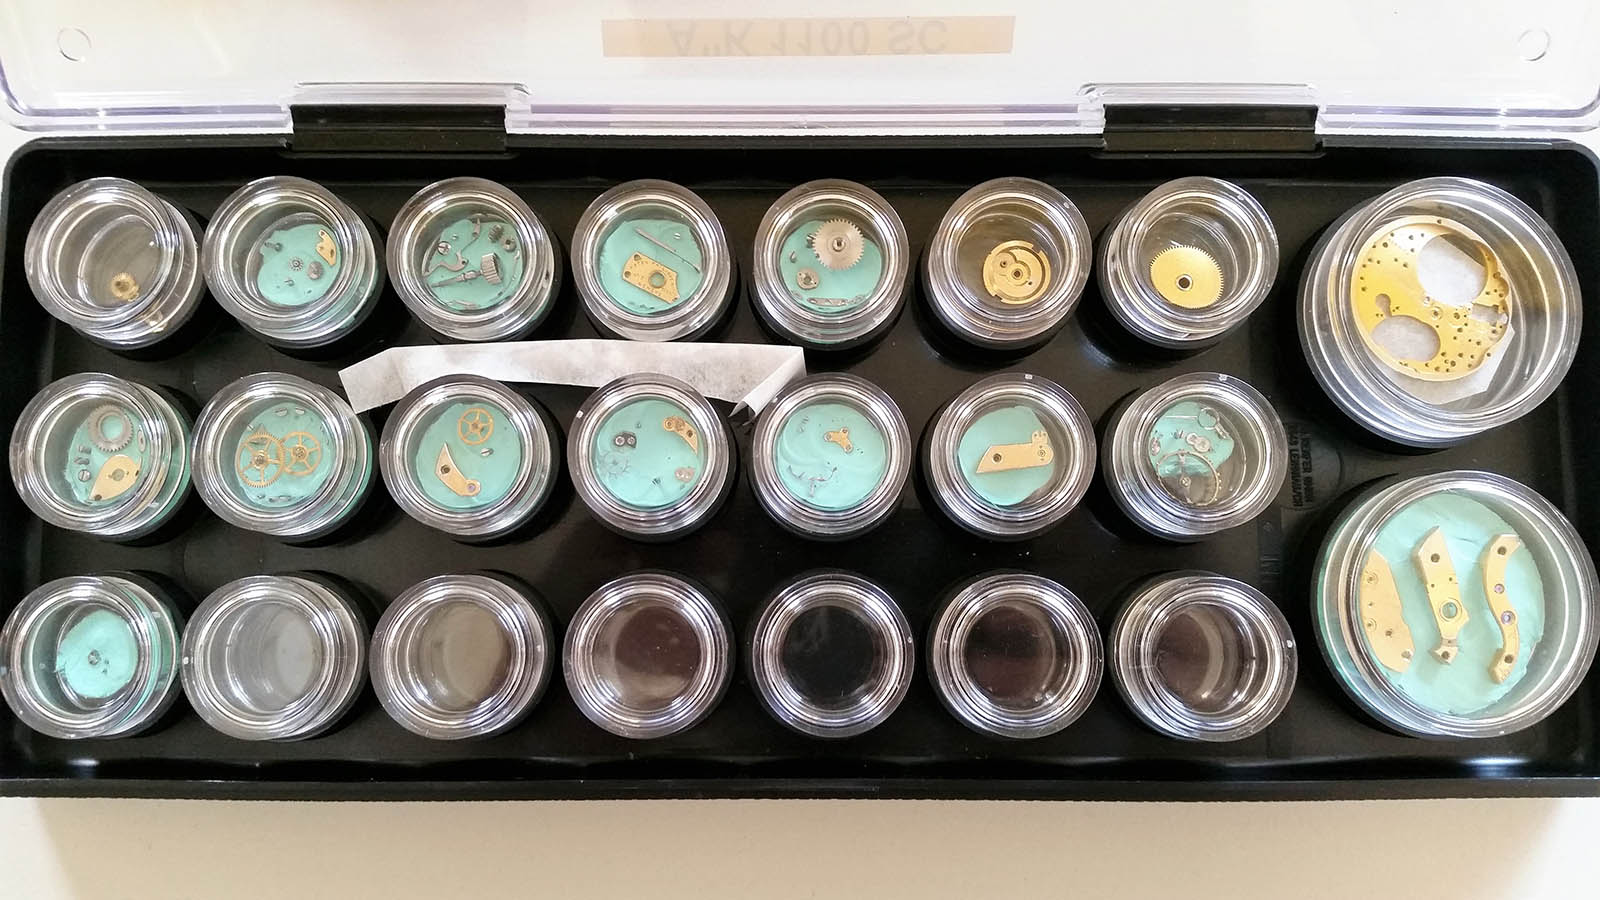
The disassembled movement ready to be worked on
First, the escapement…
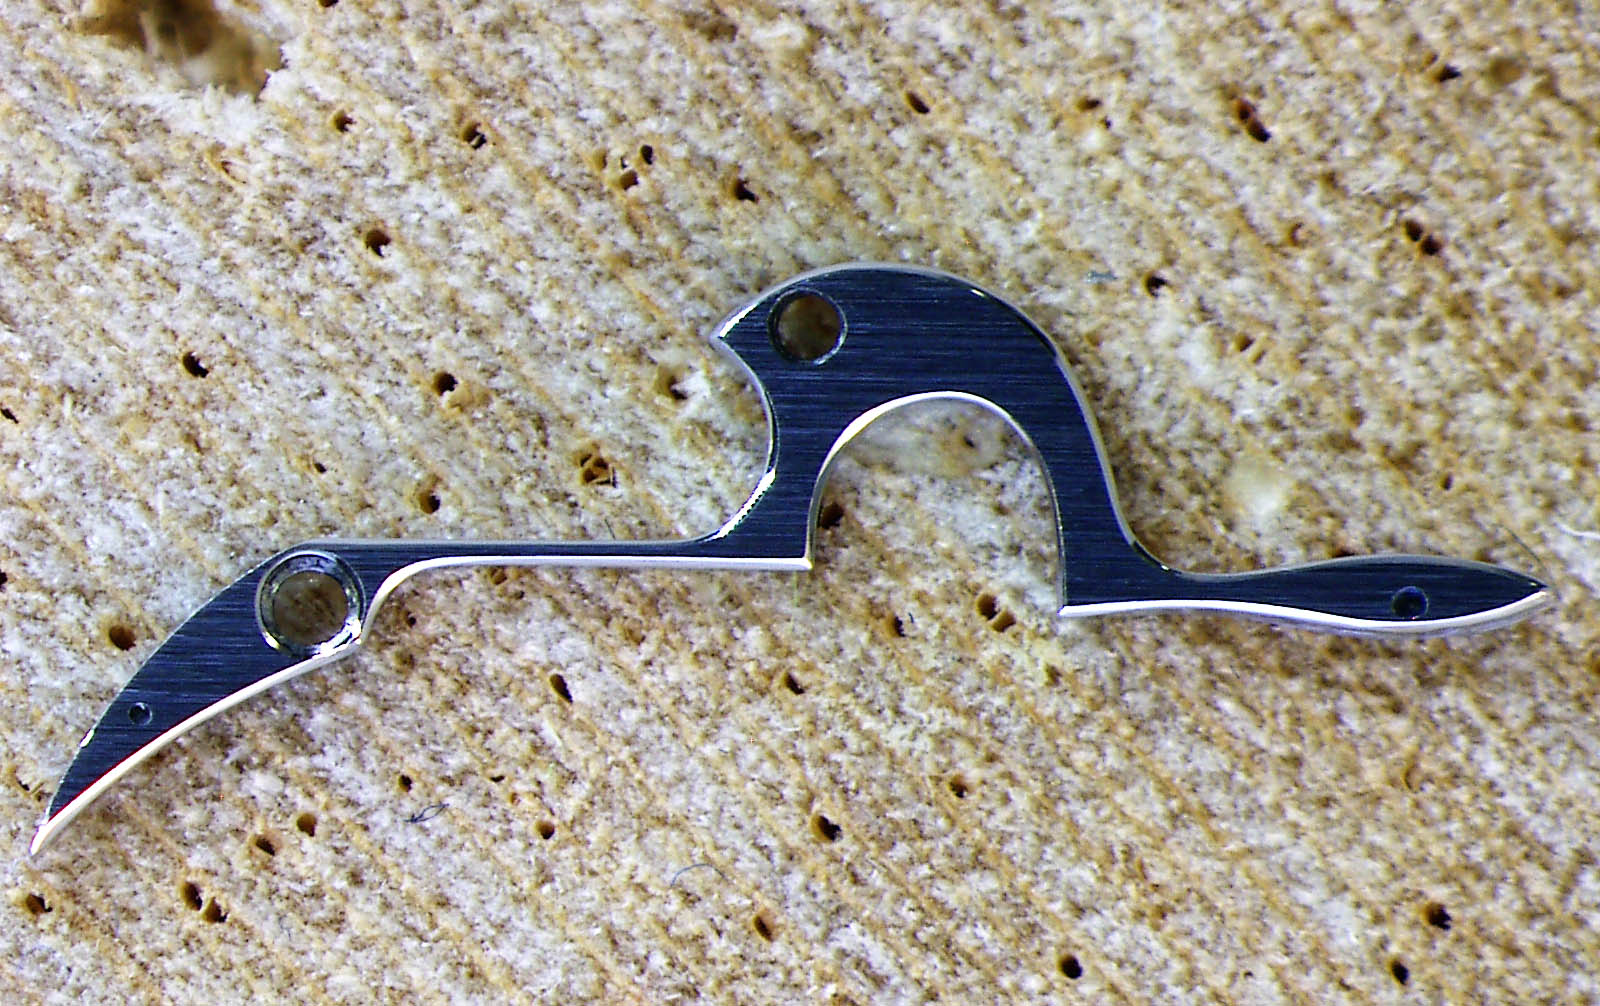
One of my students at KHWCC, Theren Wang, had demonstrated great micro-mechanical talent, good enough that he was ahead of the school’s programme, so I outsourced the Maltese cross and escape wheel to him, so he could apply his new skills to a real-world project.
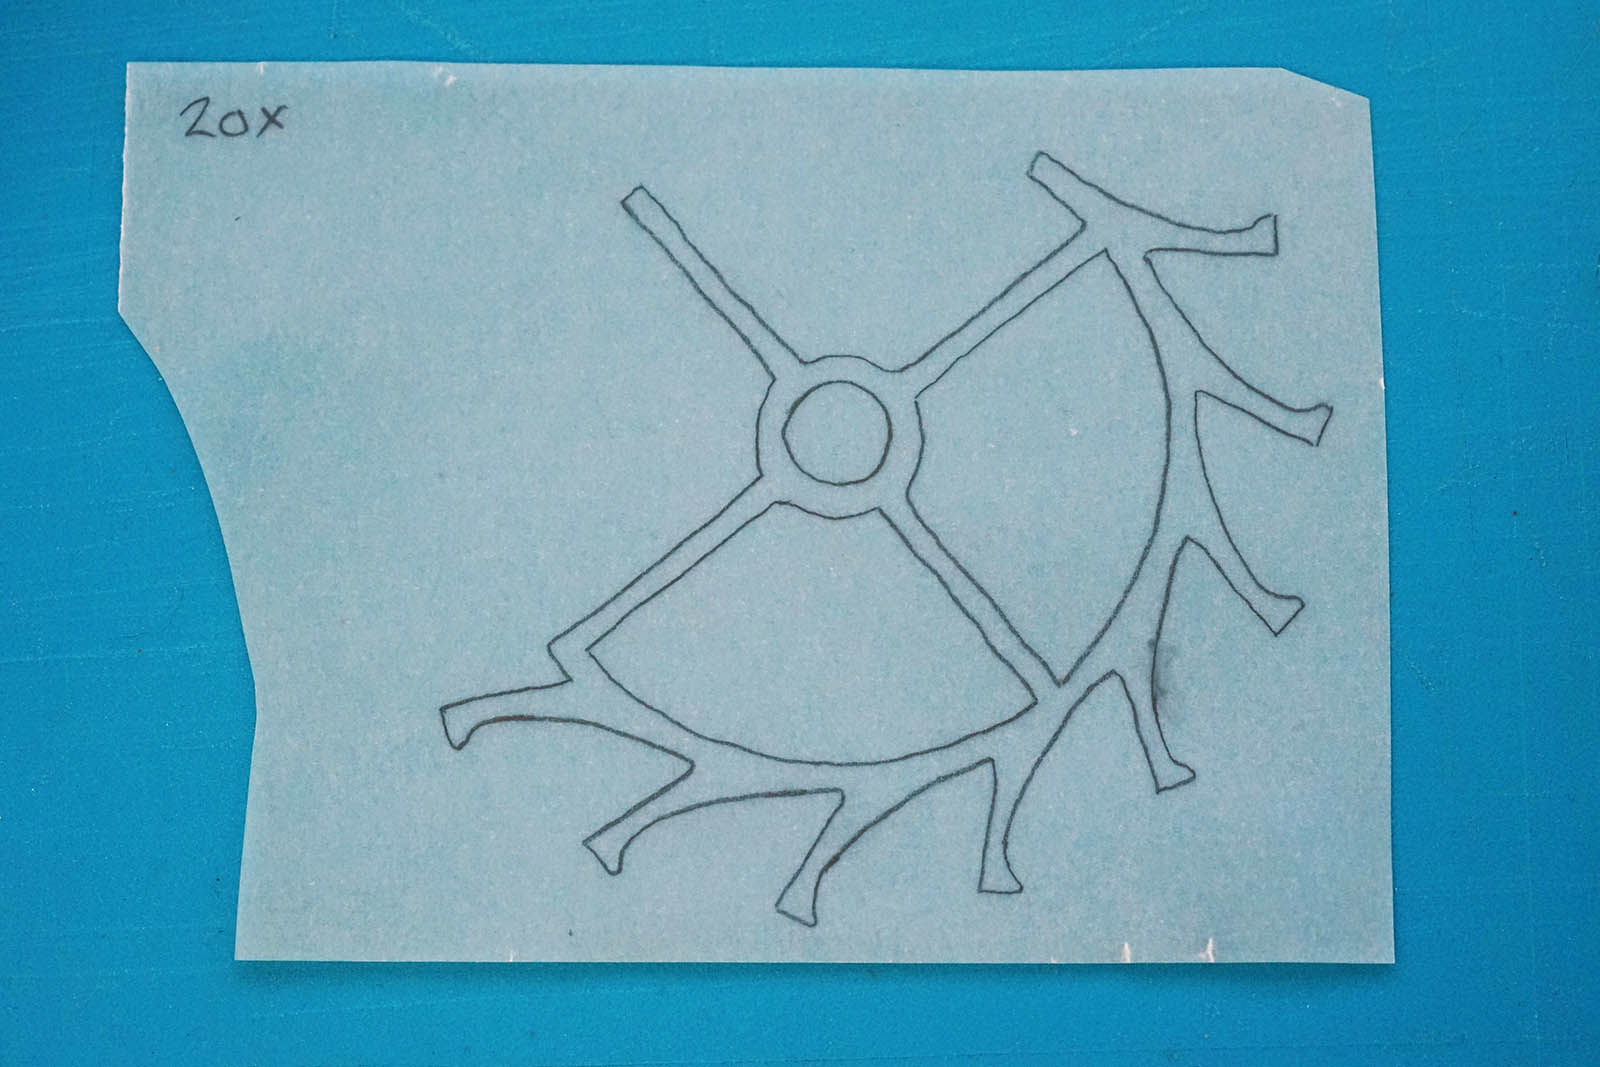
Theren had to first design the Maltese cross and finger, which is fastest when done the traditional way – with pen on cardboard on an enlarged scale – and then cutting them out in order to be able to simulate and test the function. It’s a quick way to make sure everything makes sense mechanically.
Once the design checked out, Theren turned and milled the two parts on the lathe. He then hardened and tempered them via heat treatment. After some manual adjustment to the shape, the stop work was then tested with the barrel.

Theren designing the Maltese cross stop work
Milling the cross of the stop work
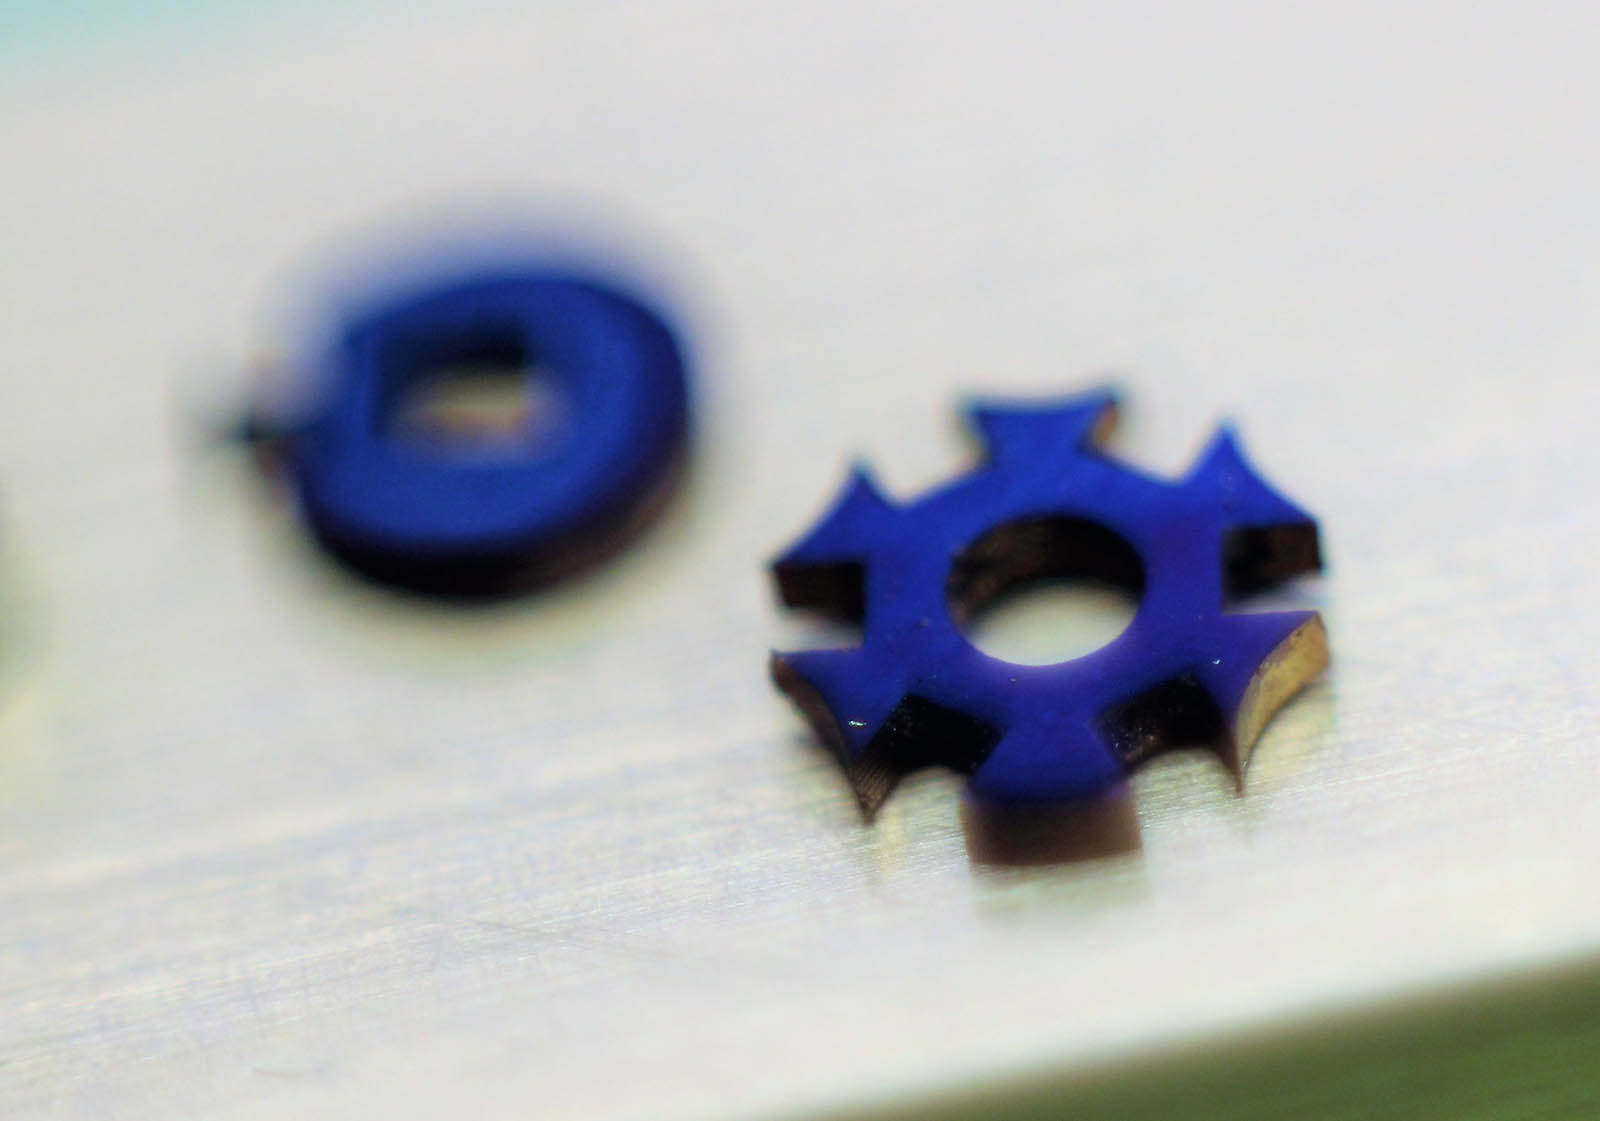
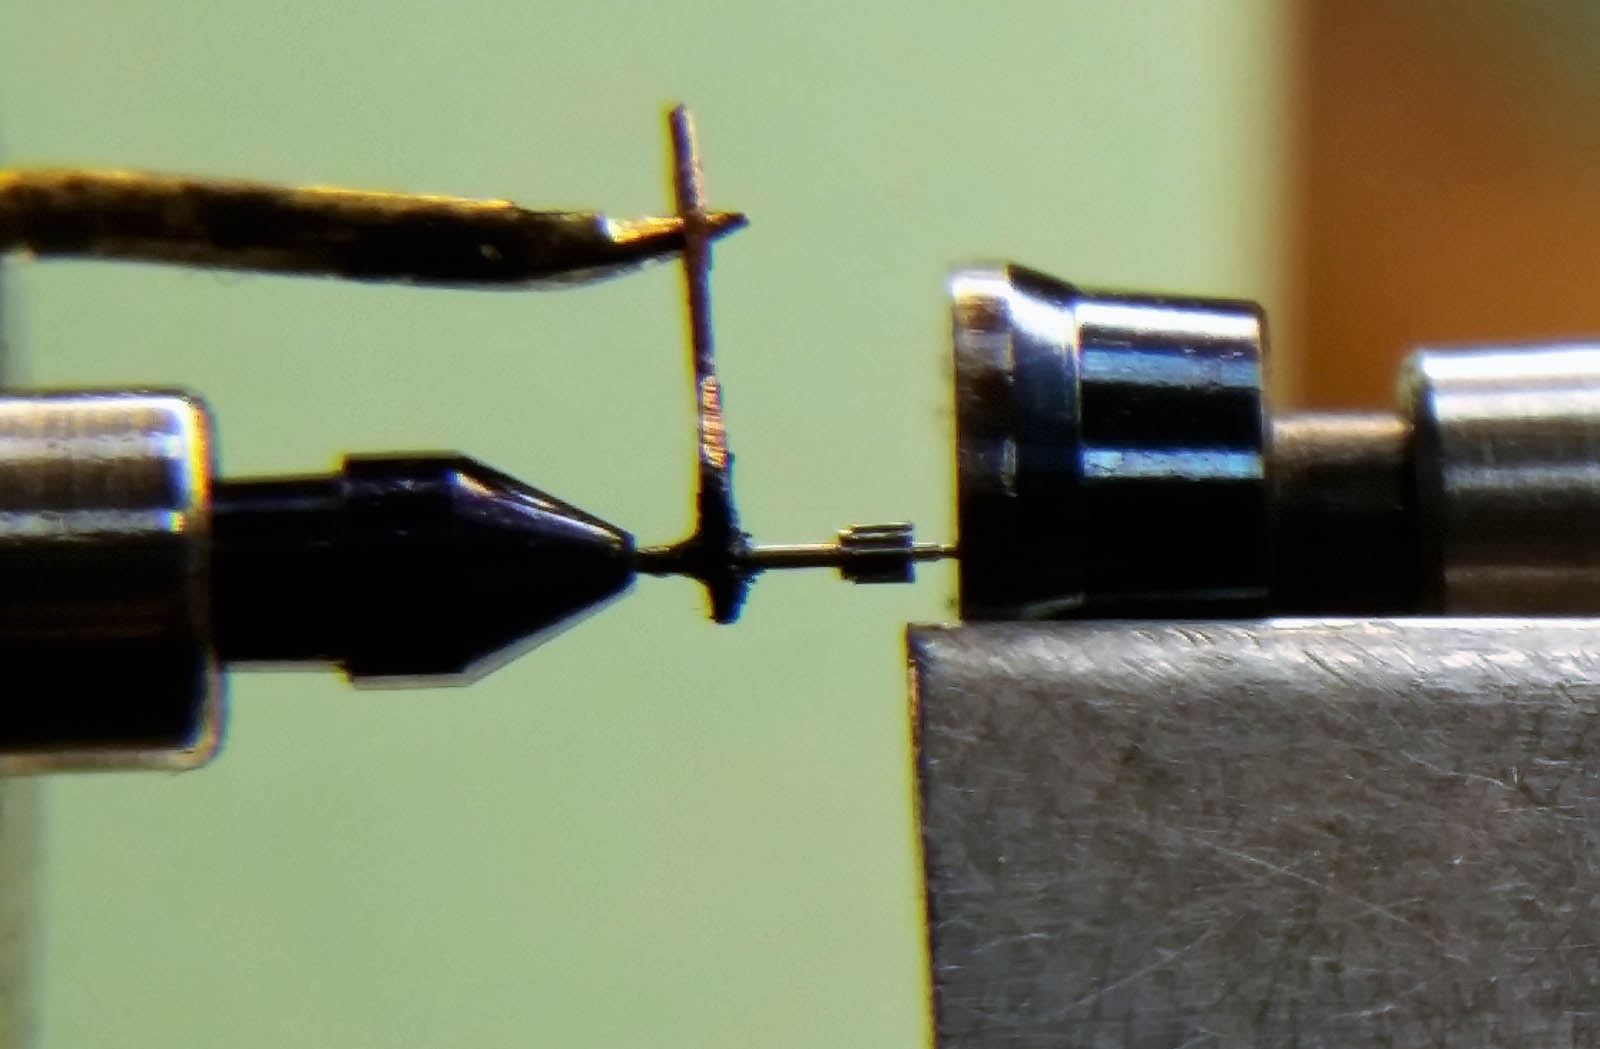
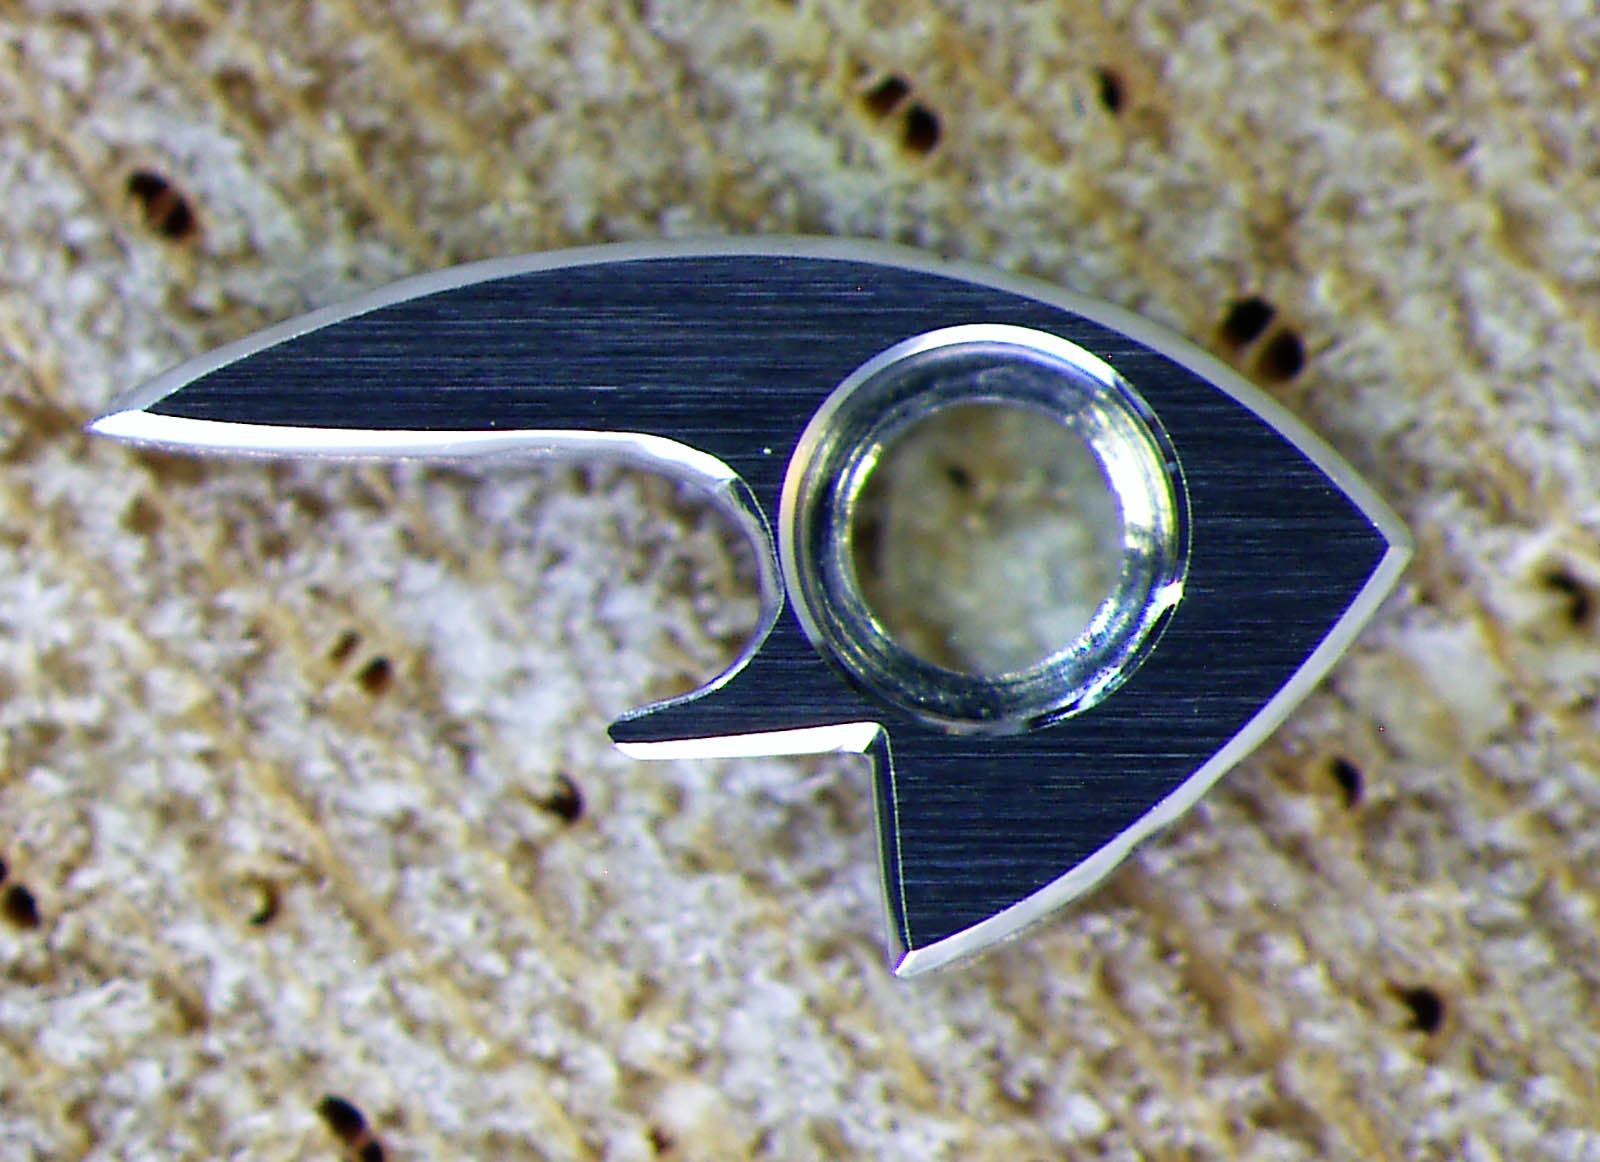
The stop work after heat-treatment
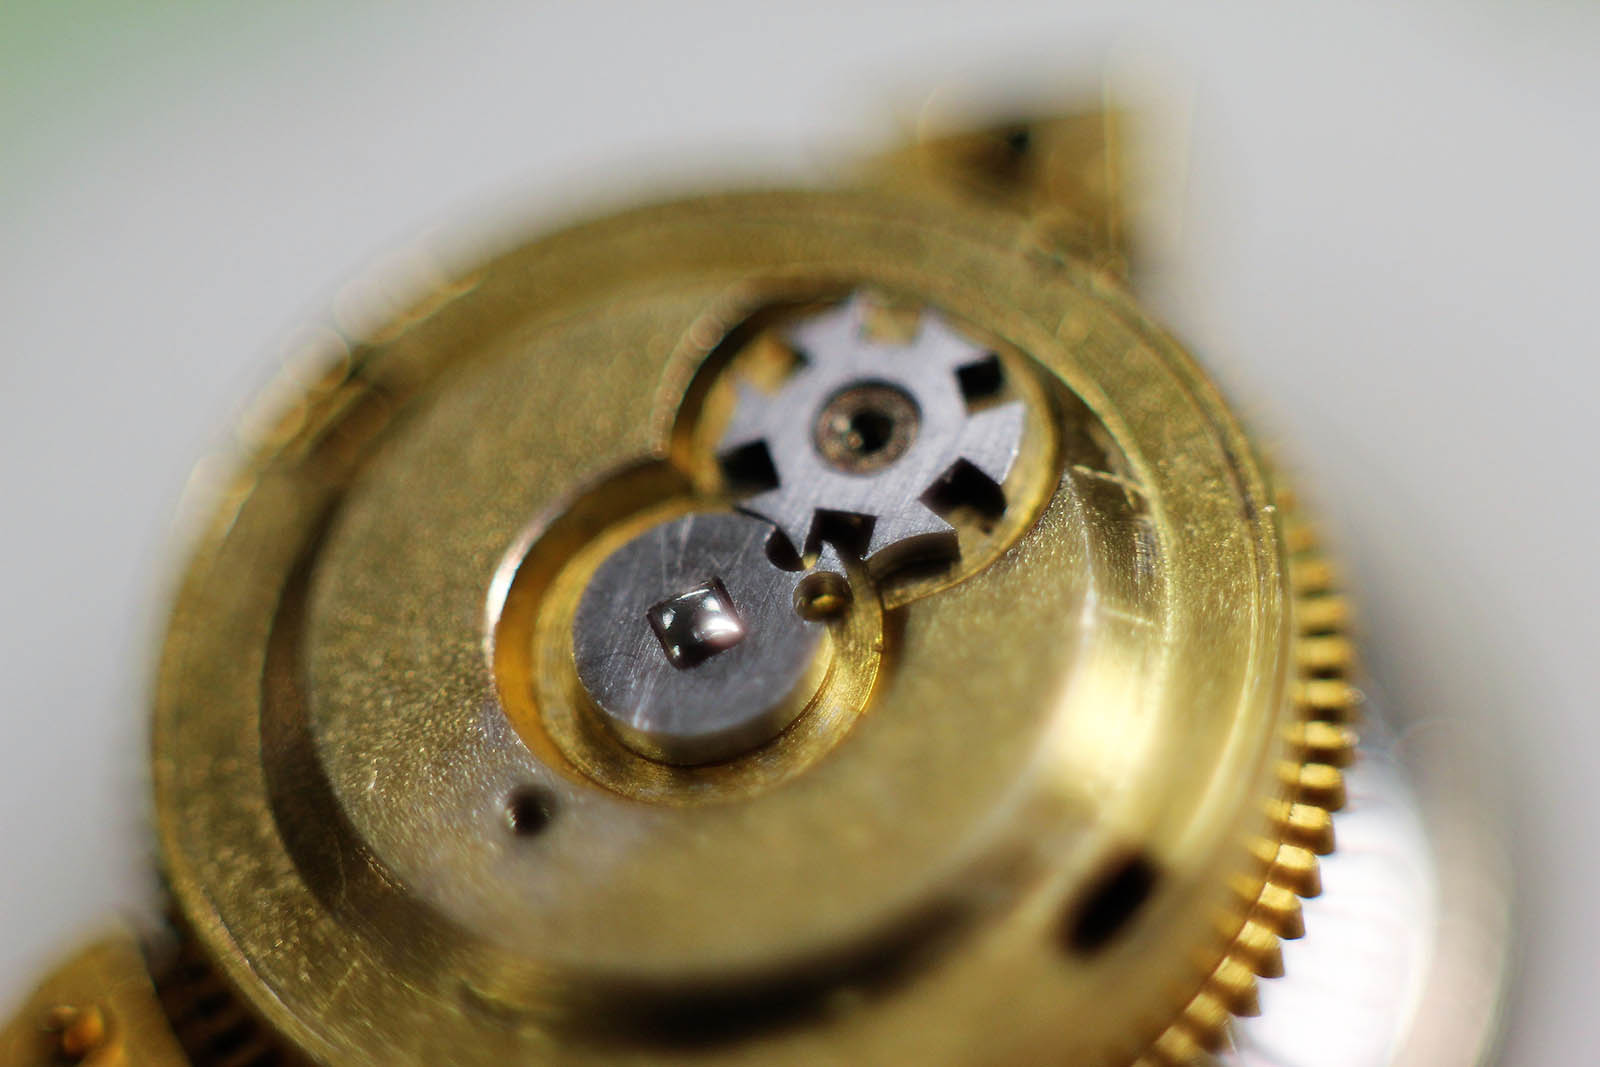
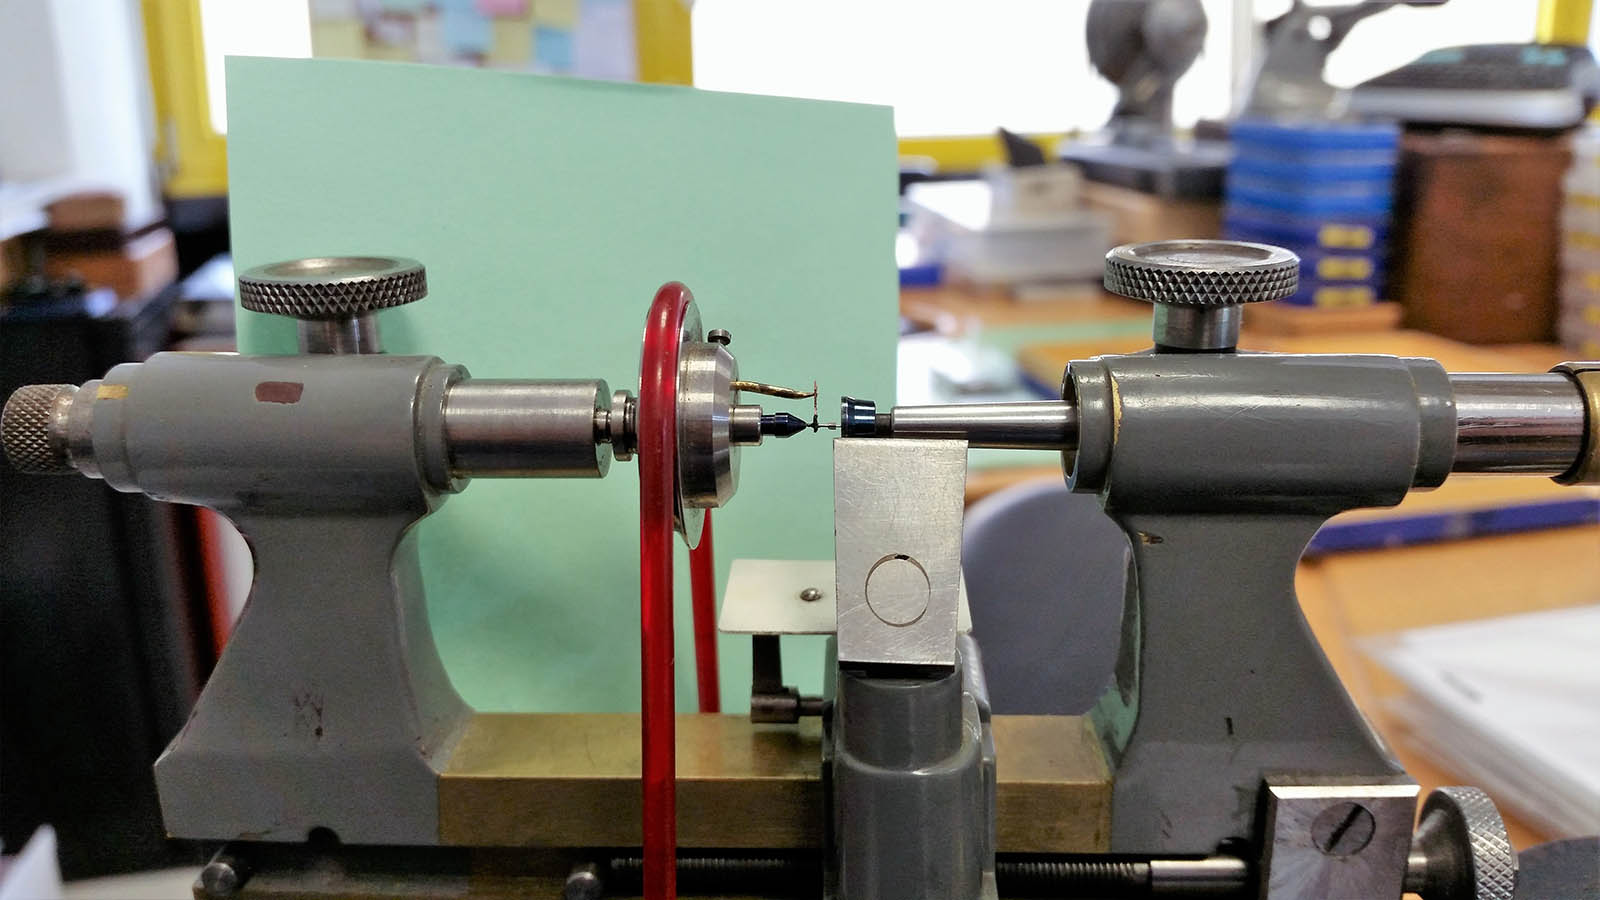
Testing the stop work with the barrel
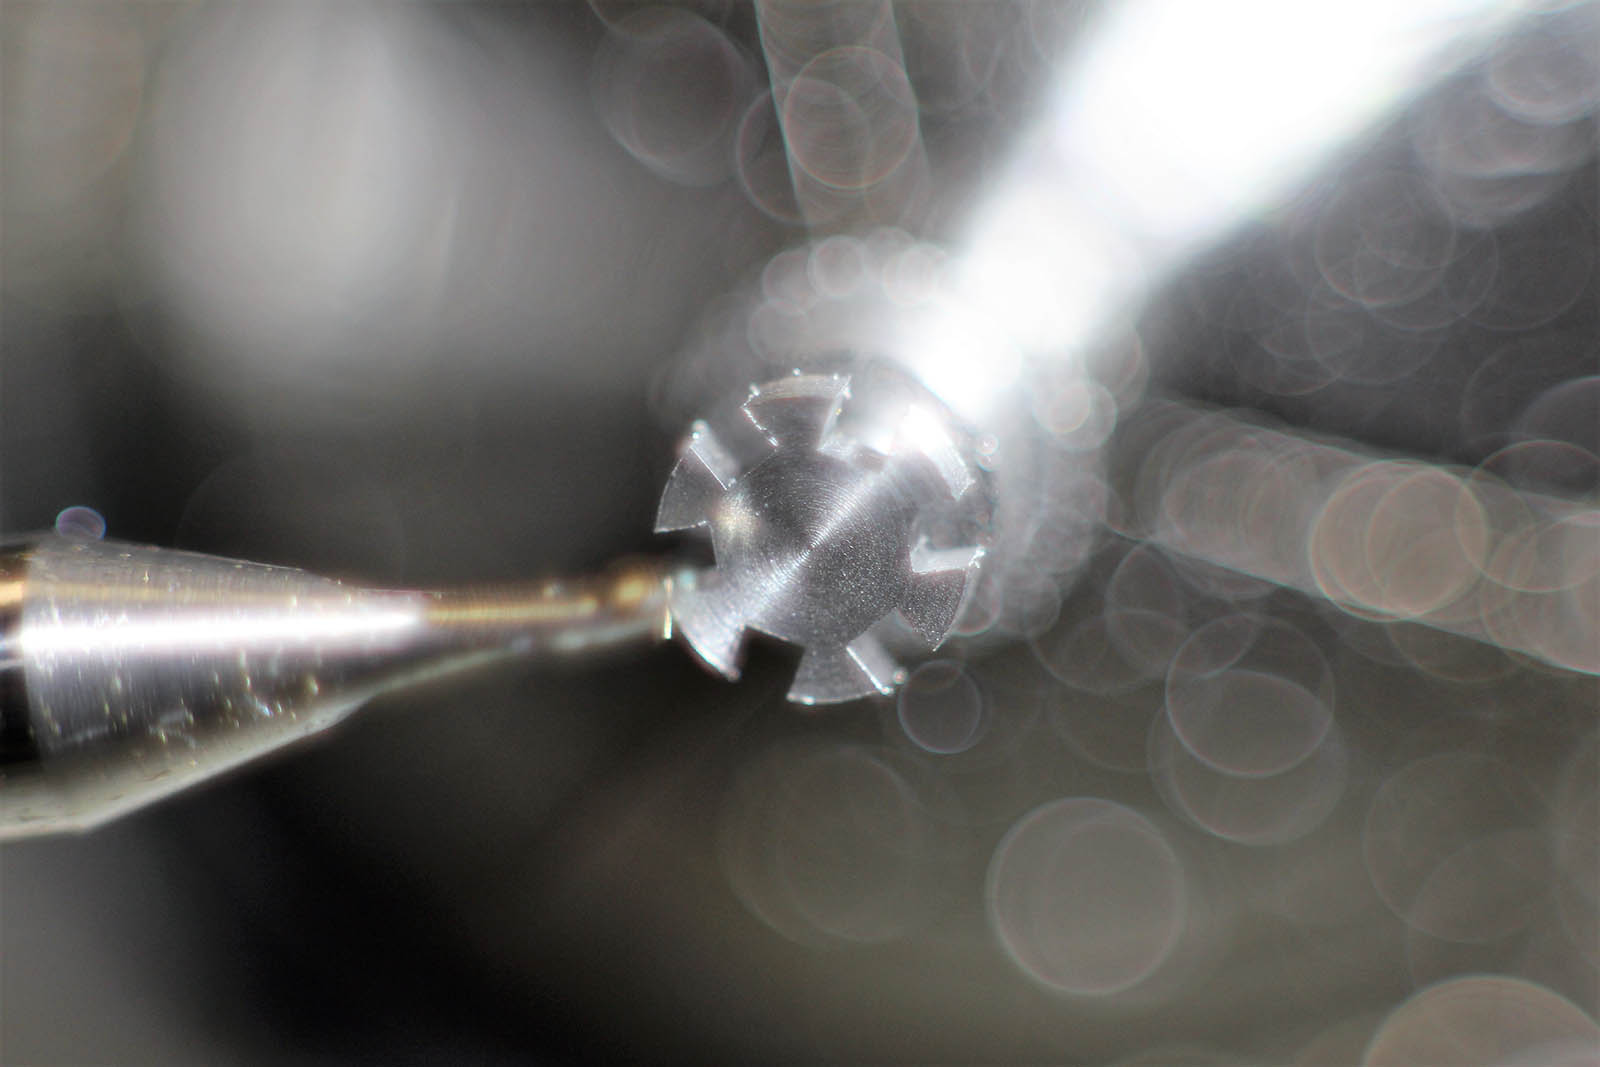
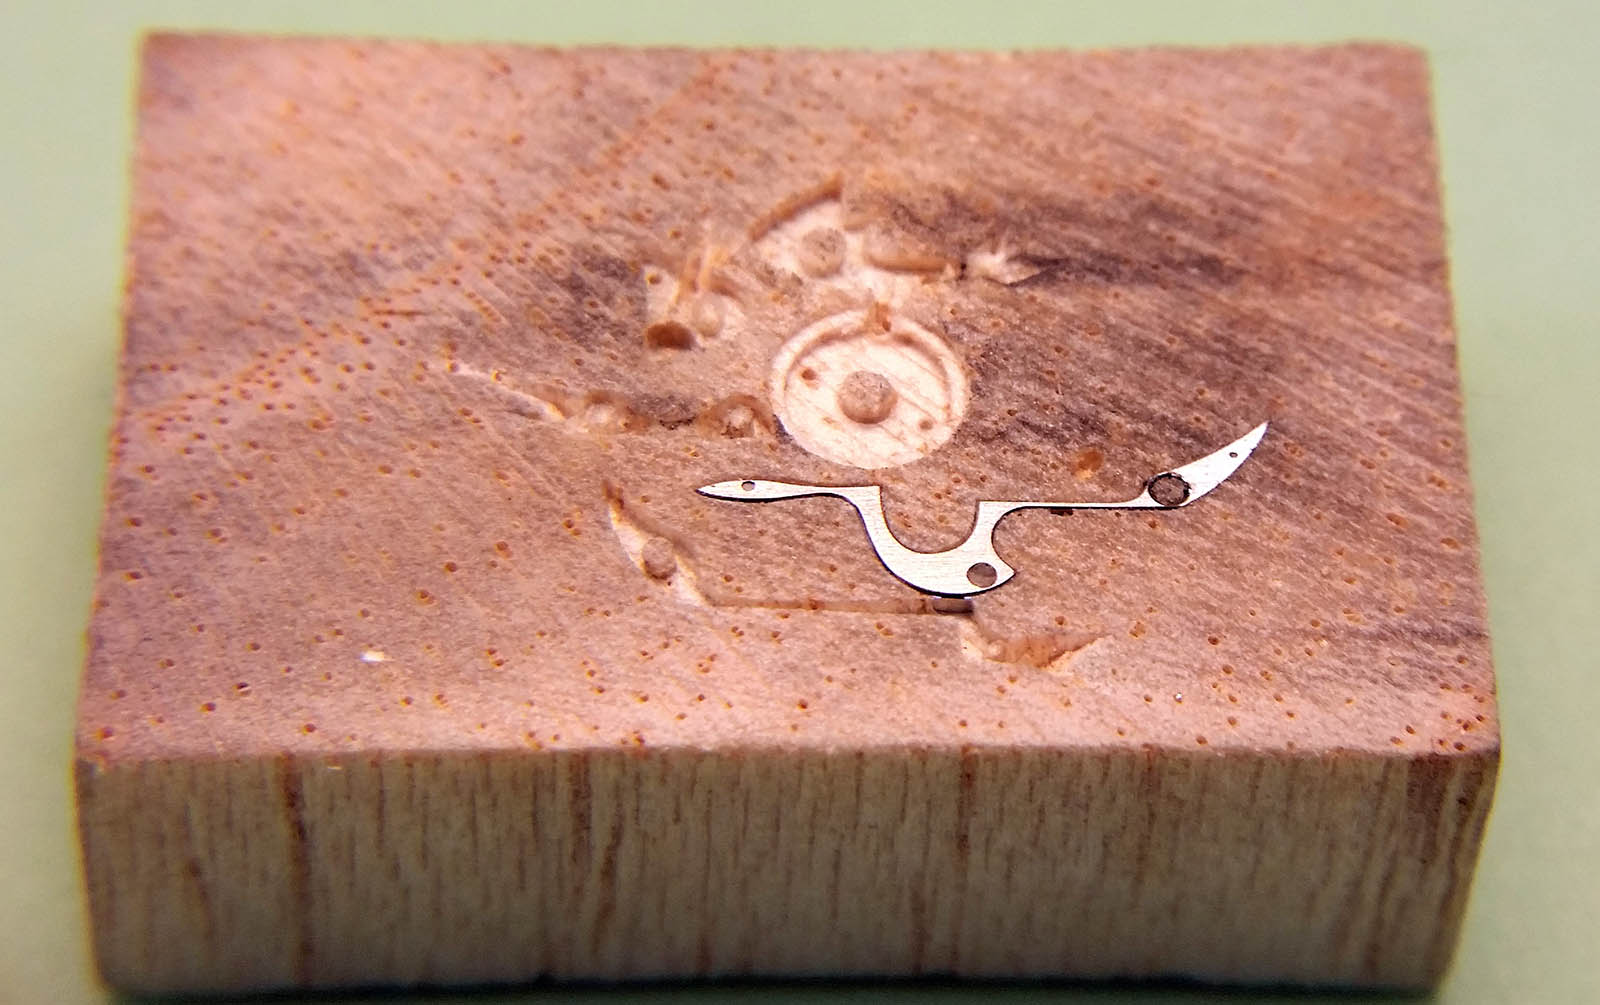
Next Theren started work on the escape wheel. The shape of the original escape wheel, or what was left of it, was drawn on tracing paper in the profile projector. Theren then used the drawing to figure out how his fly cutters should be designed in order to make a reproduction of the escape wheel. After designing the fly cutters – the tool needed to cut the teeth of the escape wheel – he made the three cutters necessary to do a Swiss lever escape wheel. Next, he set up the lathe to milling the escape wheel.
Drawing of the original, broken escape wheel
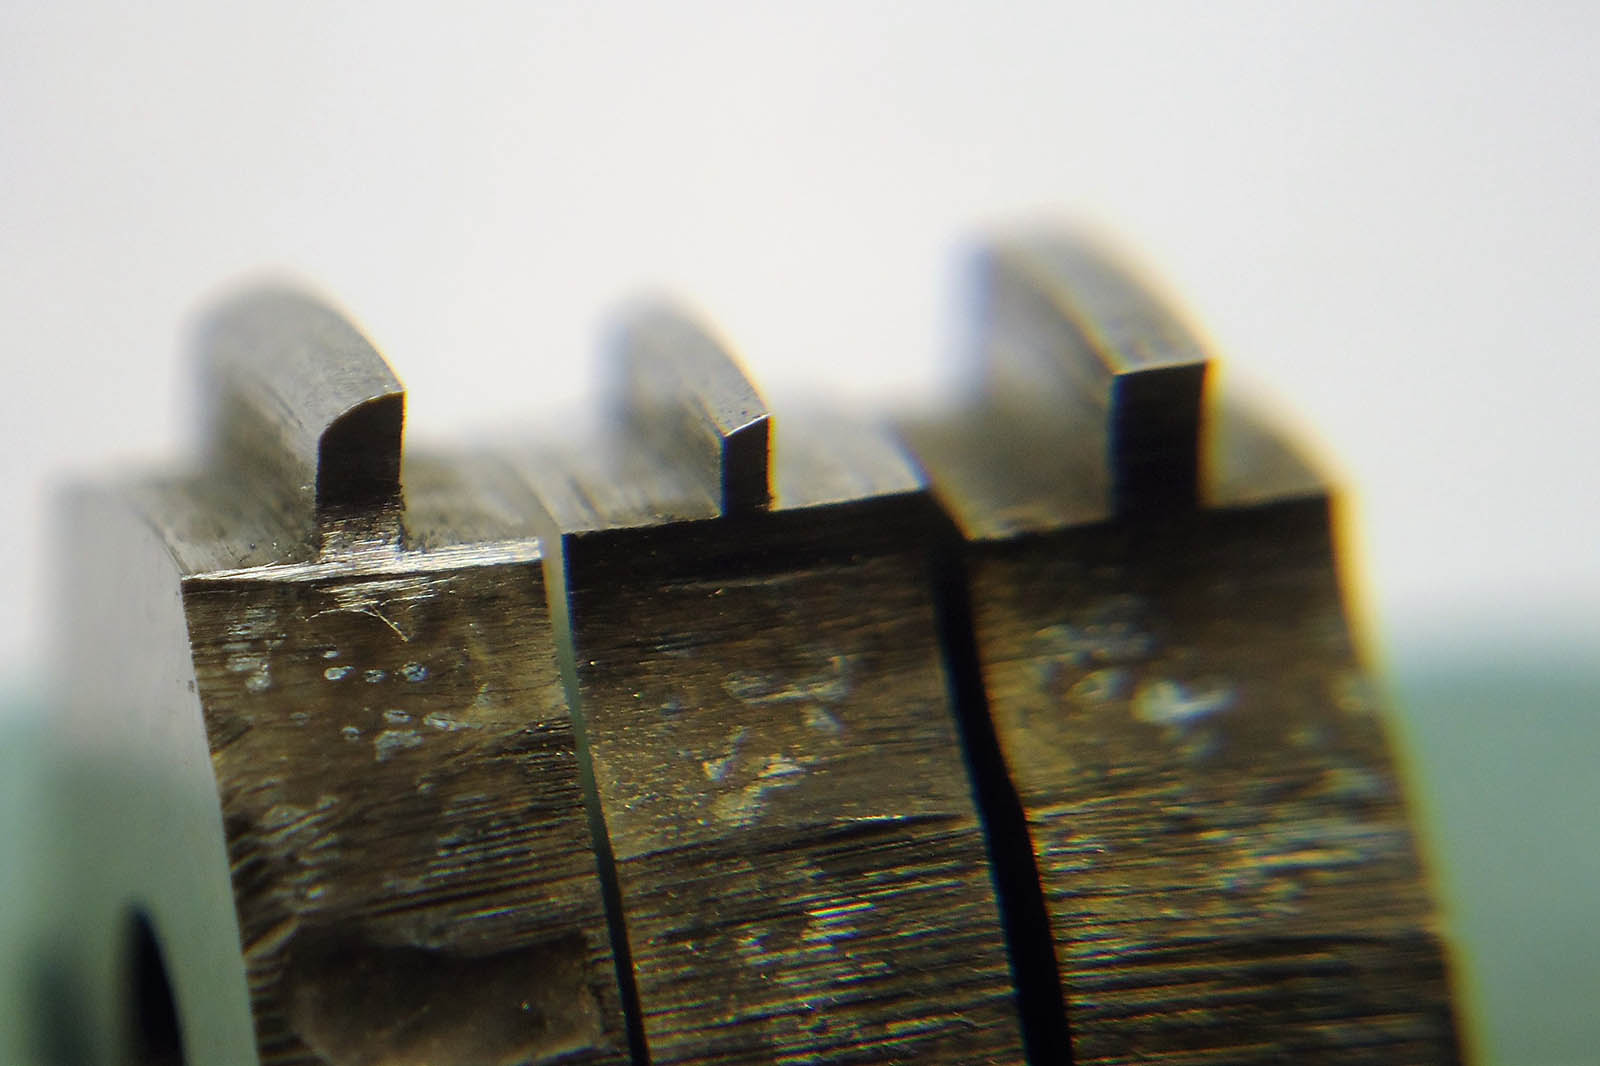
Fly cutters to mill the back slope, impulse plane and locking plane of the escape wheel teeth
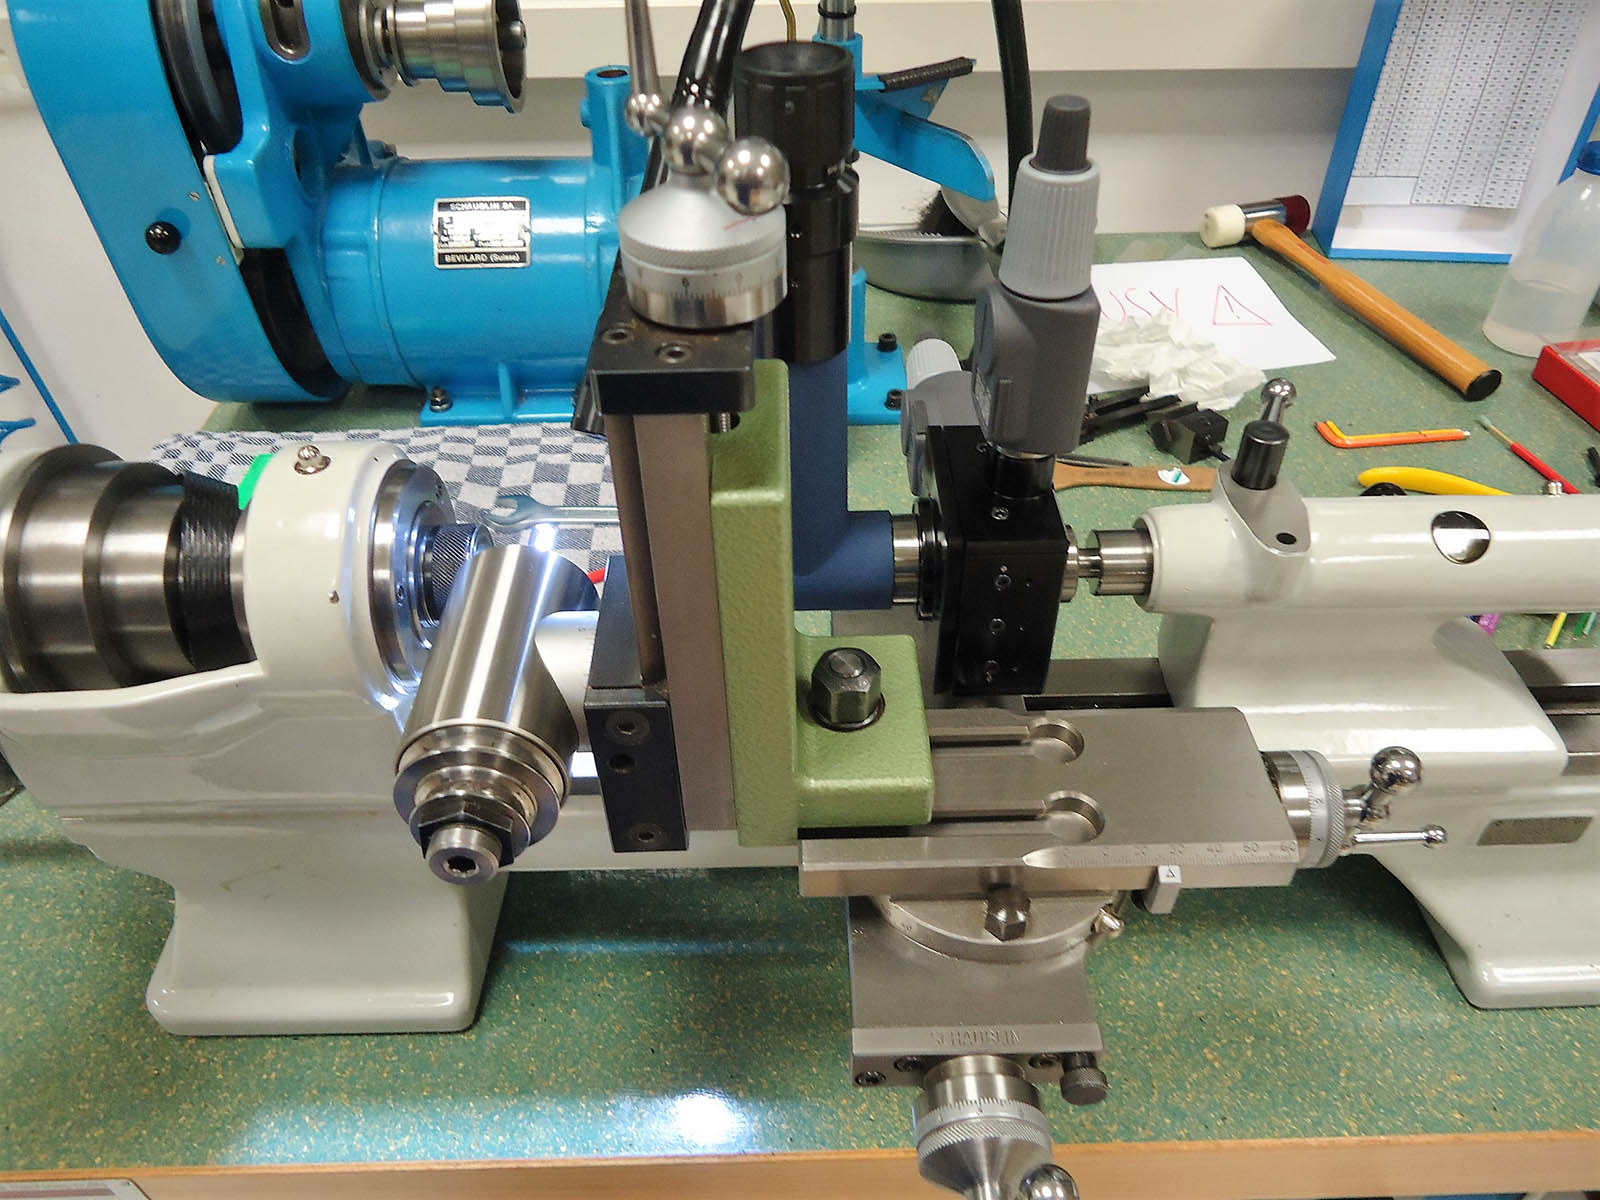
Lathe set up to mill the escape wheel
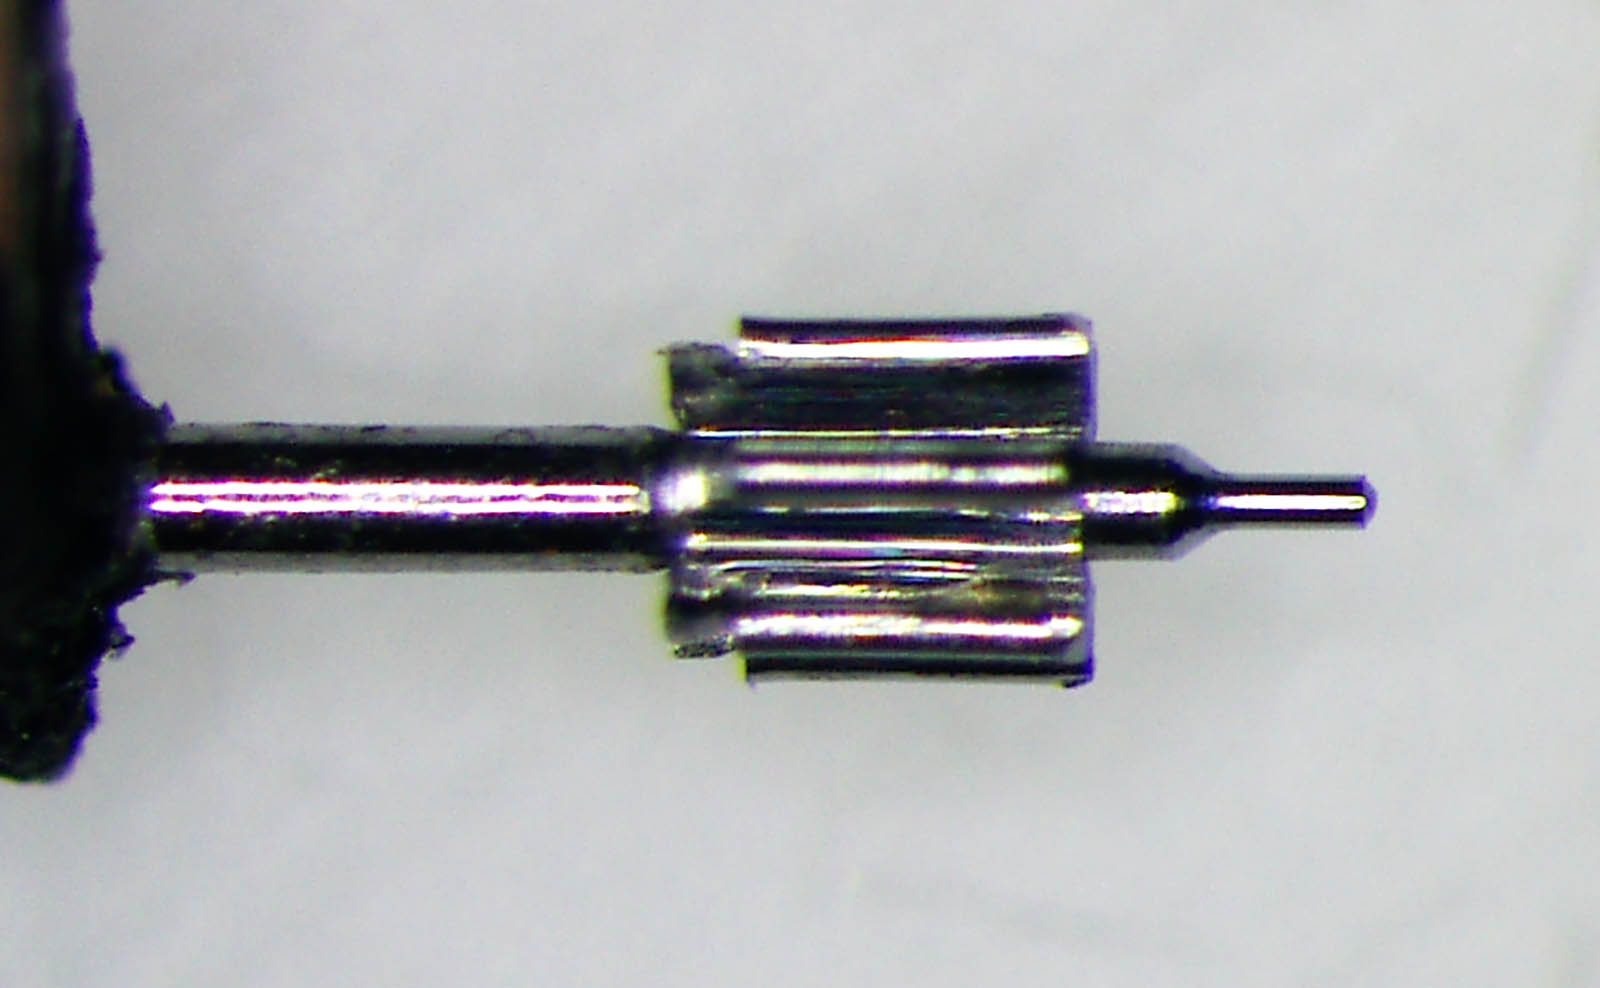
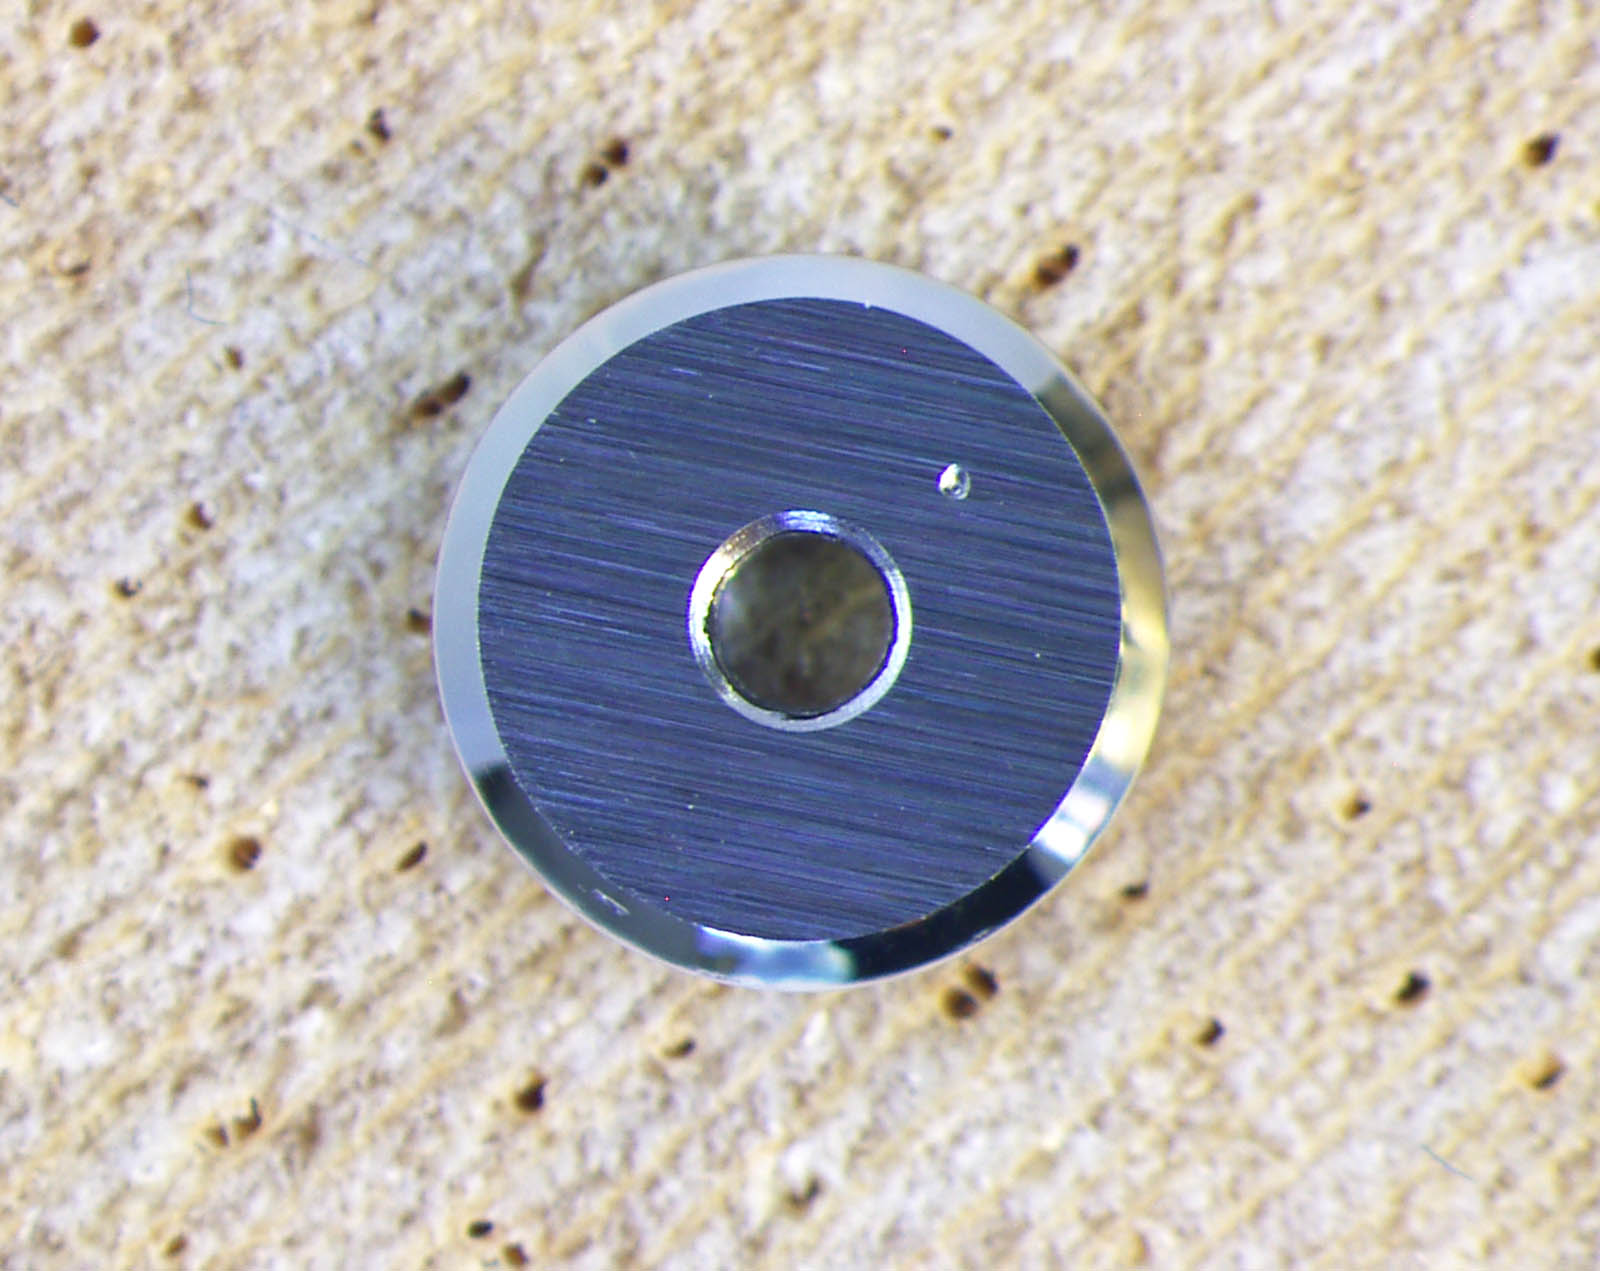
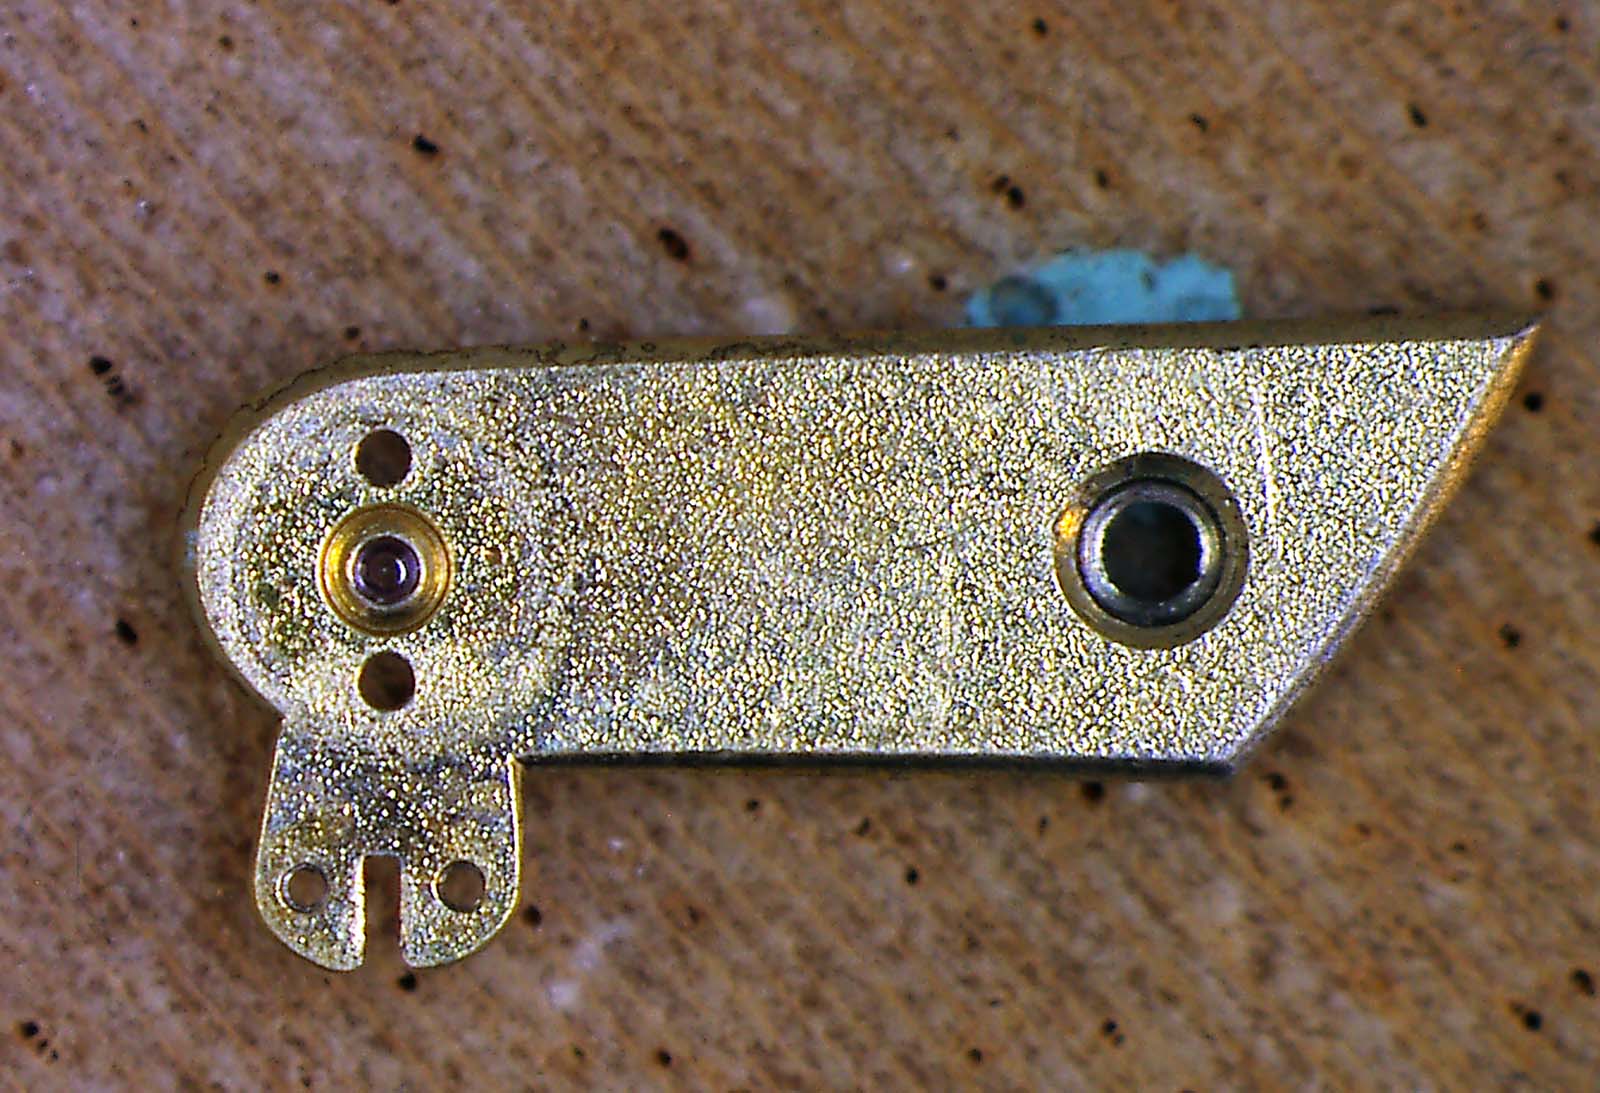
While the escape wheel was being made, the escape pinion with its broken pivot underwent re-pivoting. First, the pinion needed to be prepared to take a new axle, so that a new pivot could be turned from it. In order to be able to fit a new axle, the pinion needed to be drilled between dead centre.
The broken escape wheel pinion axle and broken pivot to the right
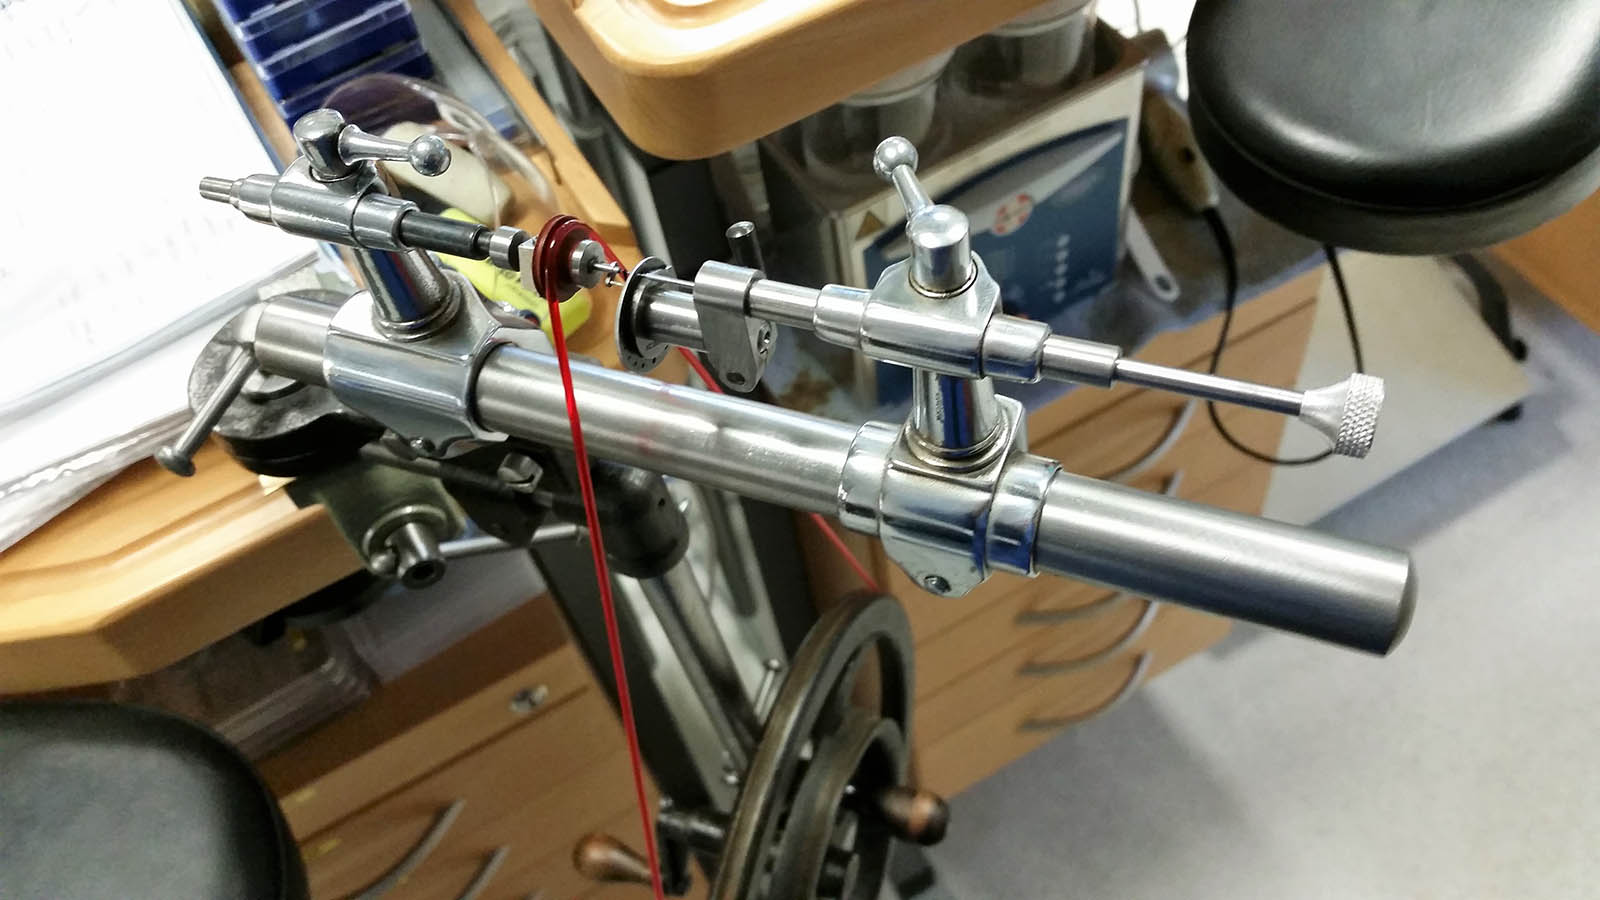
Lathe set up to drill between dead centre
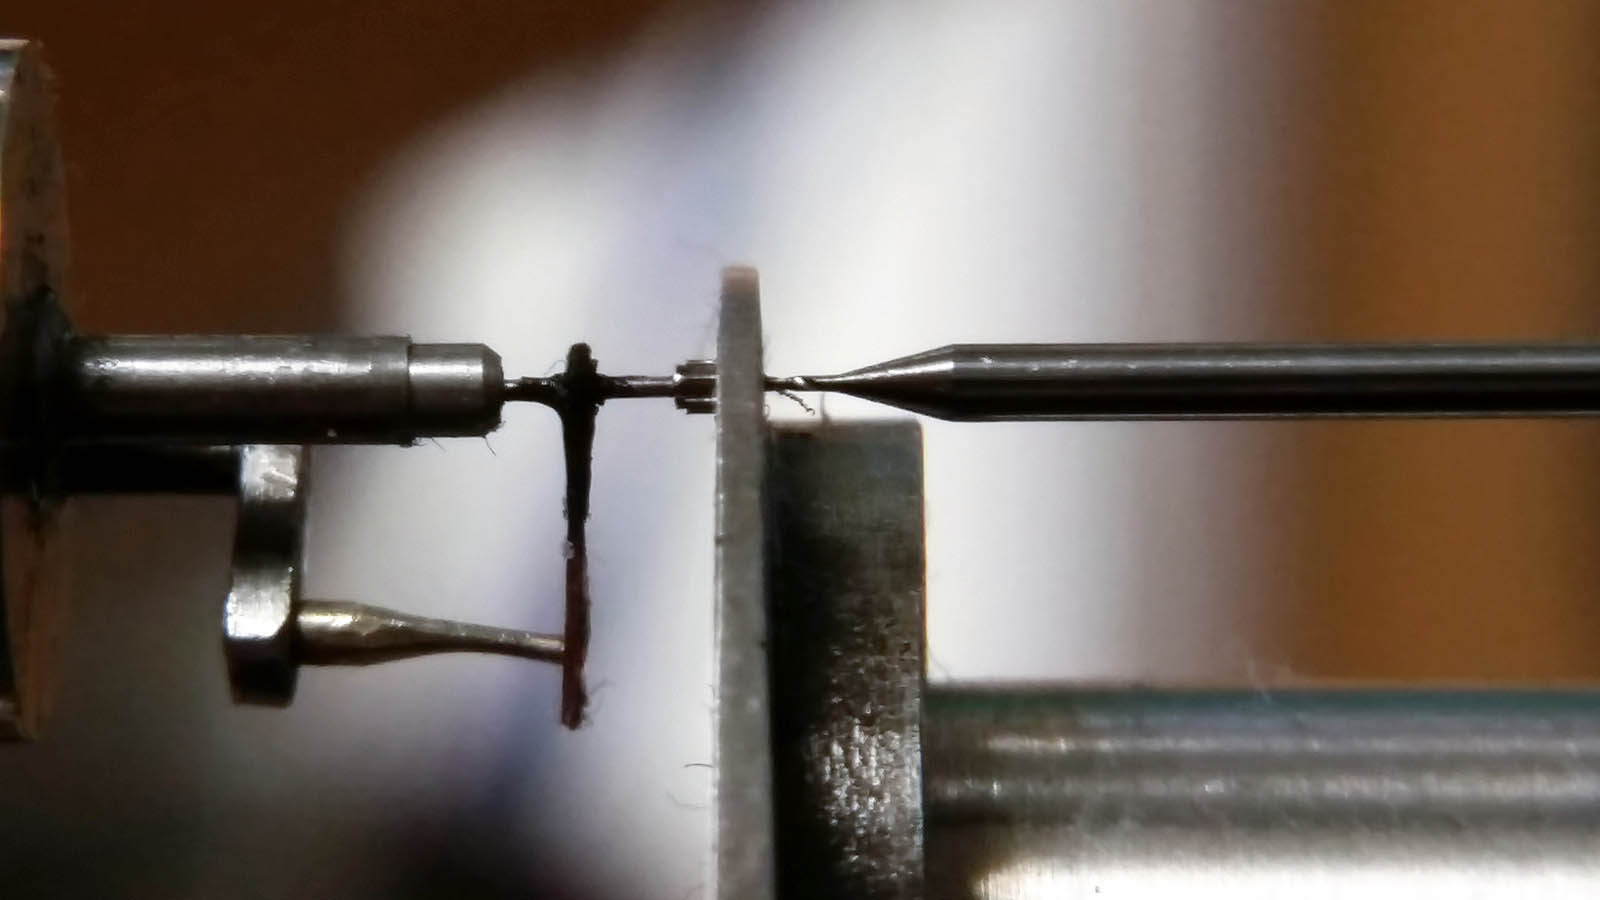
Close-up the drilling process, where the centre was spotted with a tungsten three-faced cutter before the drilling
Then blank axle was turned, made to a larger-than-need size and with male cones at both ends.
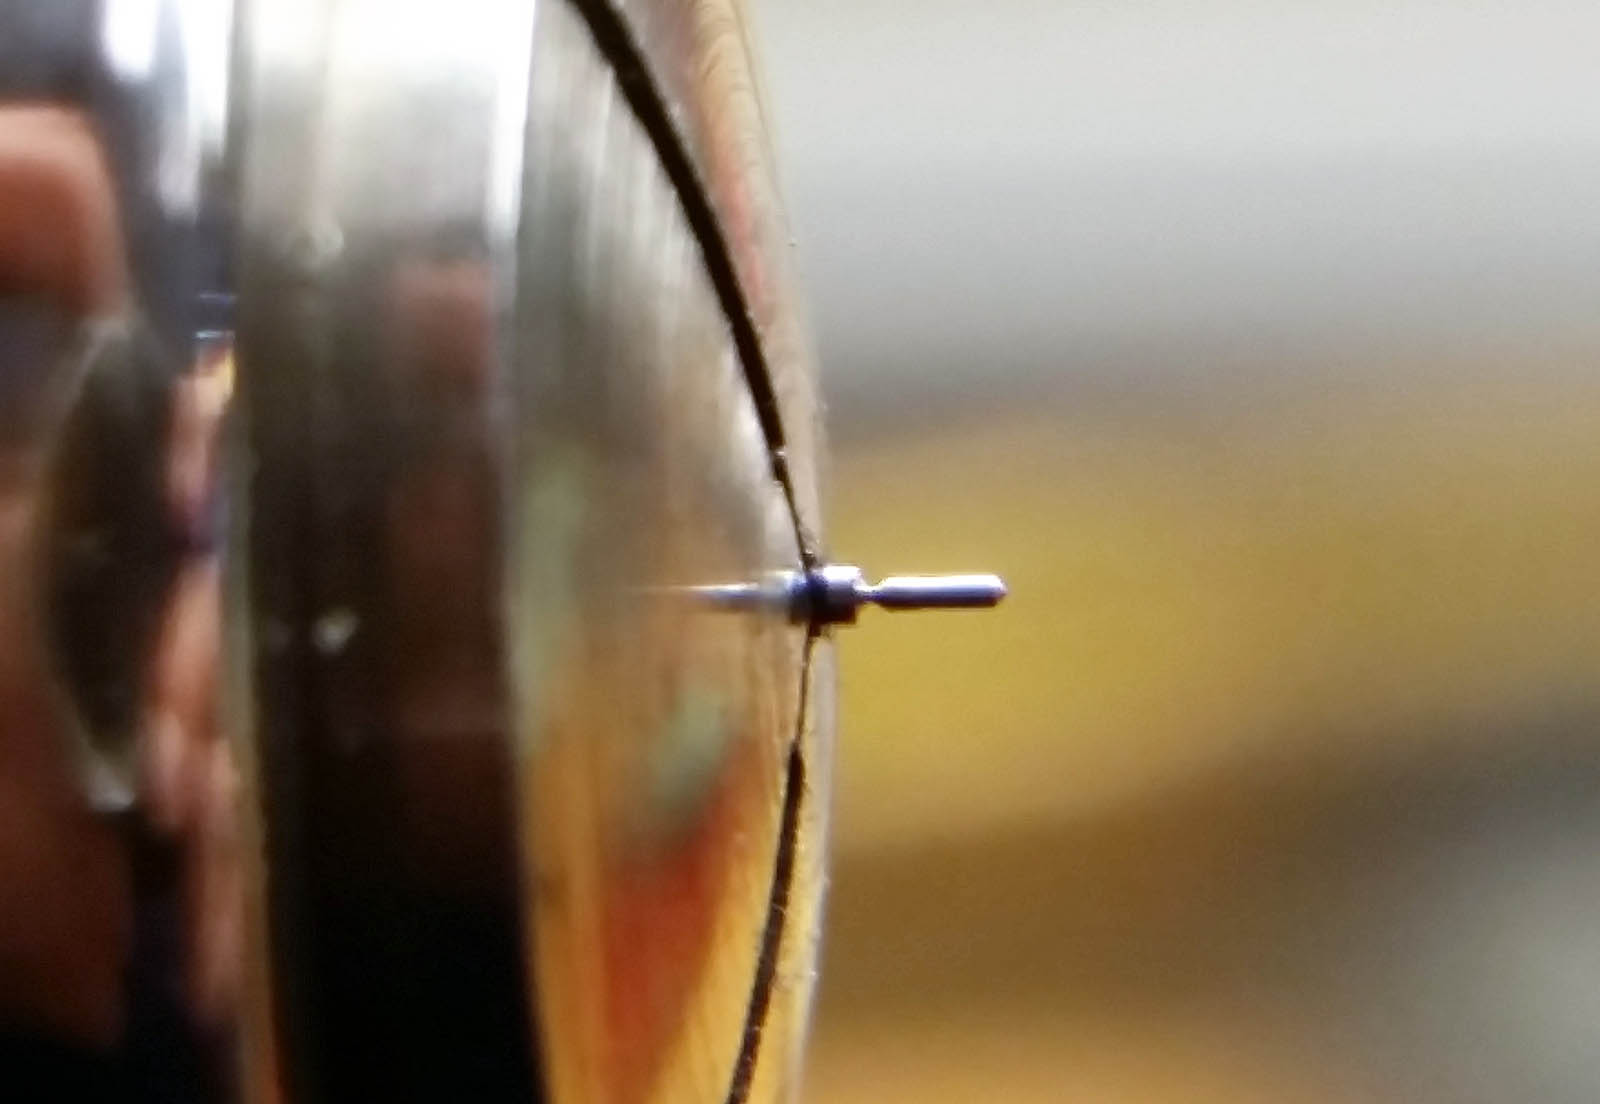
New axle blank ready for parting
Pinion and blank axle on top of a Swiss 10 cent coin
The blank axle was then friction-fitted into the pinion between dead centre. And then the pivot was turned also between dead centre, this was done with another dead-centred lathe dedicated to turn small pivots.
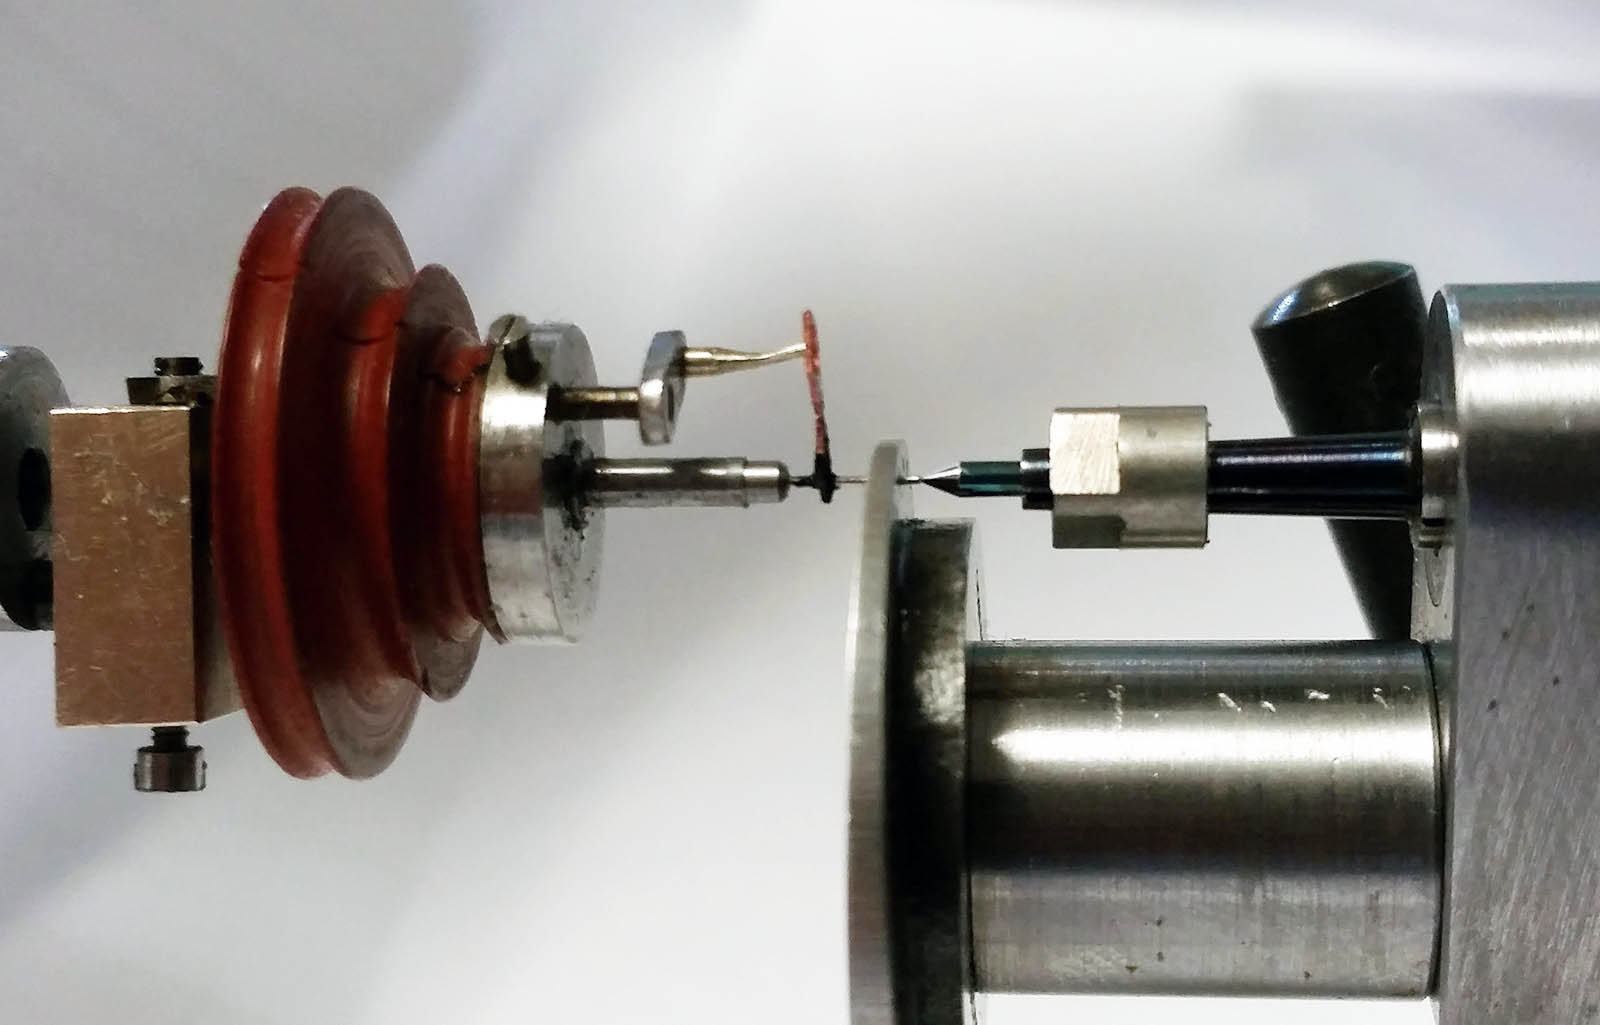
Installing the blank axle into the pinion between centres
Dead centred lathe set up for turning pivots
Close-up of pivot turning
Once the pivot was turned, it was time to burnish it in the Jacot tool. The purpose of burnishing pivots is to create a harder outer surface on the steel part, making it more wear-resistant while still keeping the inside of the metal strong and elastic. This can be achieved by cold-working it with a suitable machine, such as the Jacot tool.
The Jacot tool has the pinion with its pivot rolling backwards and forward, driven by the same to and fro movement of a bow attached to a pulley that has a fixed brass pin connected to a carrier attached on the pinion. The pivot is supported on a hardened steel support and a flat burnishing tool, either made from hardened steel or hard metal like tungsten carbide, lies on top of the pivot, which is simultaneously pusher in the opposite direction from the rolling of the pivot, with pressure applied on the pivot to compress the metal.
Set up of the Jacot tool
Close up of pinion in the Jacot tool, ready for burnishing
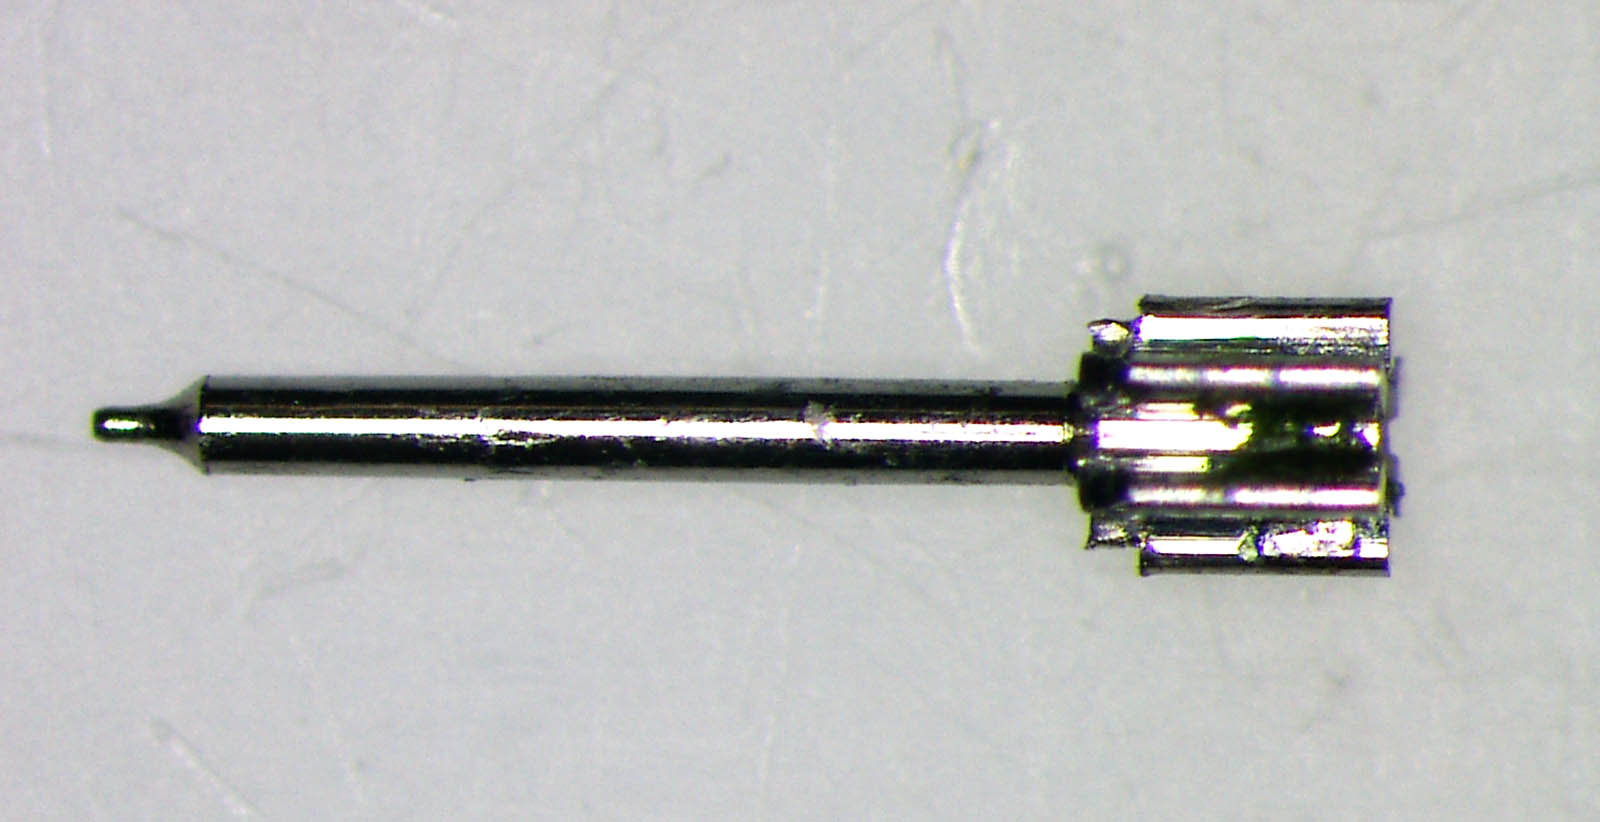
Below was the last step in the re-pivoting operation, showing the result of re-pivoting the escape wheel pinion. The pinion was then installed in the new escape wheel and tested with the pallets to ensure they work.
Finished, re-pivoted pinion with burnished pivot
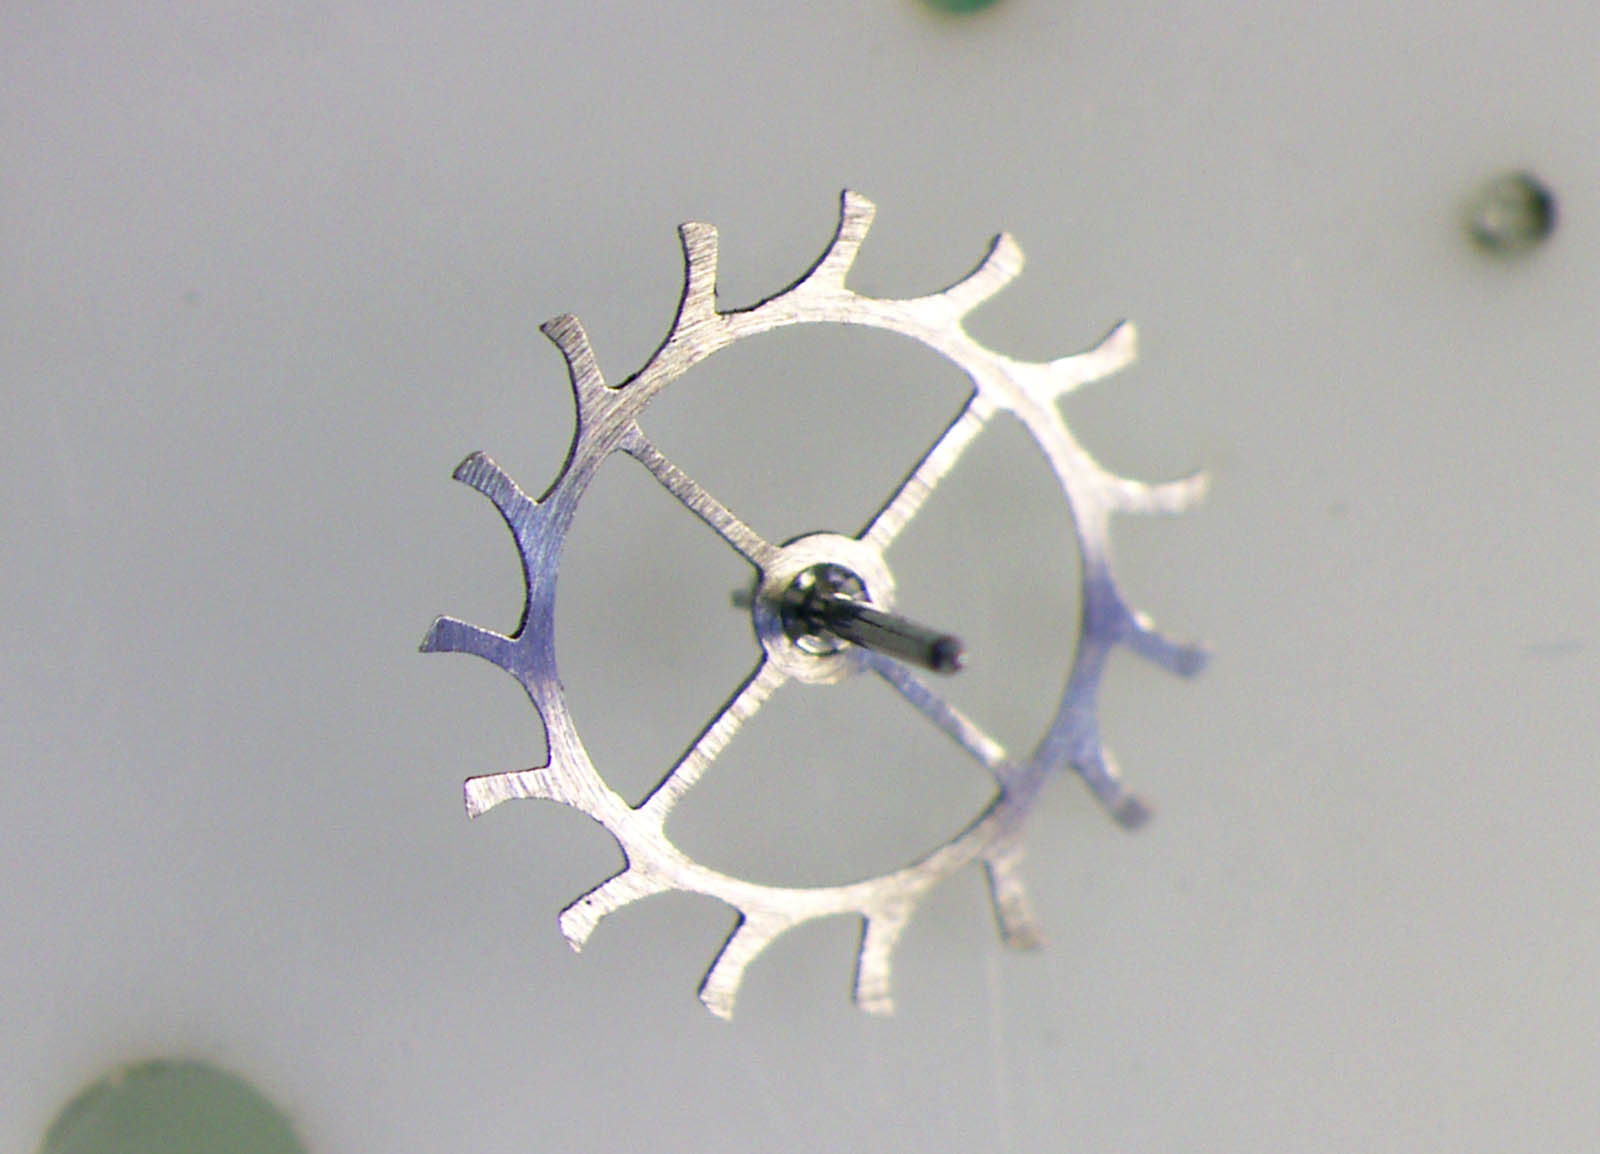
The new escape wheel and pinion assembled

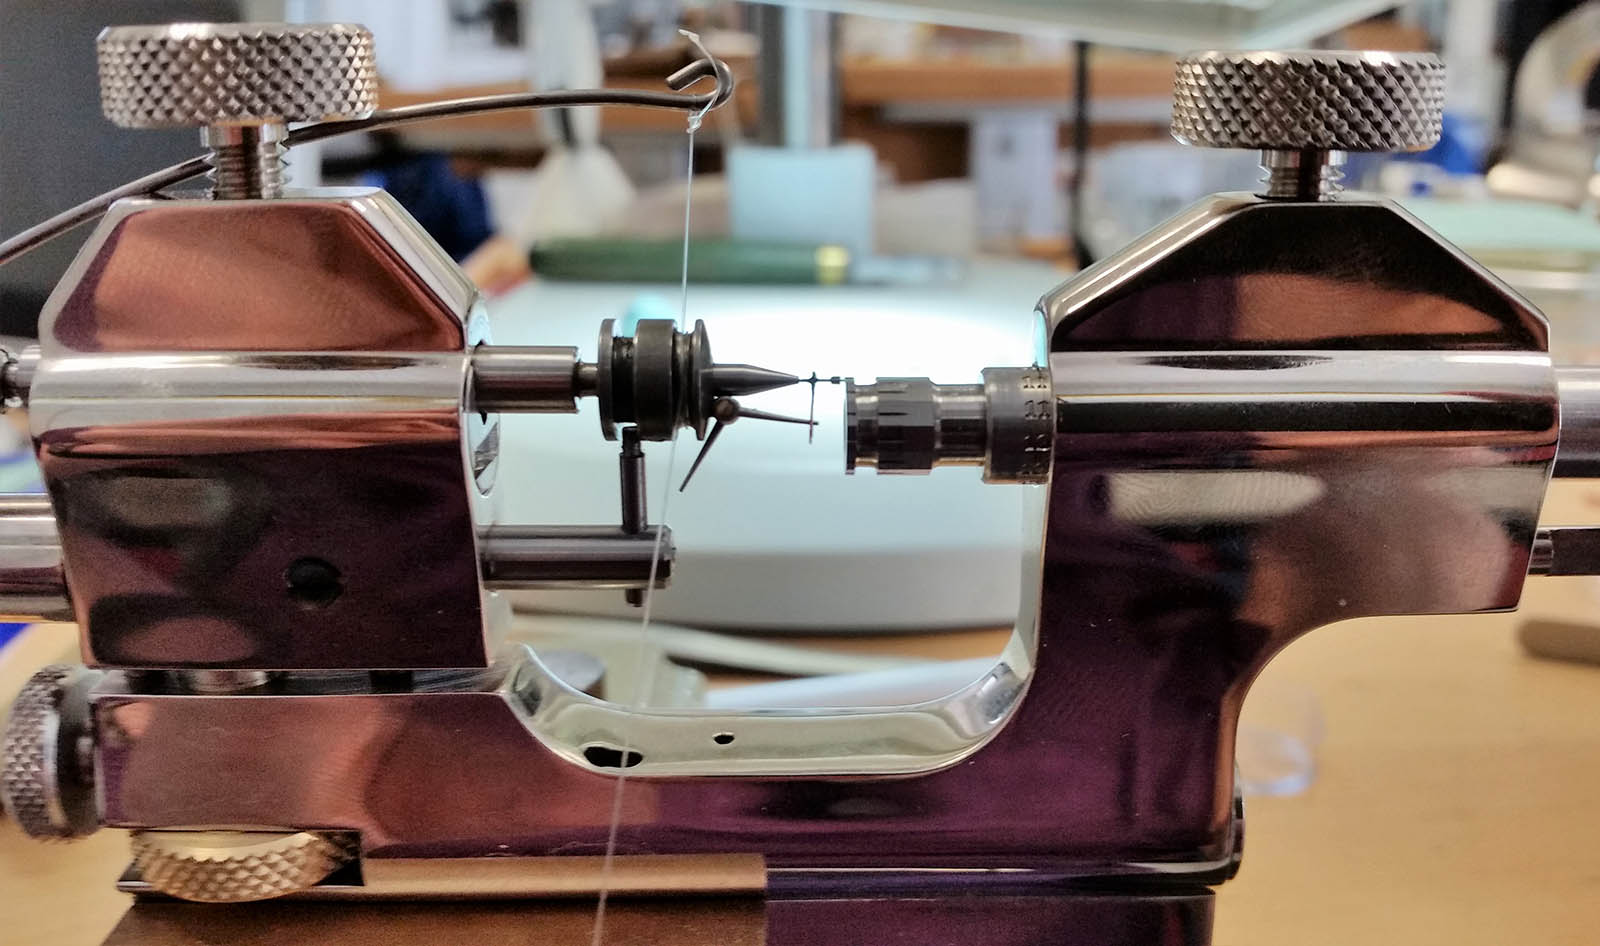
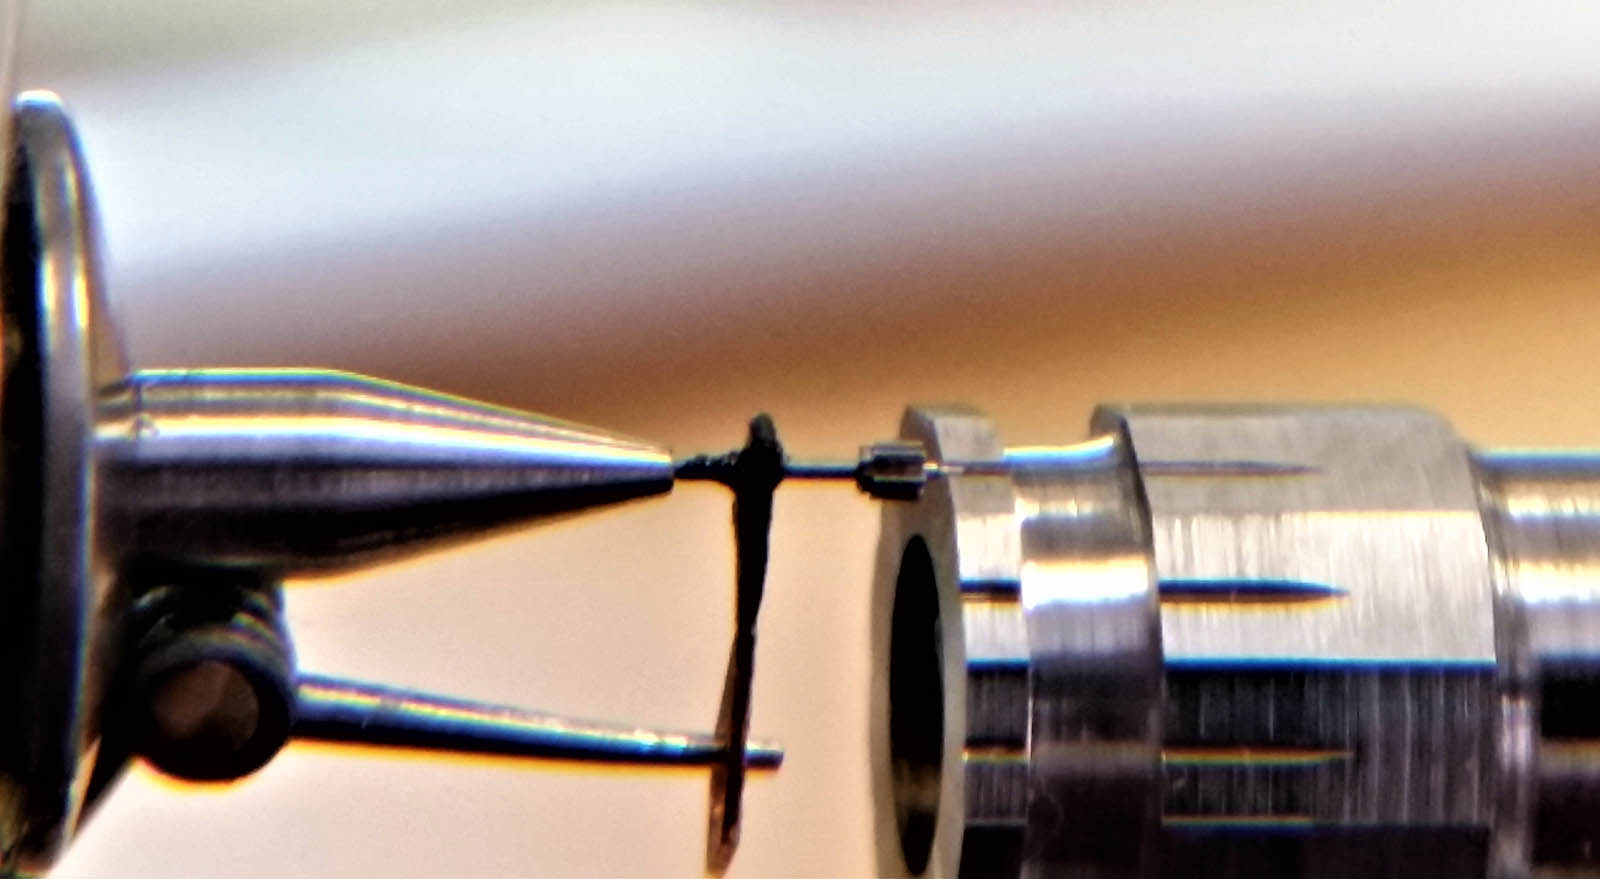
Trying out the escape wheel with the pallets
The winding stem
Next a winding stem was made from hardened and tempered silver steel rod. A cone at one end of the steel rod was turned, which forms the cone at the end of the pivot of the winding stem. Then all the various cylinders to make the winding stem functional were turned from the same rod.
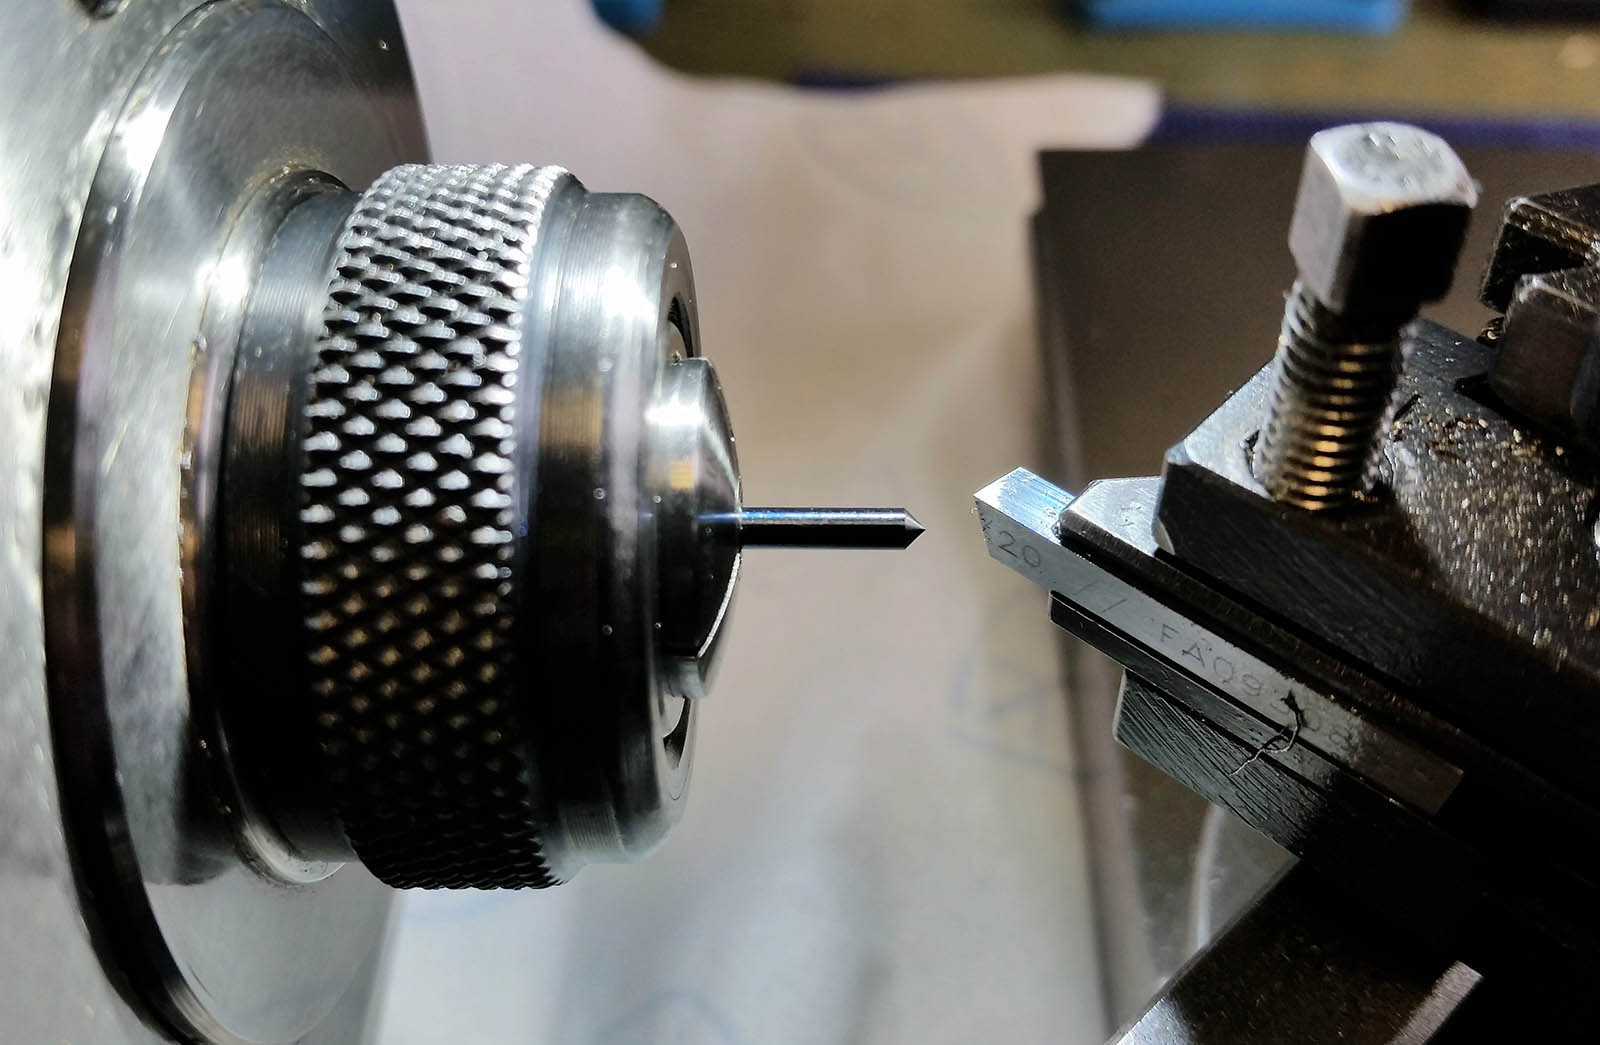
Turning a cone at the end of a blue steel rod
Various sized cylinders turned on the winding stem
A thread at the back of the winding stem for the crown was made next, followed by filing the square for the winding stem.

Making the threads on the winding stem

Filed square on the winding stem
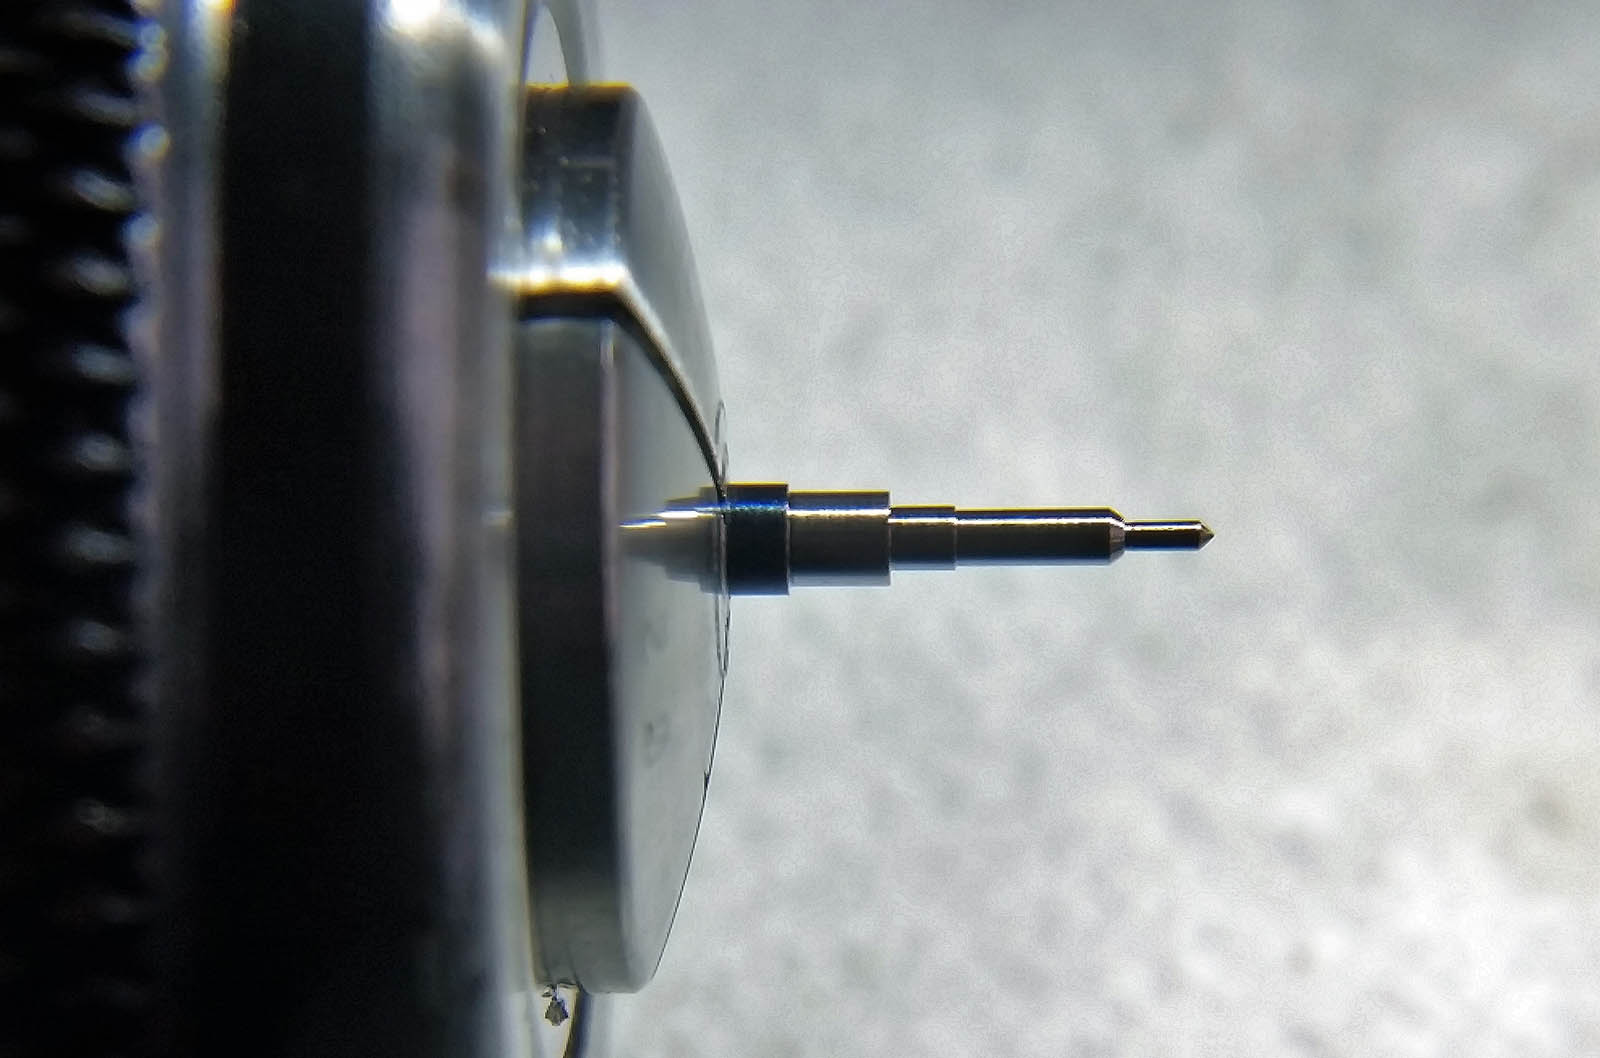
Finally, a slot for the setting lever was turned, finishing the winding stem.
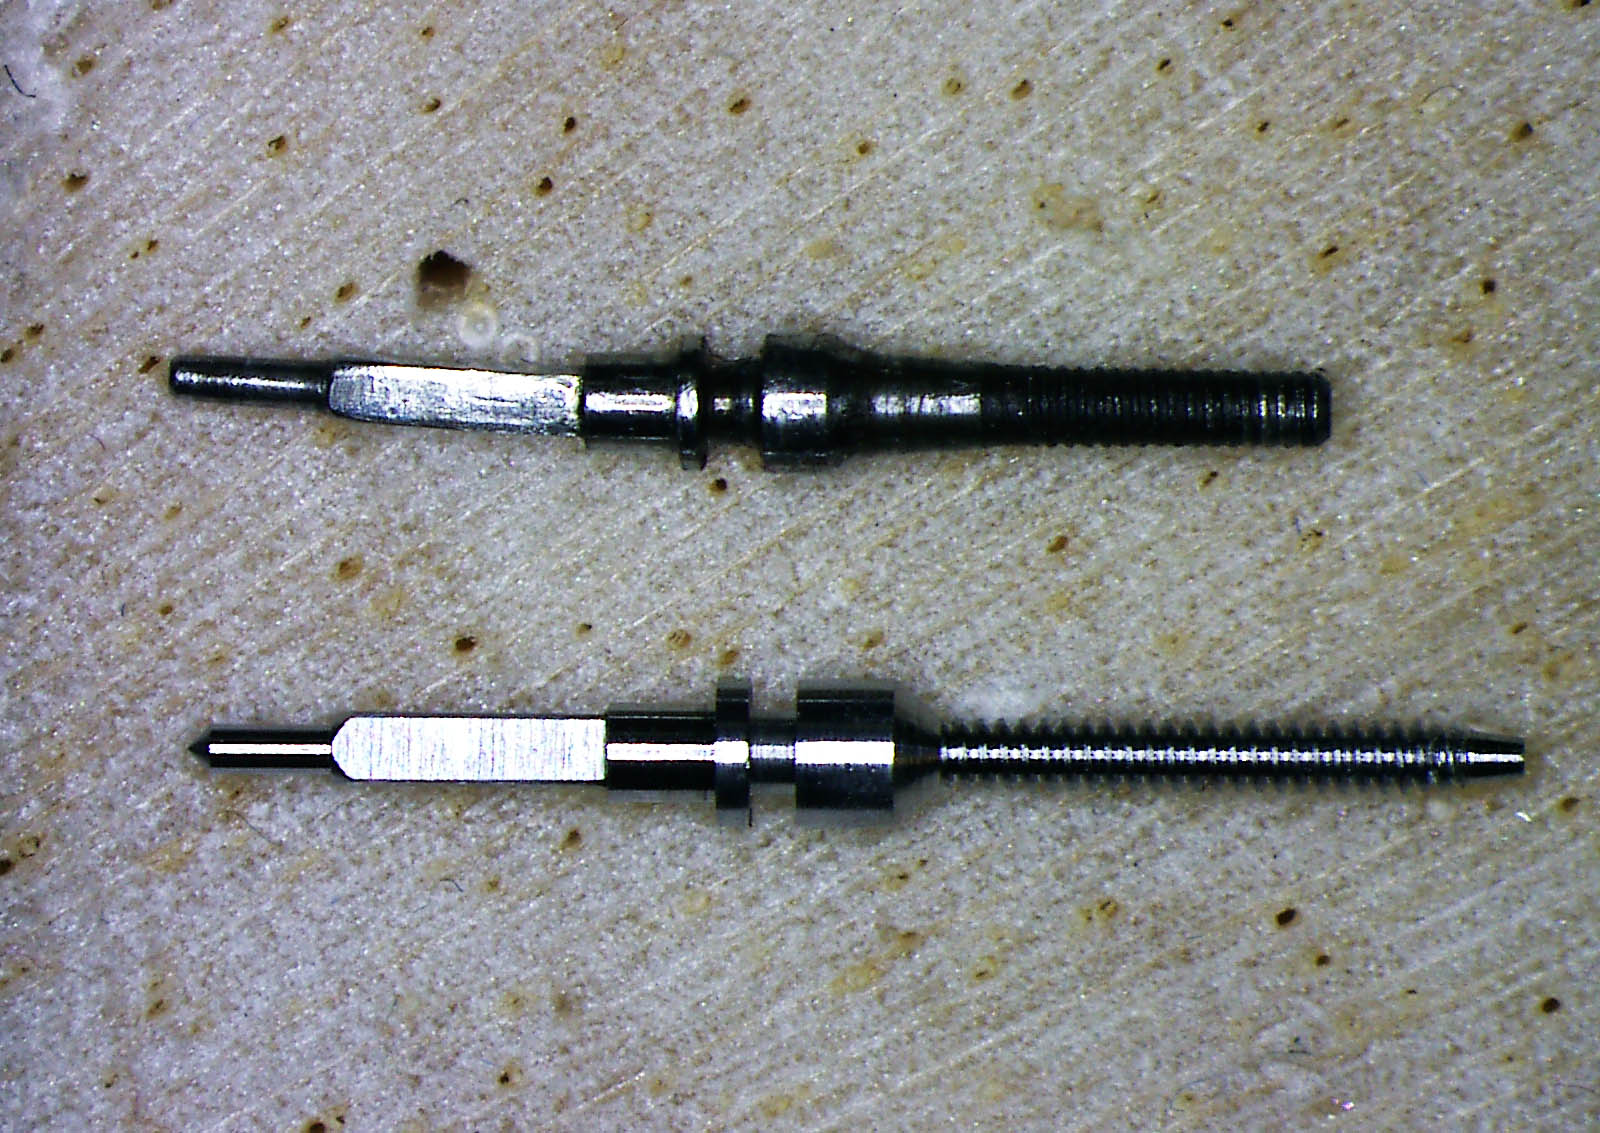
The old winding stem (above), and the newly made replacement
Testing, part one
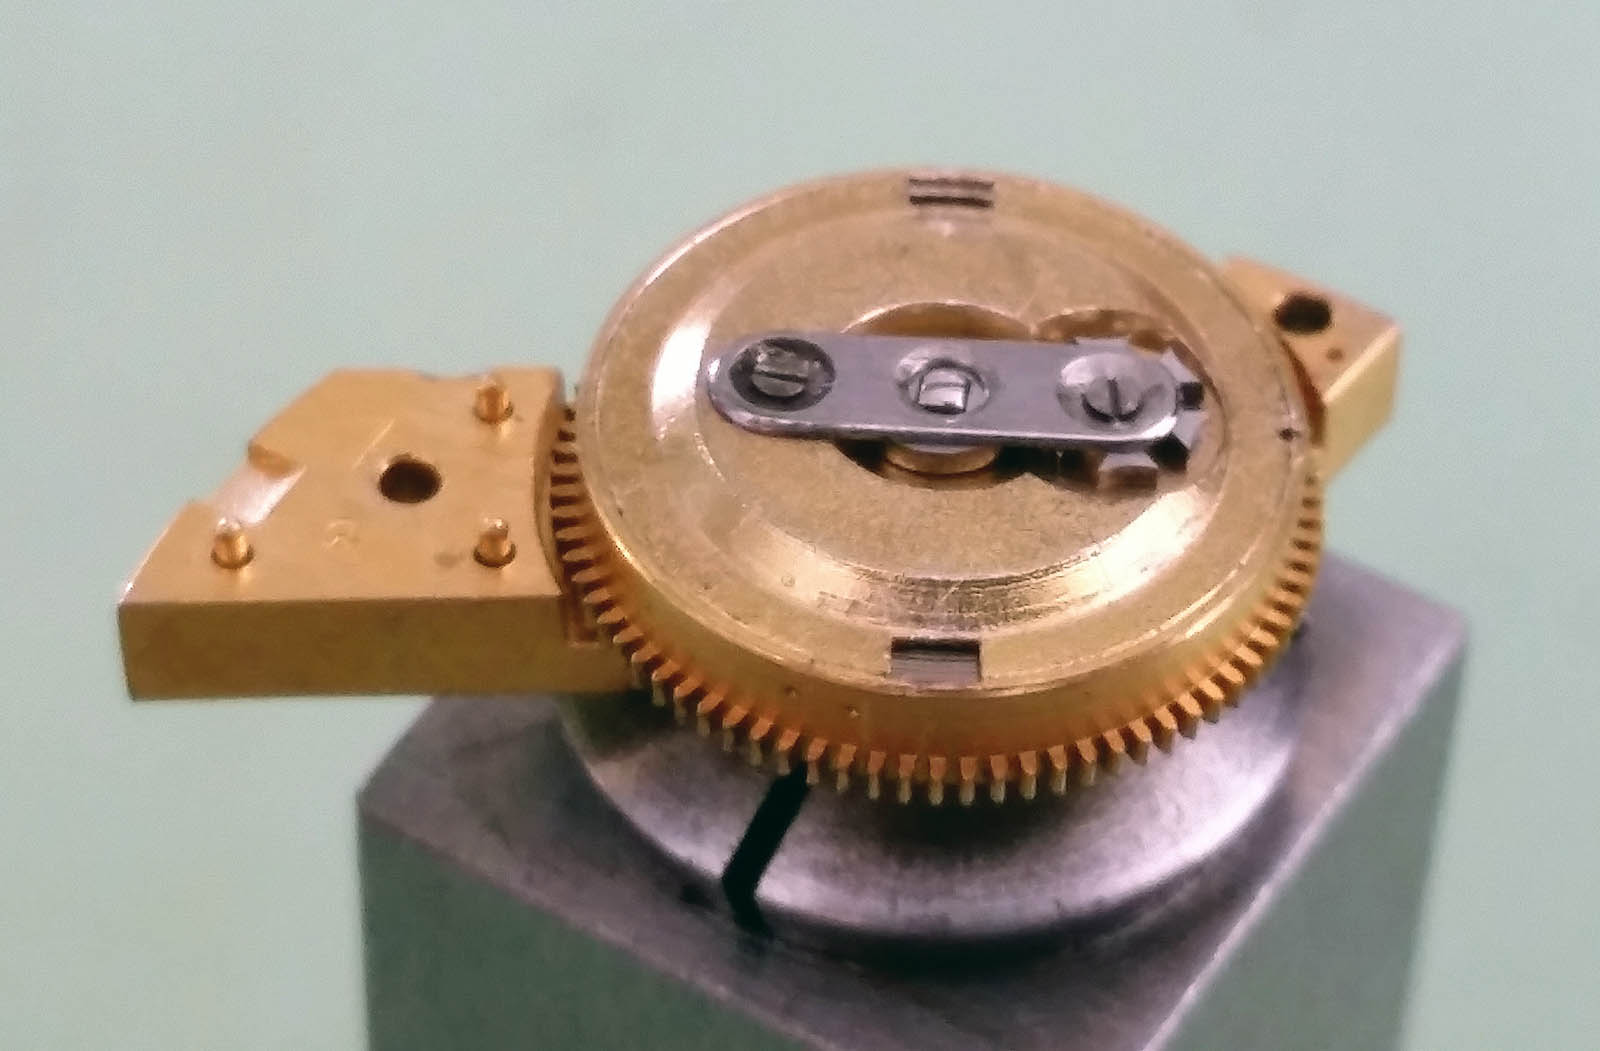
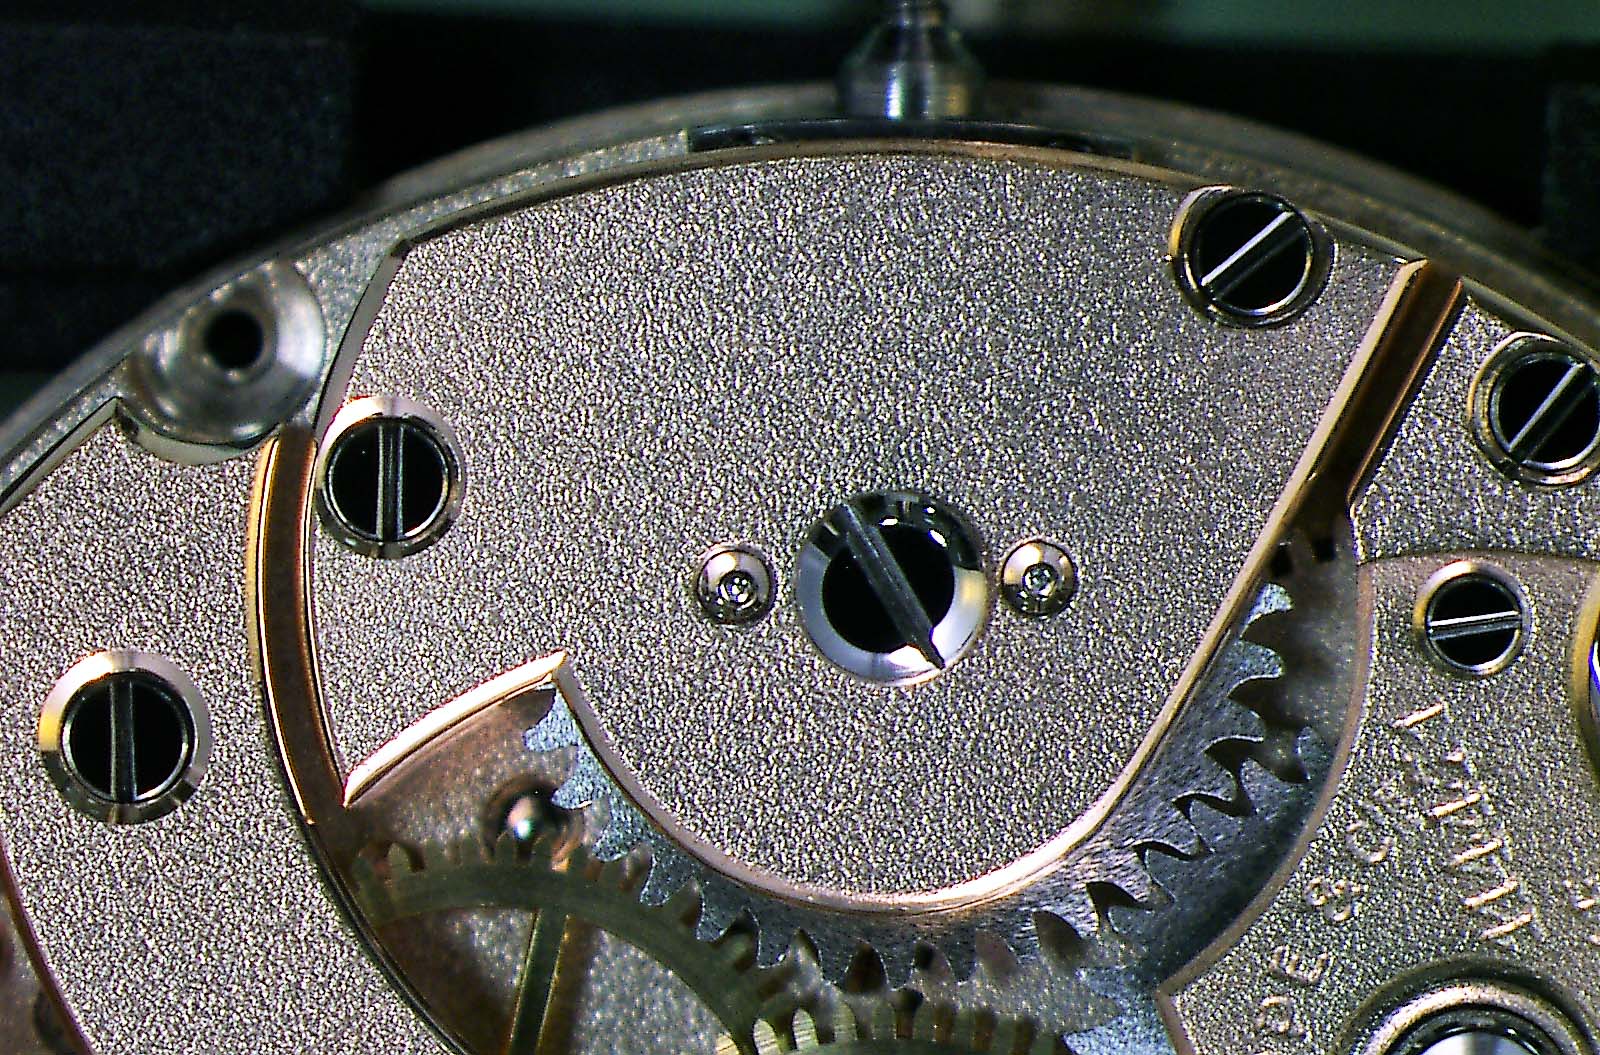
Next the movement was assembled and adjusted for function and performance, and a new fresh antimagnetic, stainless steel mainspring was installed in the barrel.
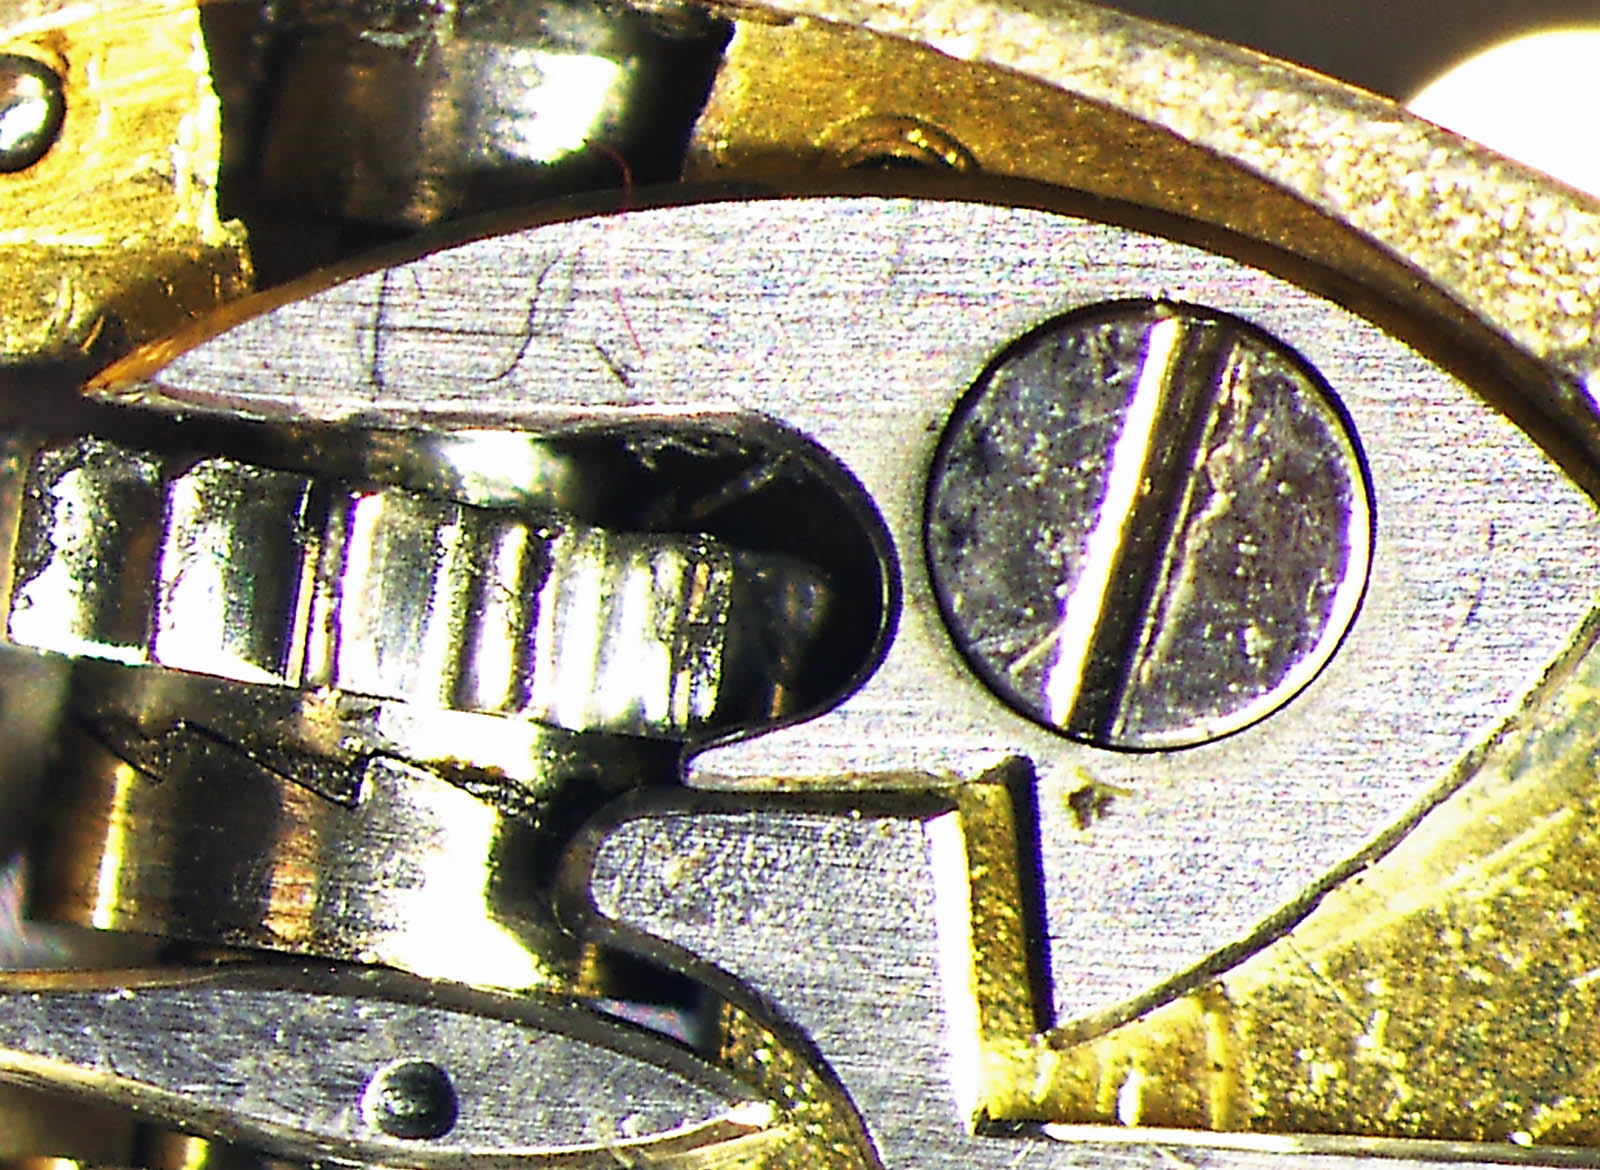
It was then discovered that the fourth wheel bridge locating pins were bent so much that the fourth wheel was touching the main plate. The bent pins were corrected, so the fourth wheel was running upright.
When I come across strange things like this, all the alarm bells in my head go off! The reason is simple: there is usually a reason for a watchmaker to make such an adjustment, typically to correct for an error. So if I just straightened the pins, and did not further investigate, there would have been a risk of missing out on something else that was wrong, for instance gear depth.
The engagement of the gears was tested, and there wasn’t optimum engagement with the third pinion. It was too deep, so correcting the bridge would bring back the correct depth of engagement with the third pinion. But it had almost no effect on the escape wheel pinion. As a result, I suspected the marks on the sides of the bridge were the result of someone trying to pry up the bridge during disassembly with the incorrect technique and tools.
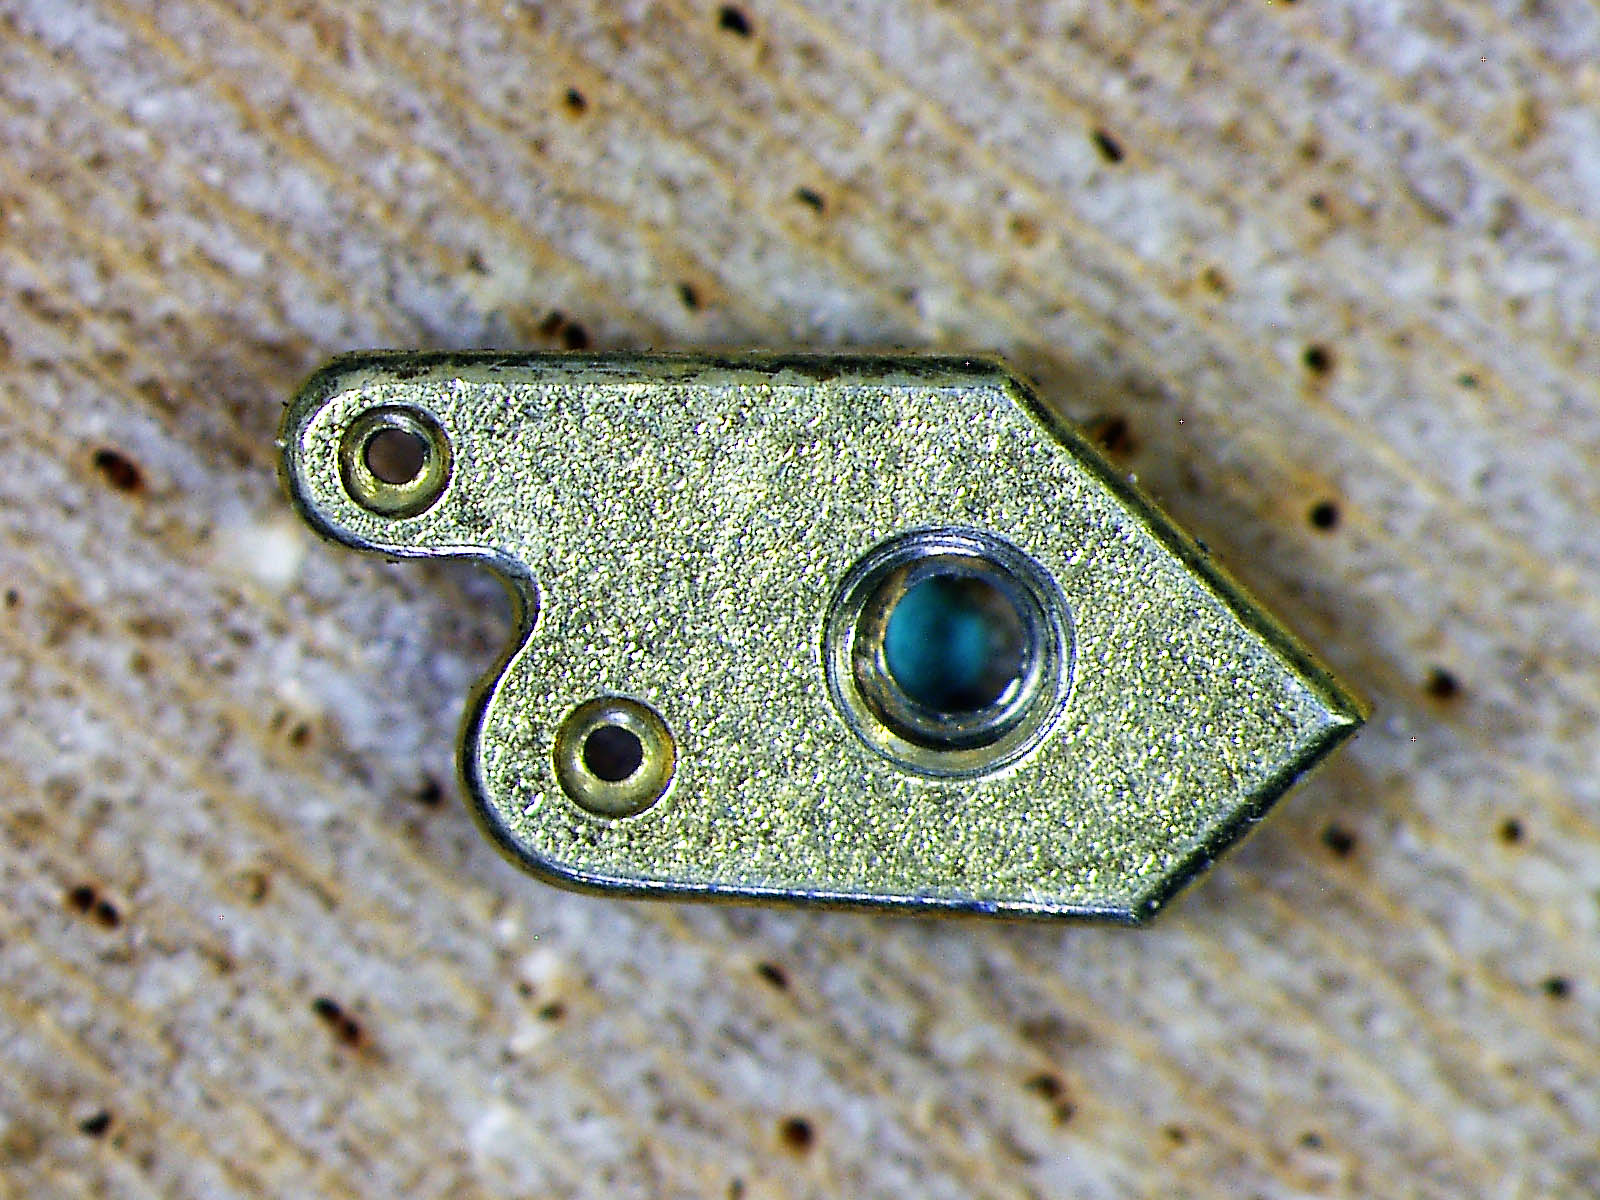
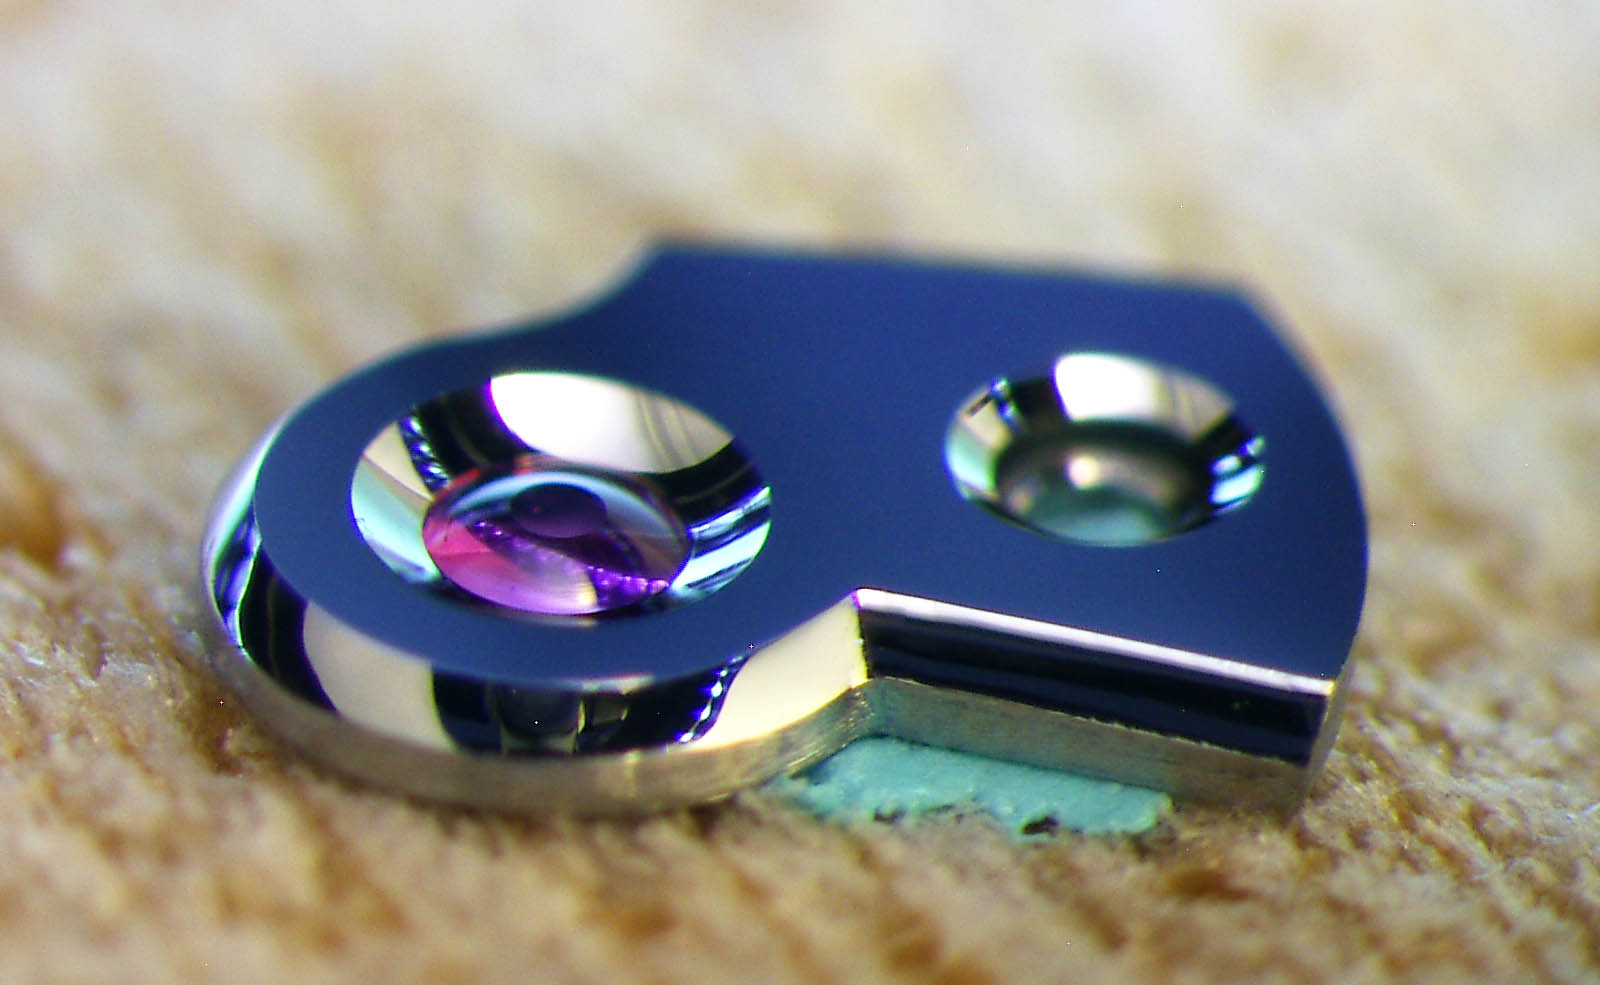
The red arrow indicates where the wheel was rubbing against the main plate, and the yellow arrow points to the scratches that could have bent the bridge
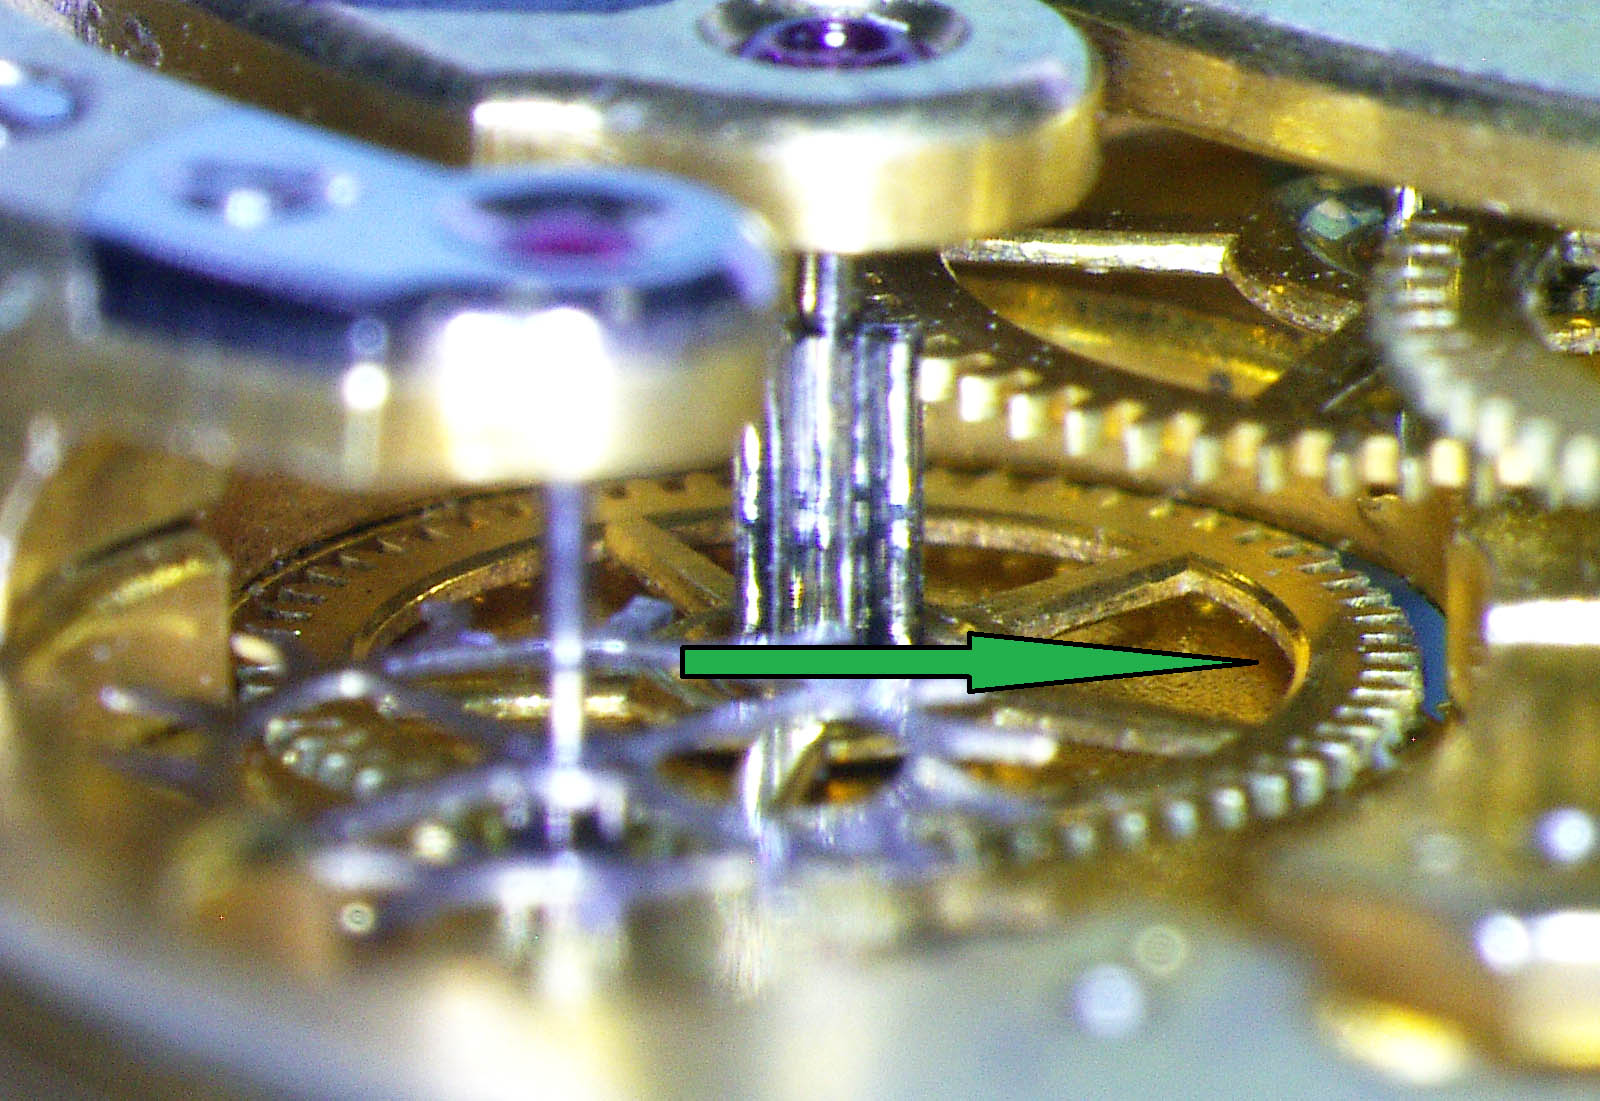
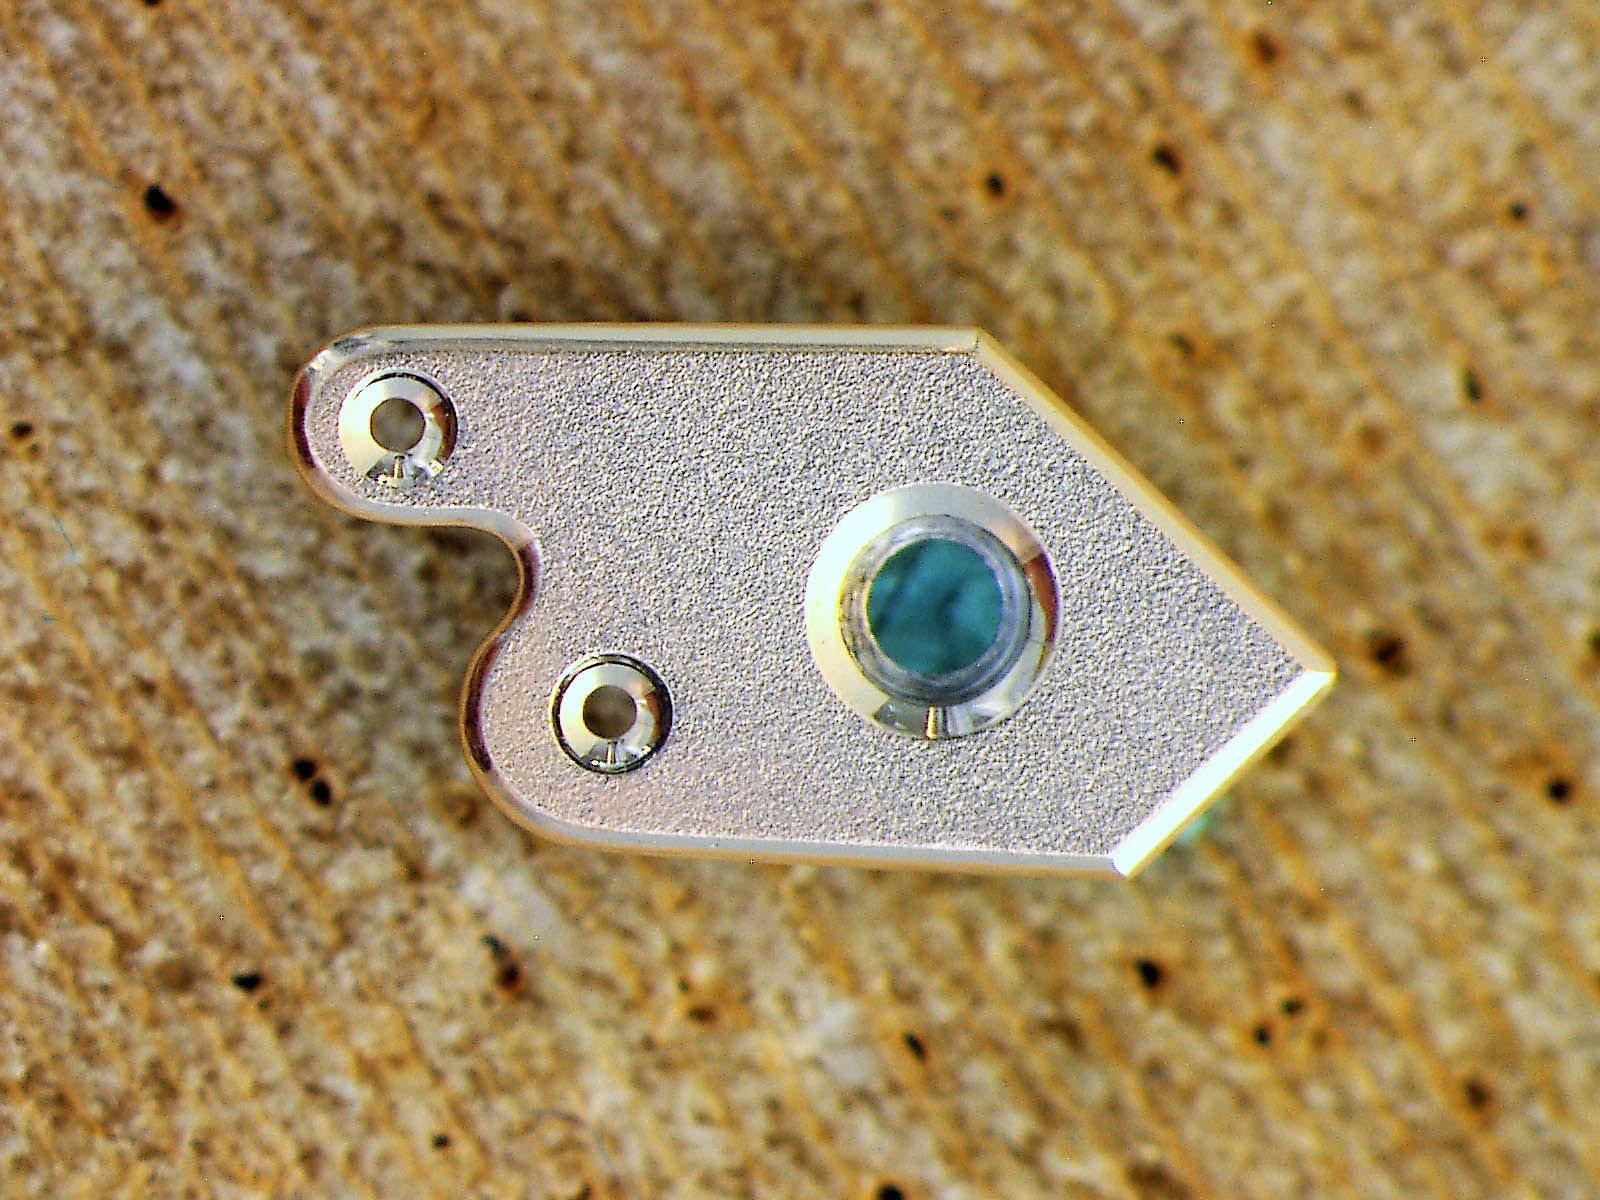
Corrected locating pins, and the green arrow points to the necessary space between fourth wheel and main plate after the correction of the bridge
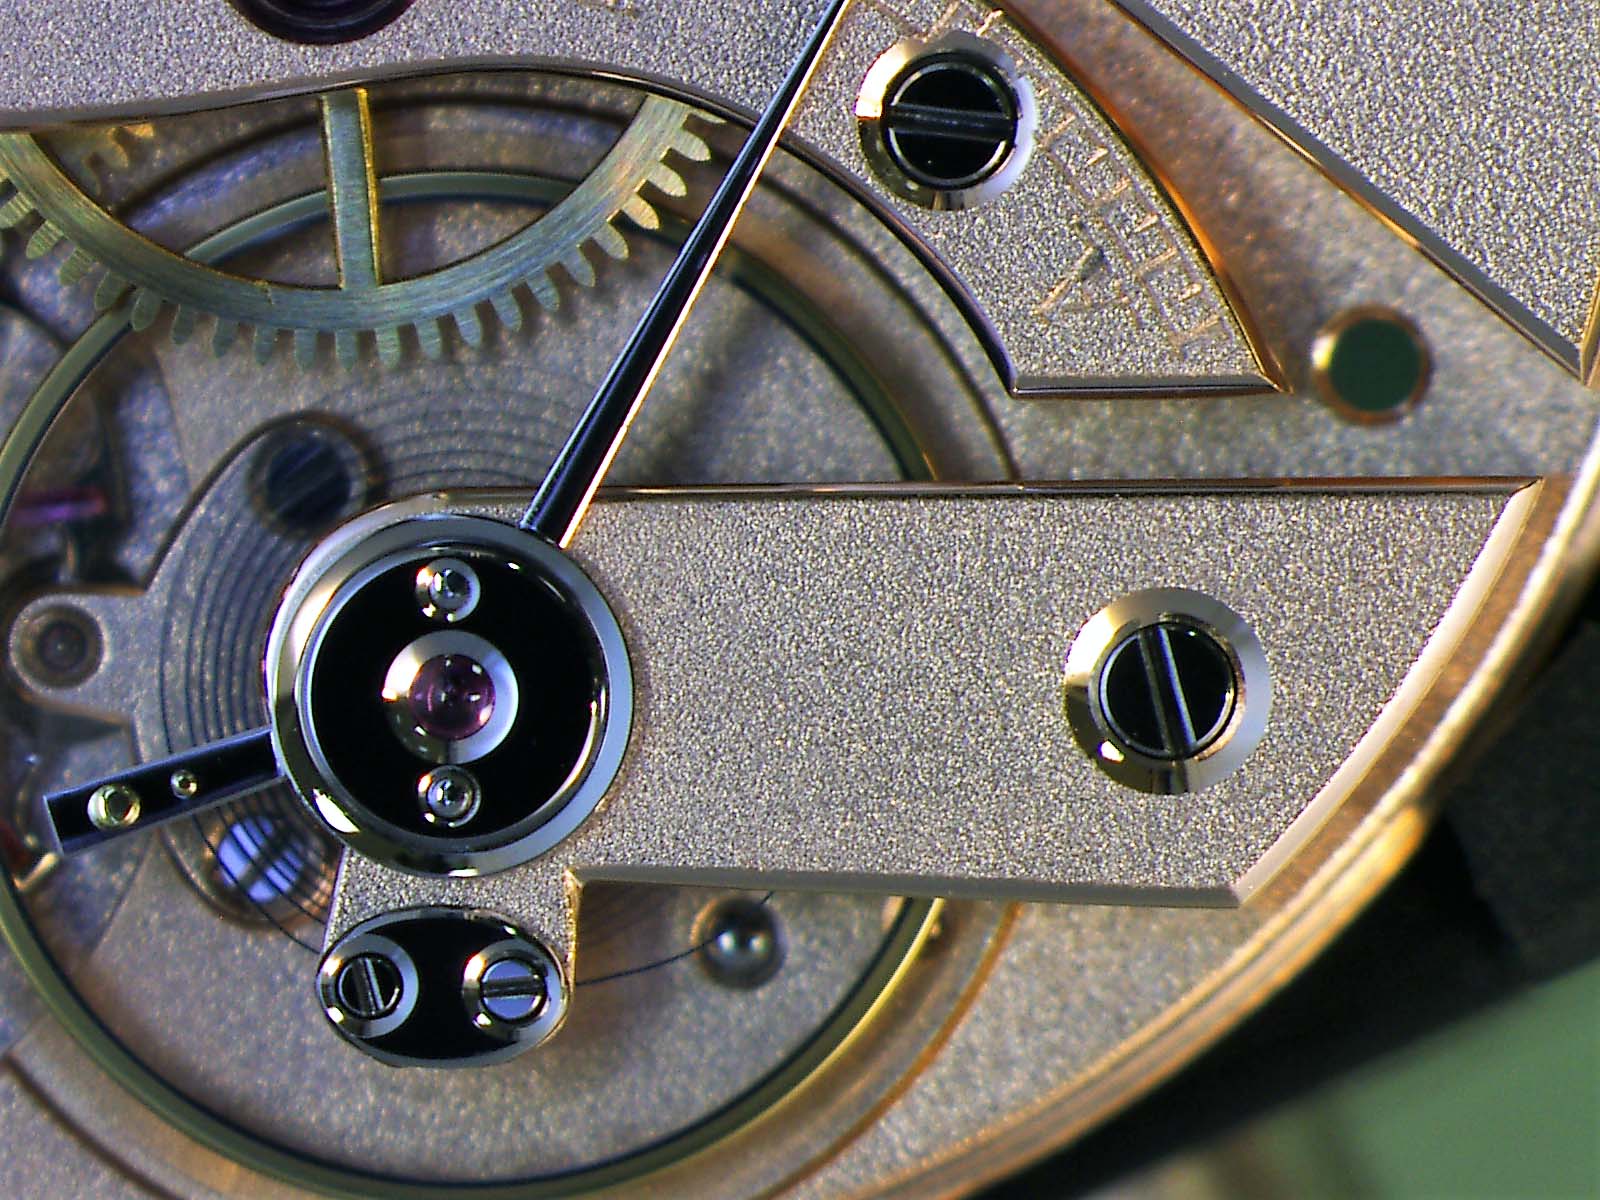
Decoration
Once all the mechanical problems had been taken care of and basic timekeeping had been achieved, the movement was taken apart again so that finishing could begin. The photos below detail the various finishing processes.
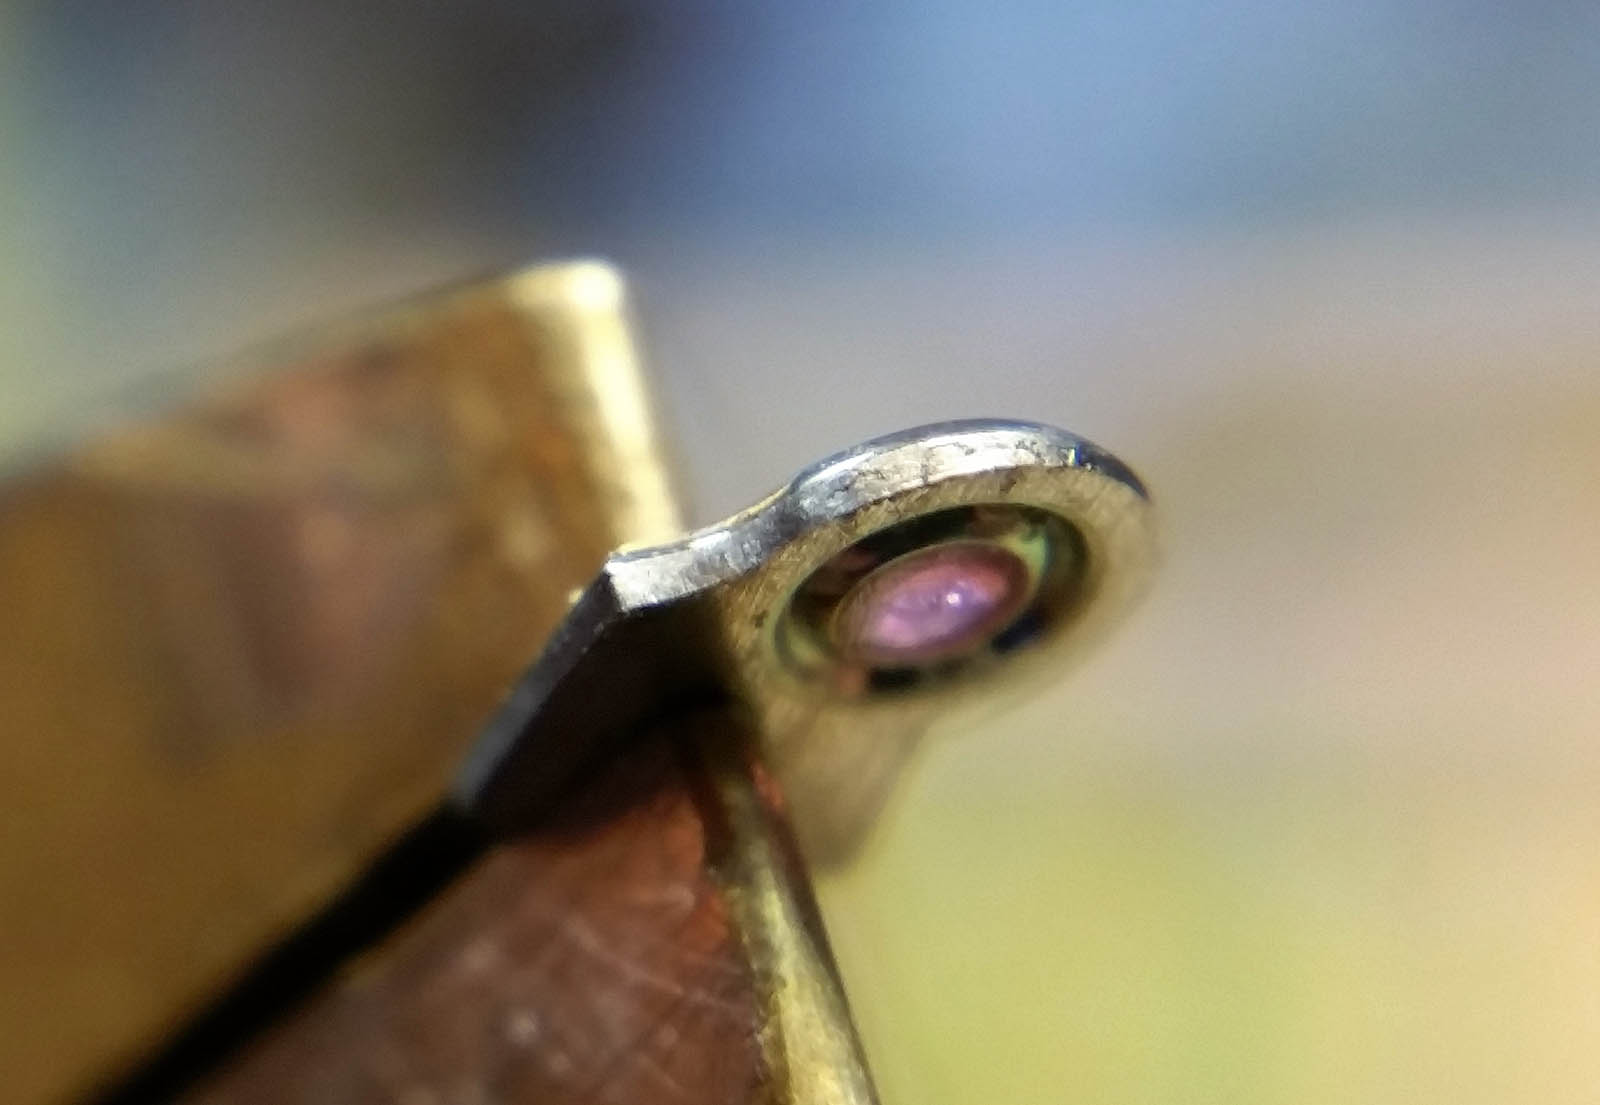
The escape wheel bridge cap with a jewel setting, before finishing its flanks
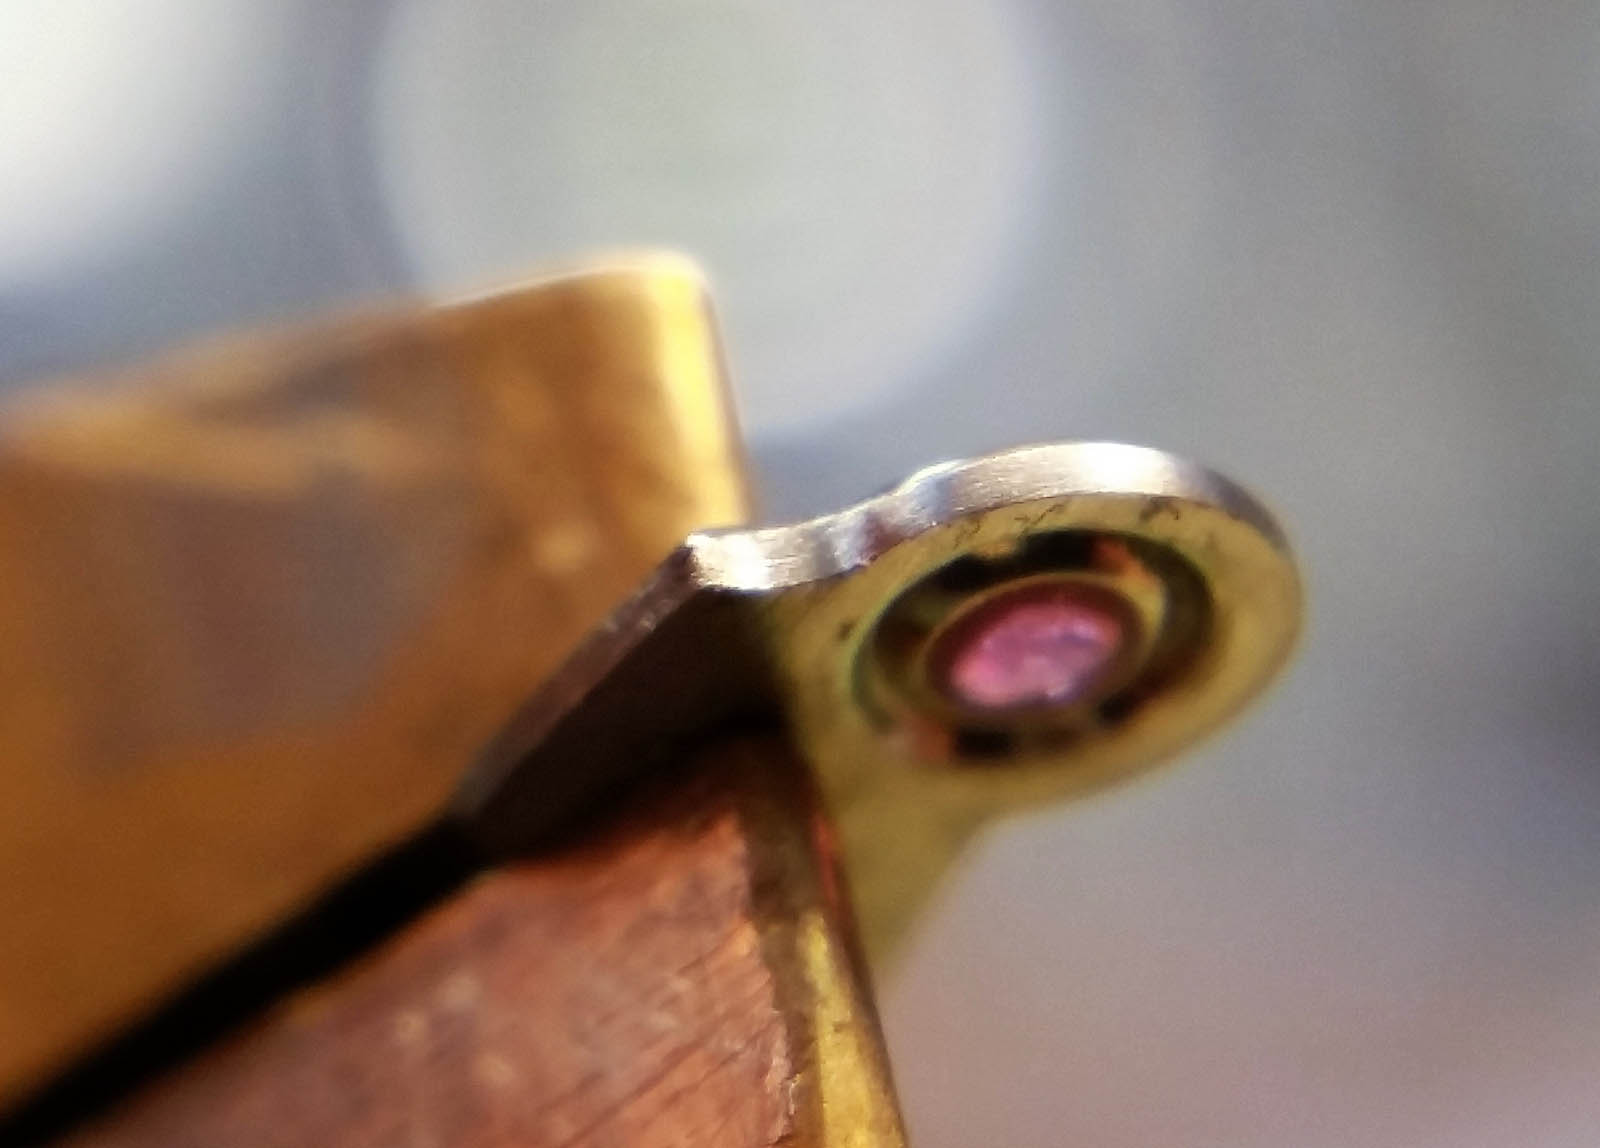
The same part after the flanks are finished with straight graining; straight graining was also done for the flanks of all the bridges
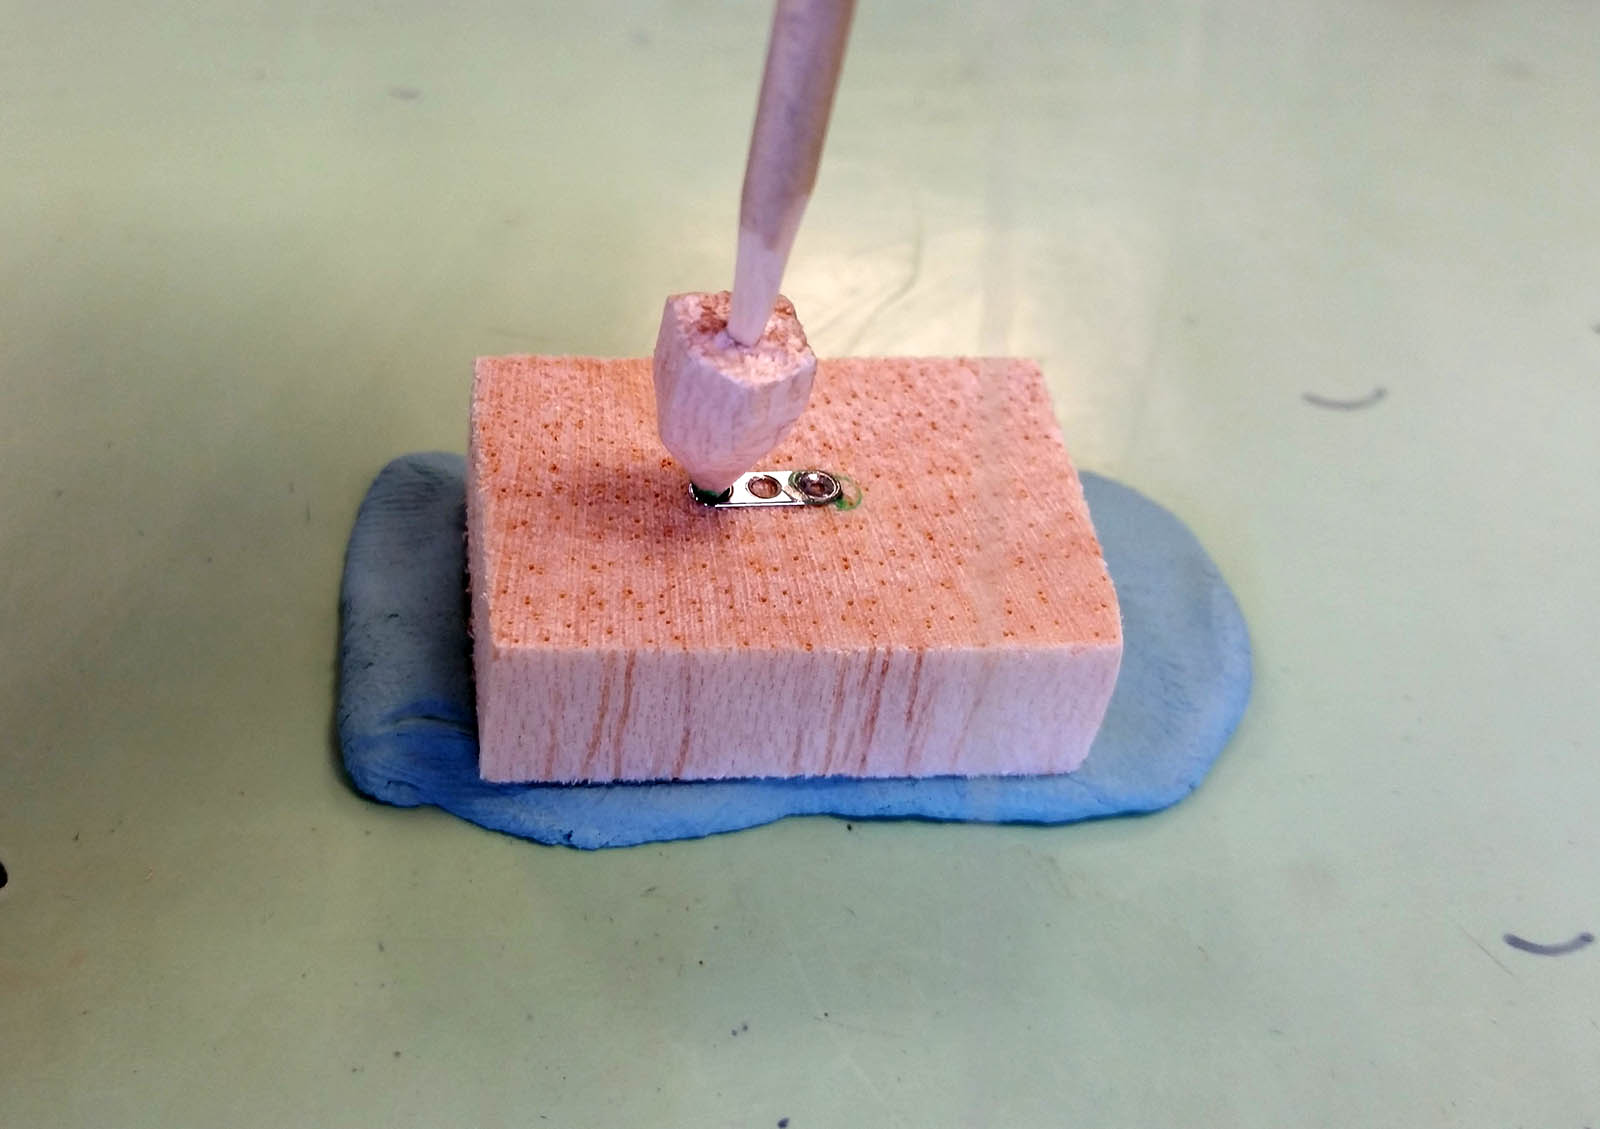
Polishing countersinks with a wooden tool
Frosting of bridges
Straight graining of steel parts – the part is embedded in soft wood and then the graining applied by rubbing it on an abrasive surface

Circular graining of wheels
Black polishing of steel parts – the part is held by the vice and polished on the tin plate below
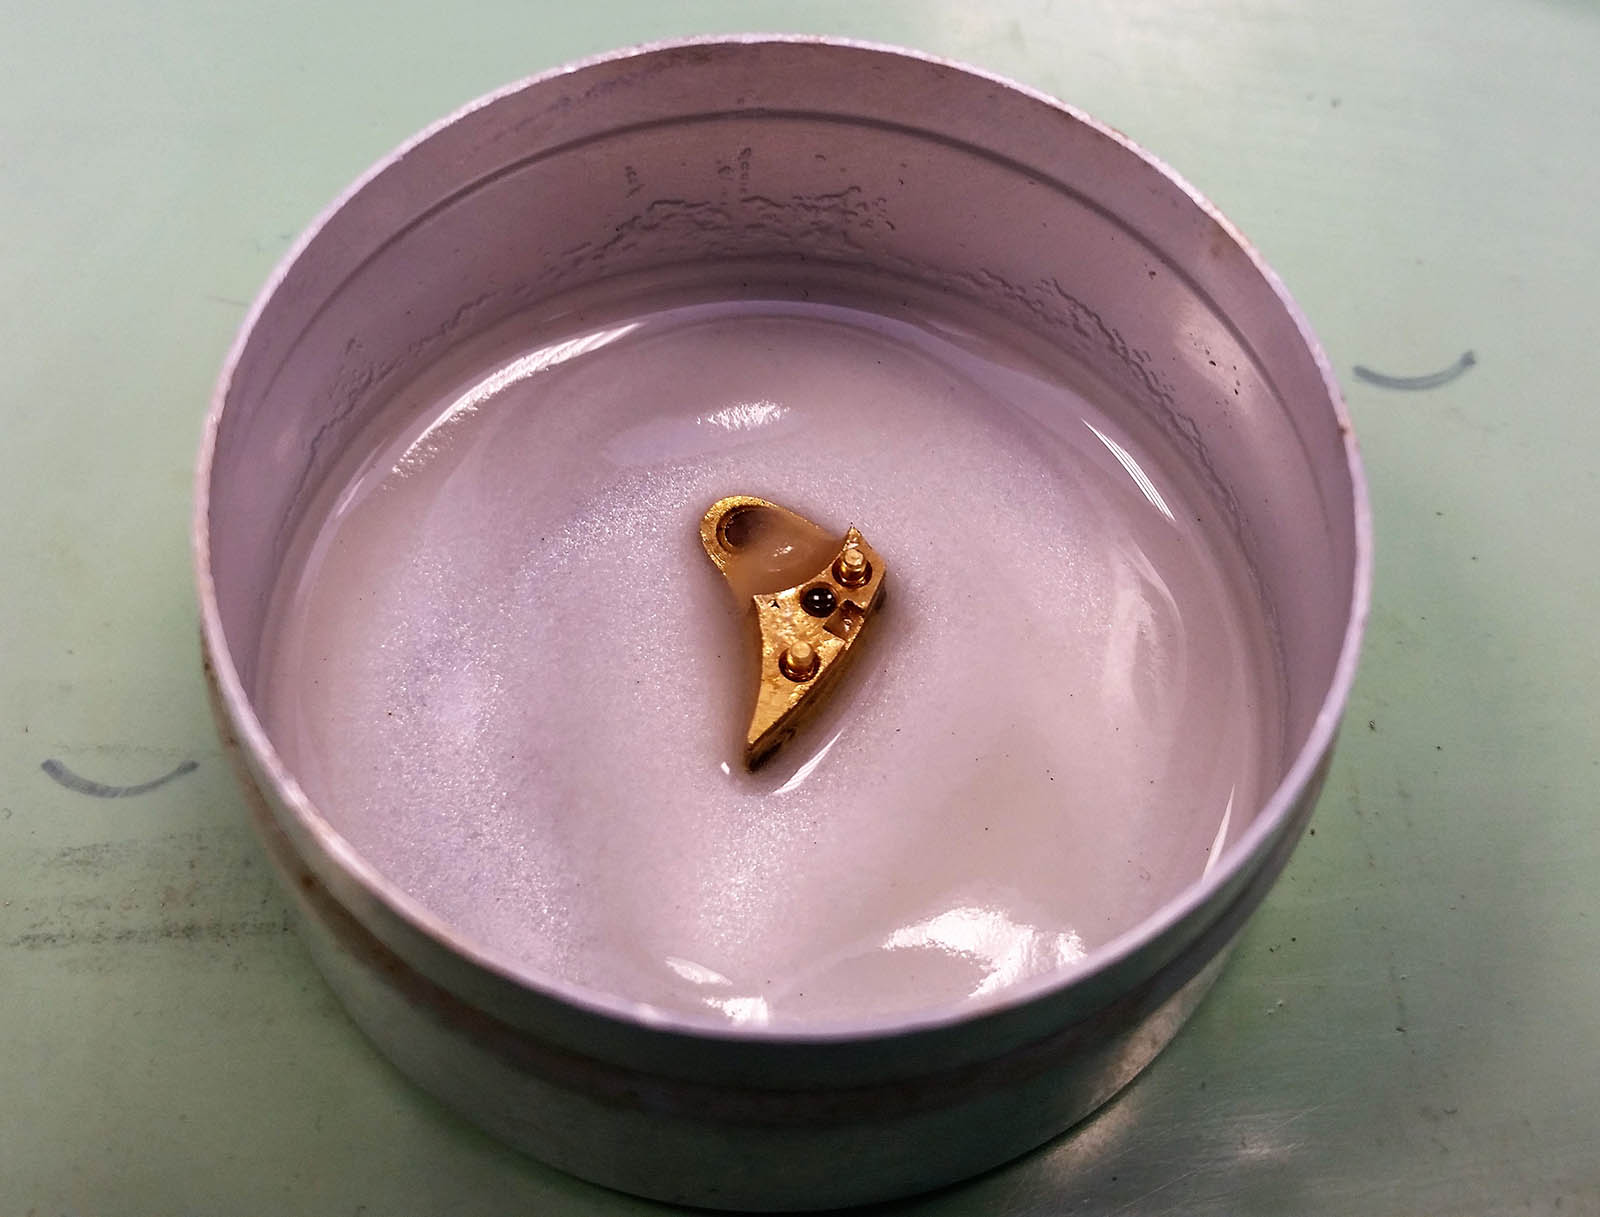
Gold plating of bridges; these are hung on a rack and then dipped in a chemical solution to coat them in gold
Gold plating of the main plate and barrel
Here we compare the movement parts before and after finishing.
The barrel before finishing
And after

The yoke before
The yoke after
Setting lever before
Setting lever after
Setting wheel bridge before
Setting wheel bridge after
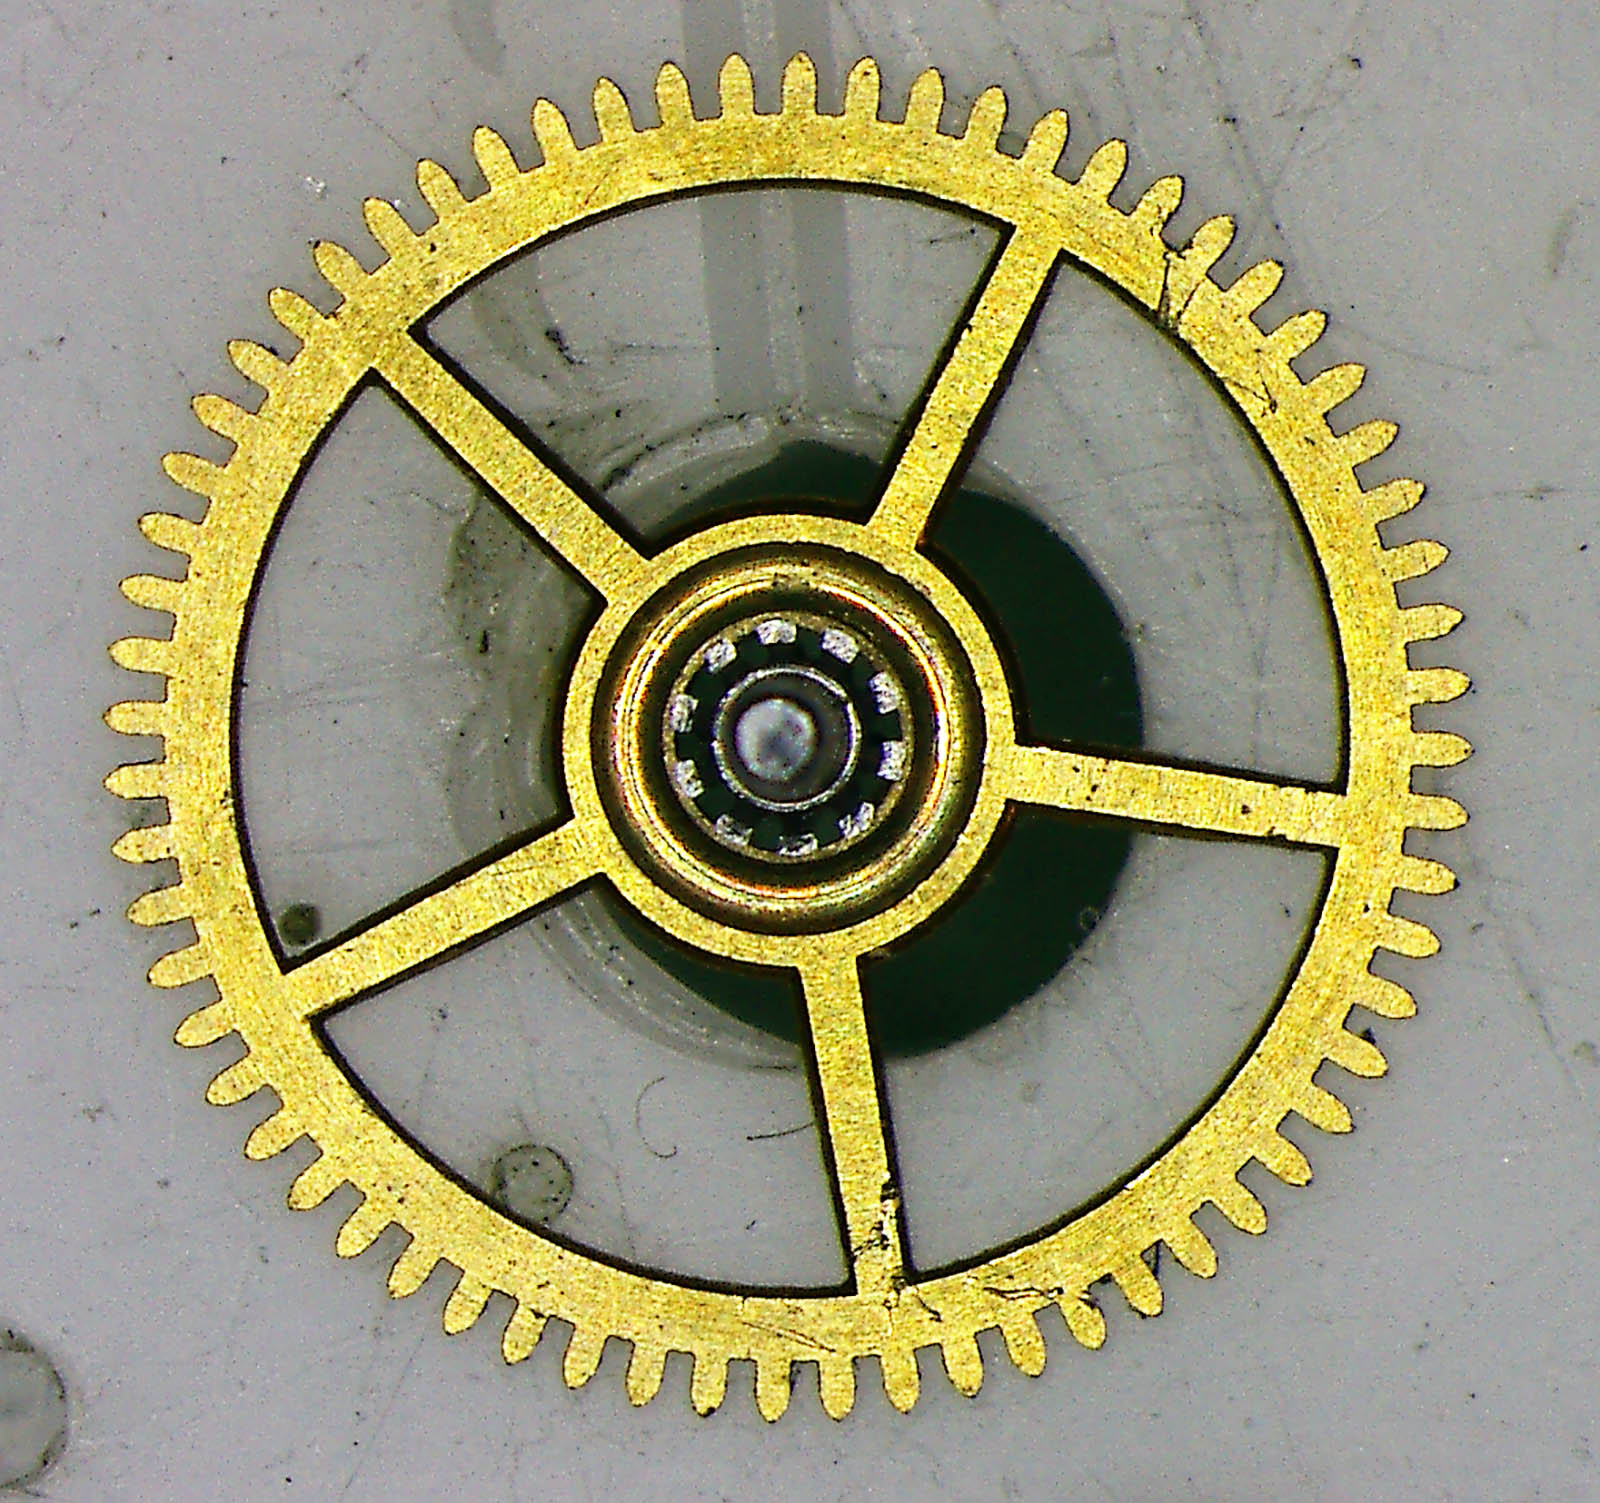
Centre wheel before

Centre wheel after
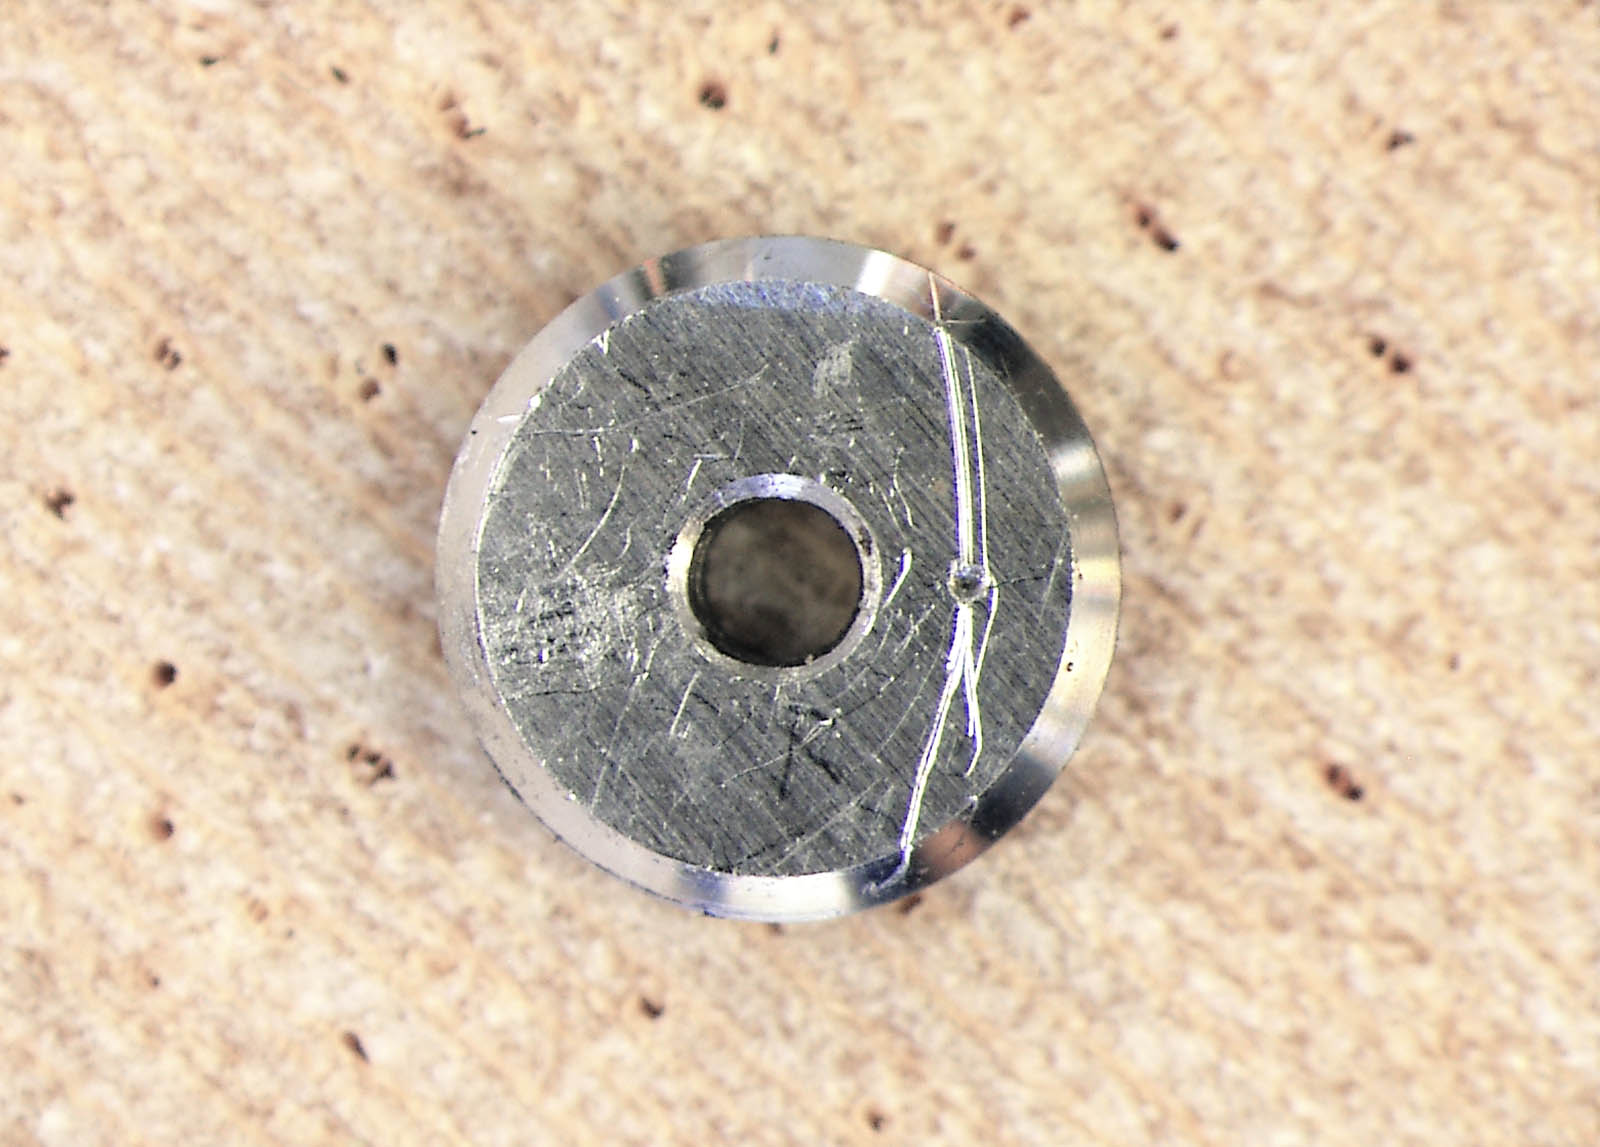
Crown wheel core before
Crown wheel core after
Regulator index before
Regulator index after
Stud holder before
Stud holder after
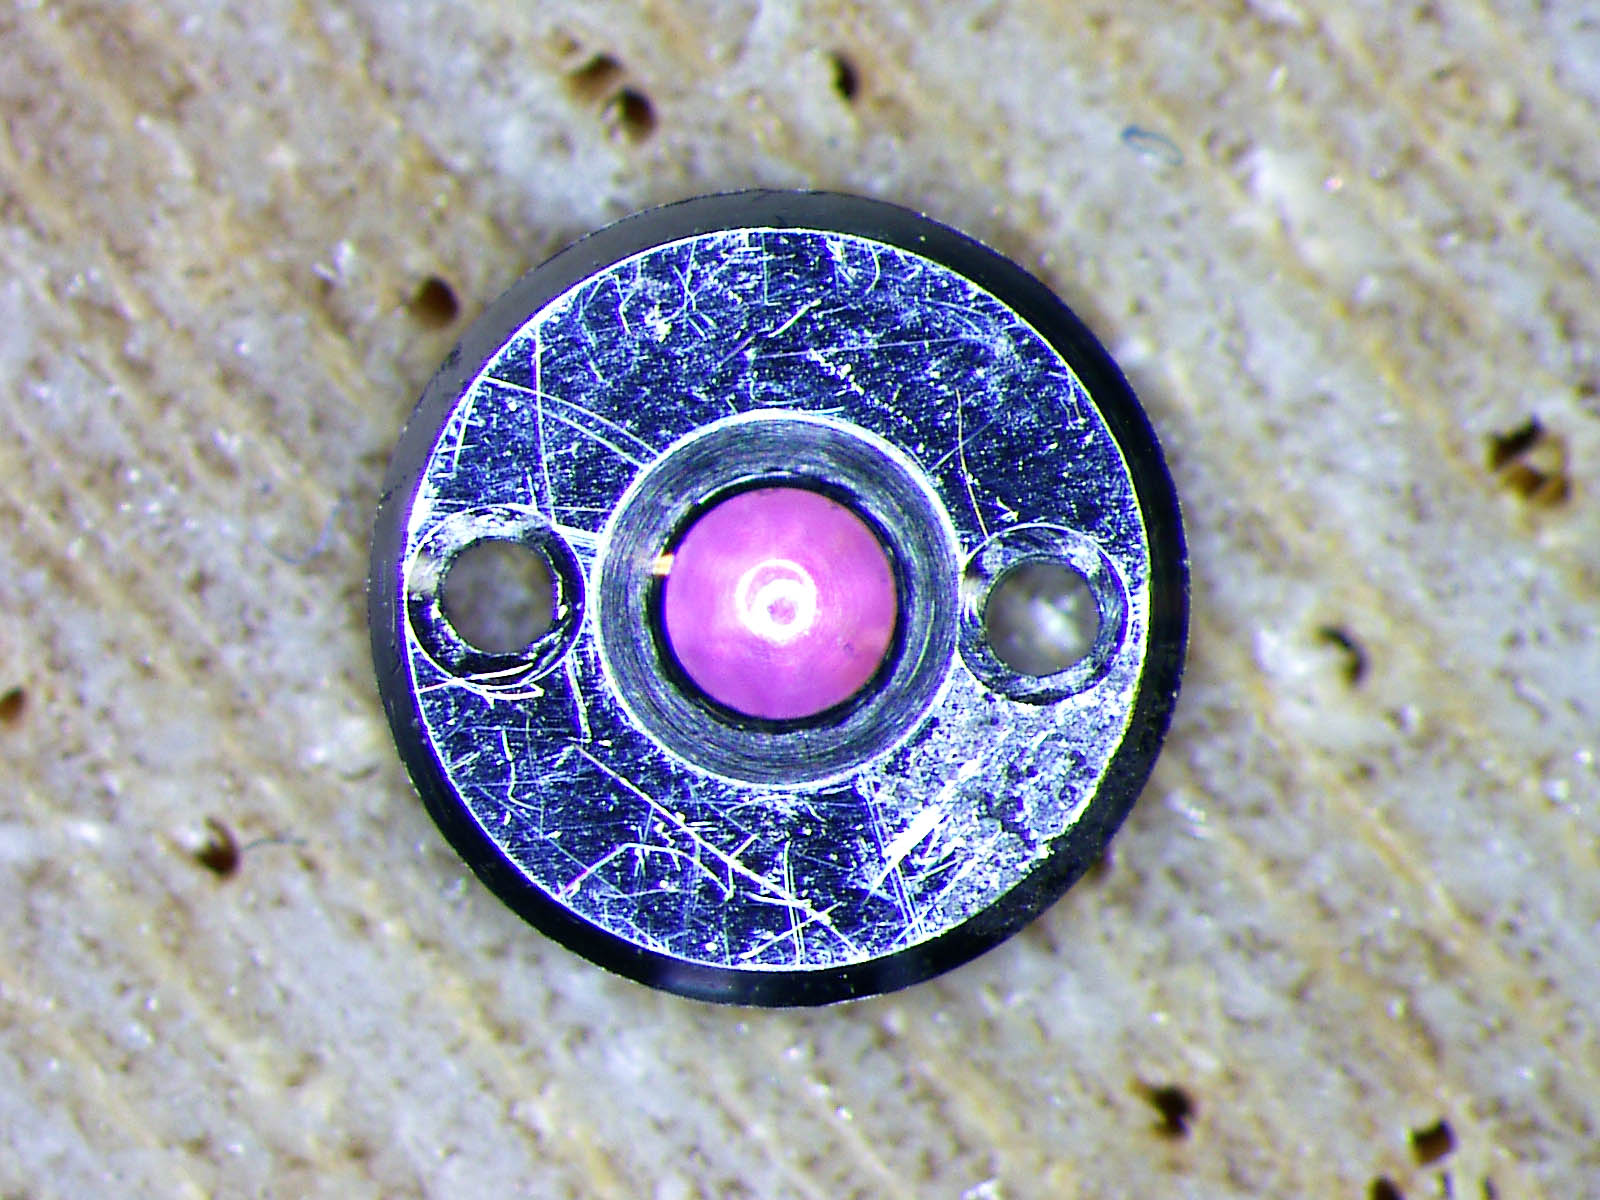
Balance cap jewel setting before
Balance cap jewel setting after
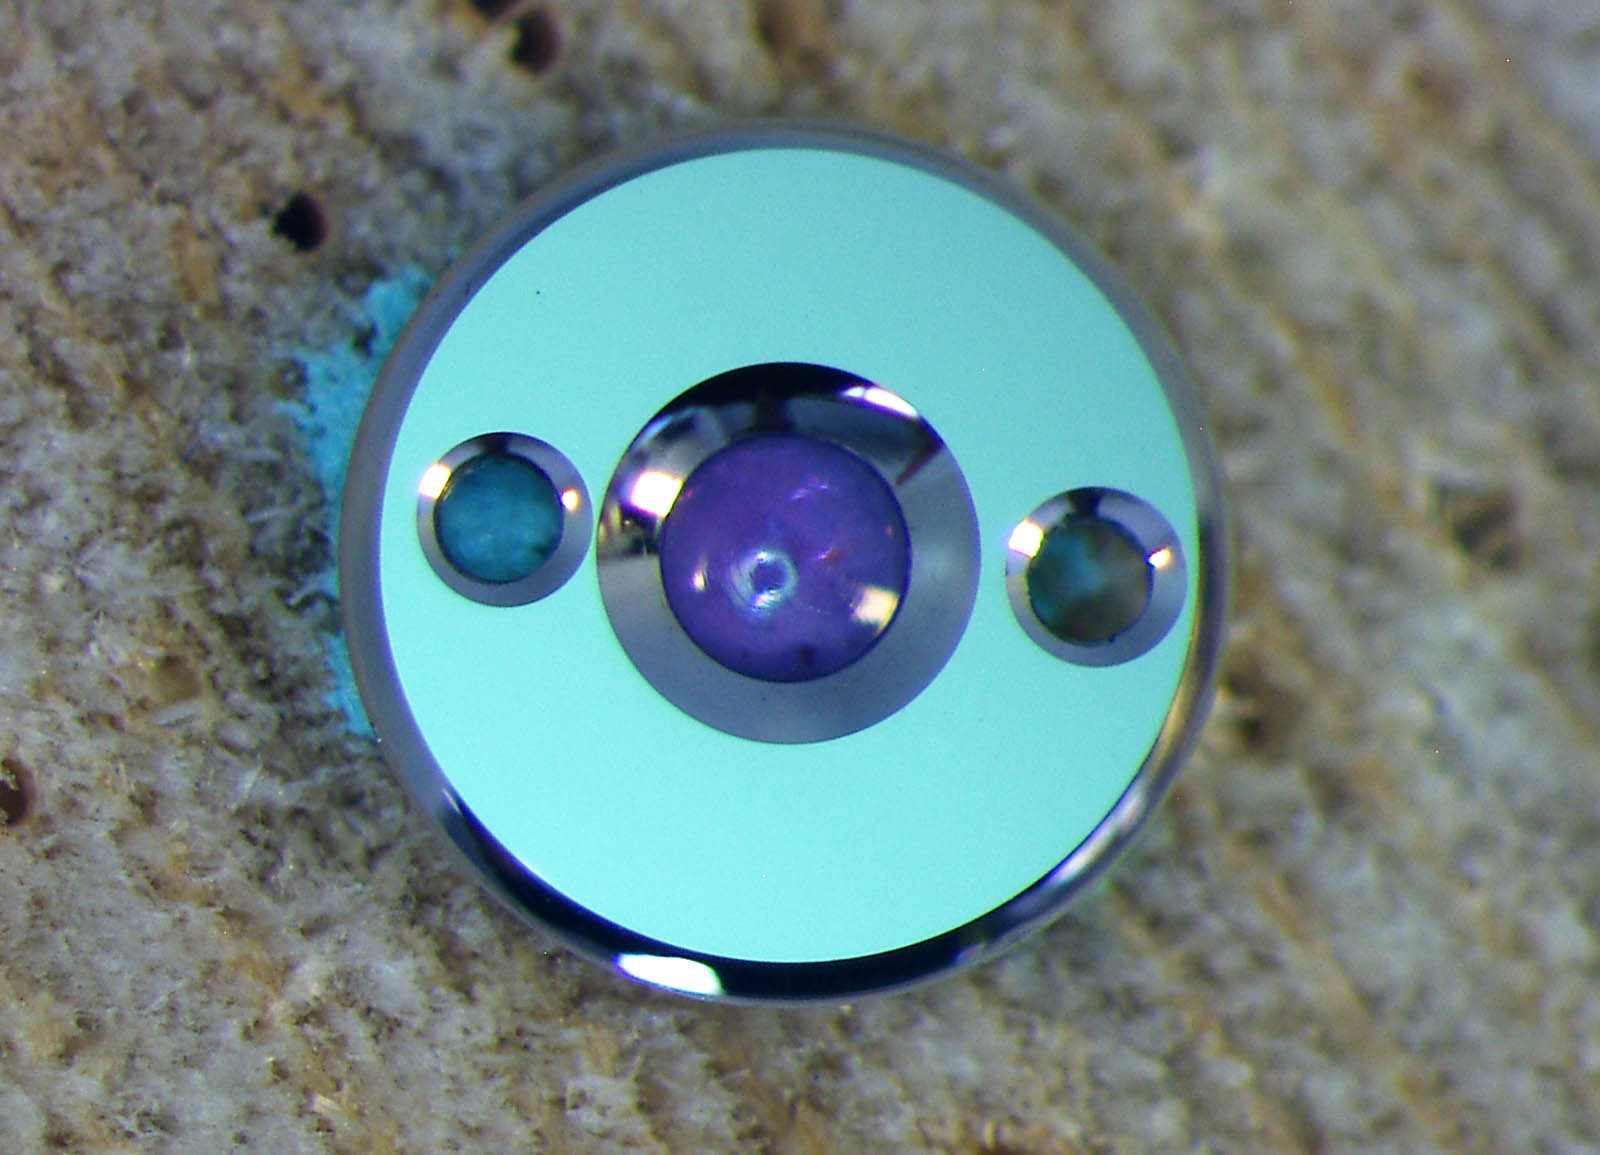
Escape wheel cap jewel setting before
Escape wheel cap jewel setting after
Crown wheel bridge before
Crown wheel bridge after
Balance bridge before
Balance bridge after
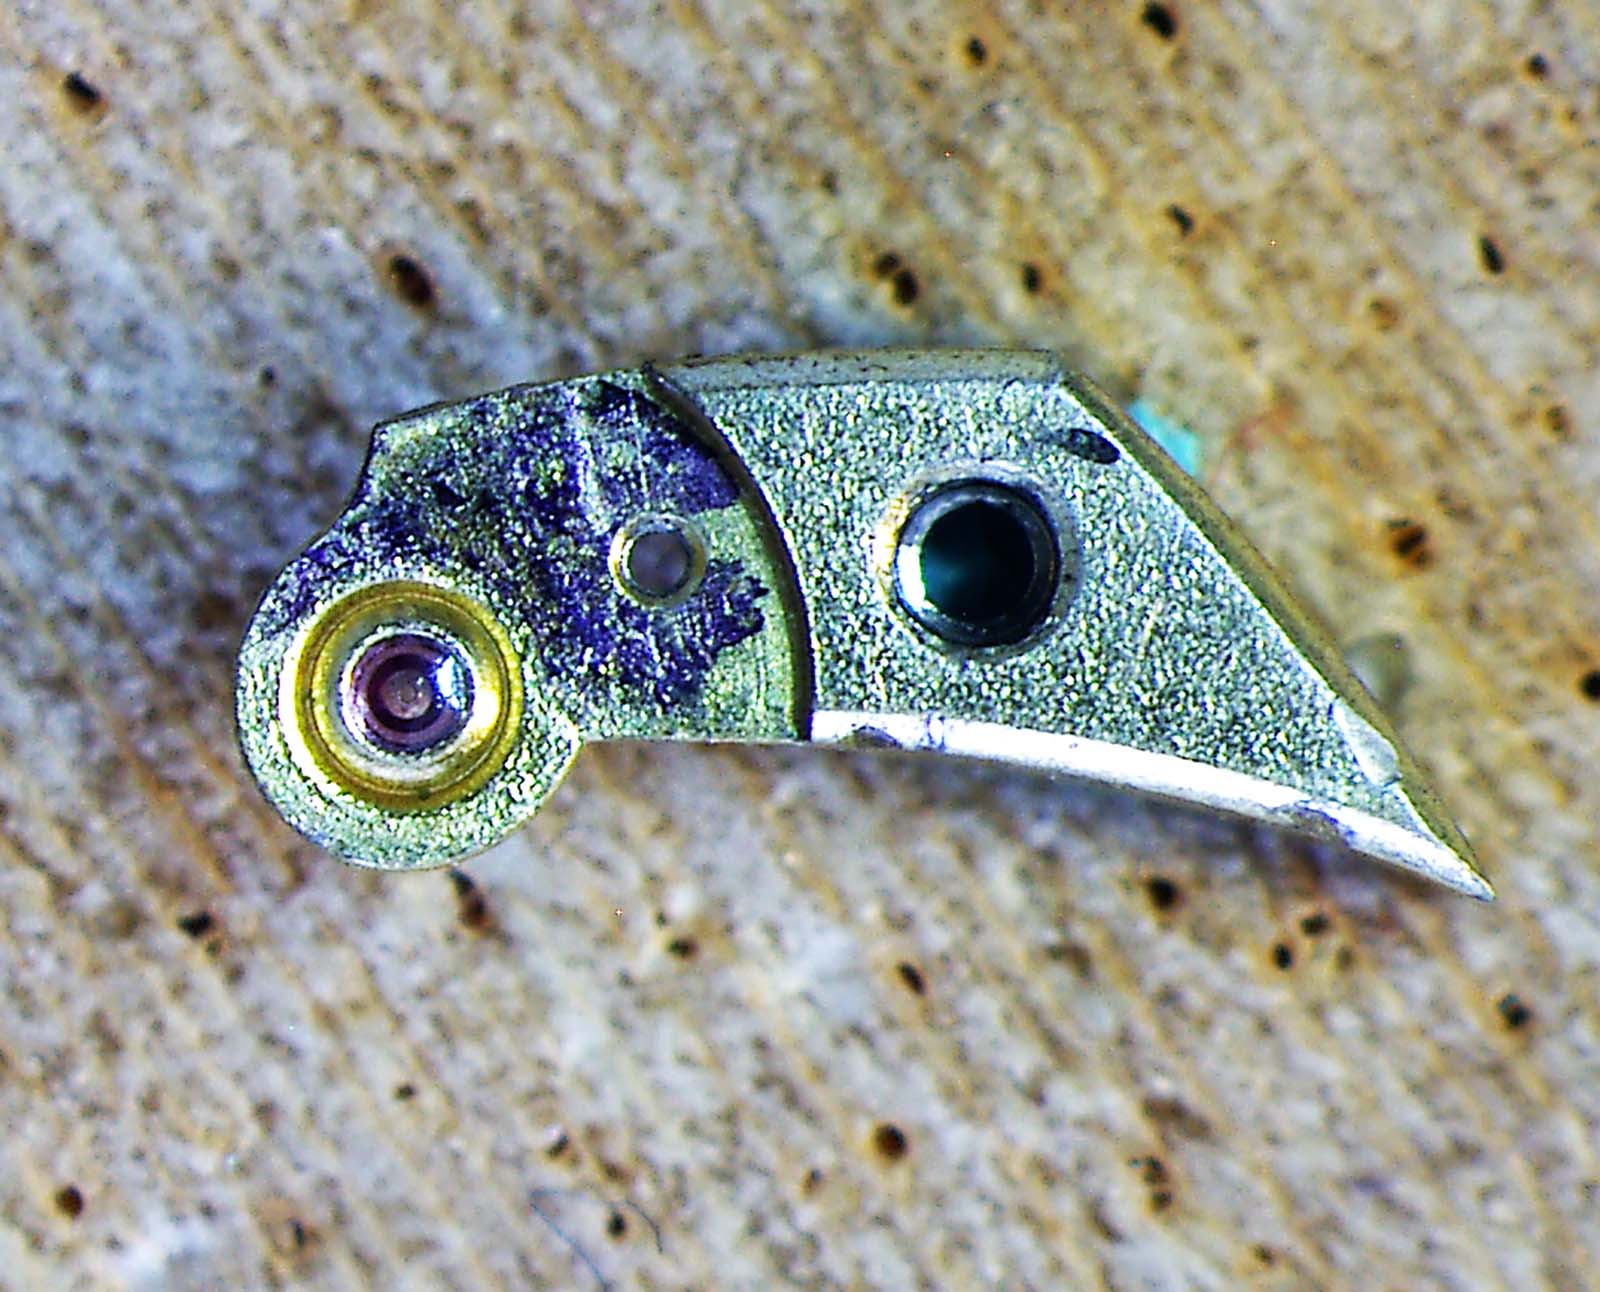
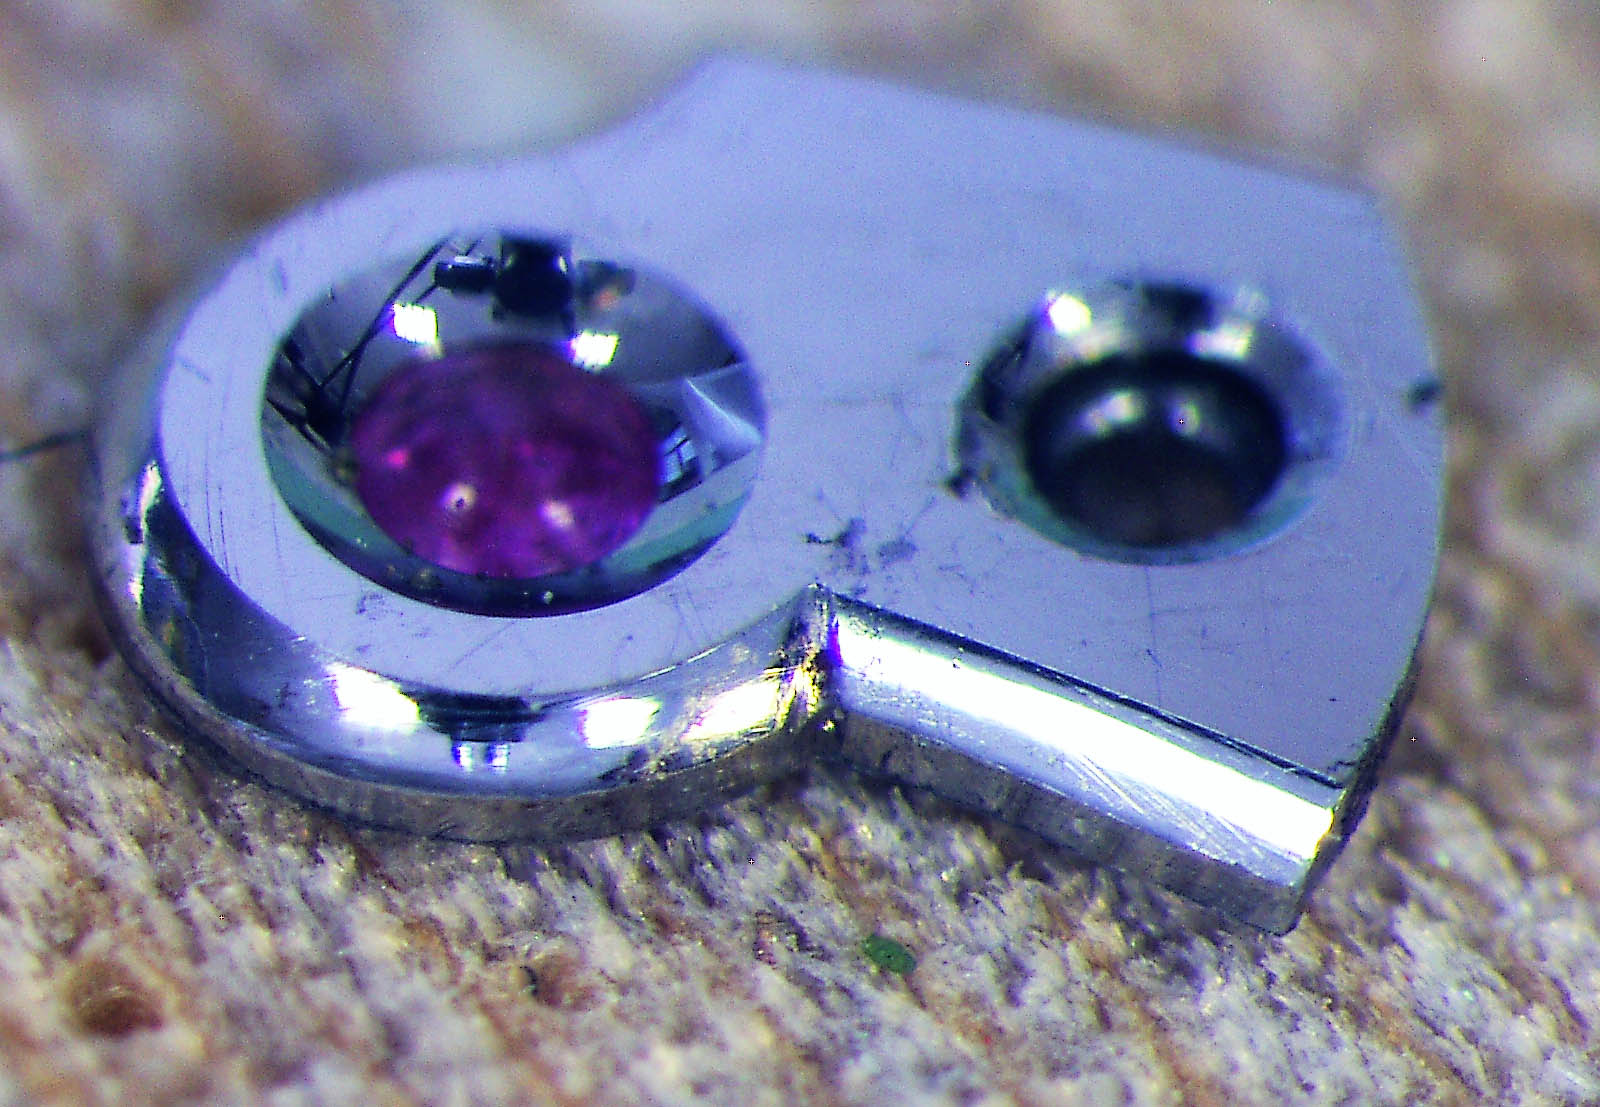
Escape wheel bridge before
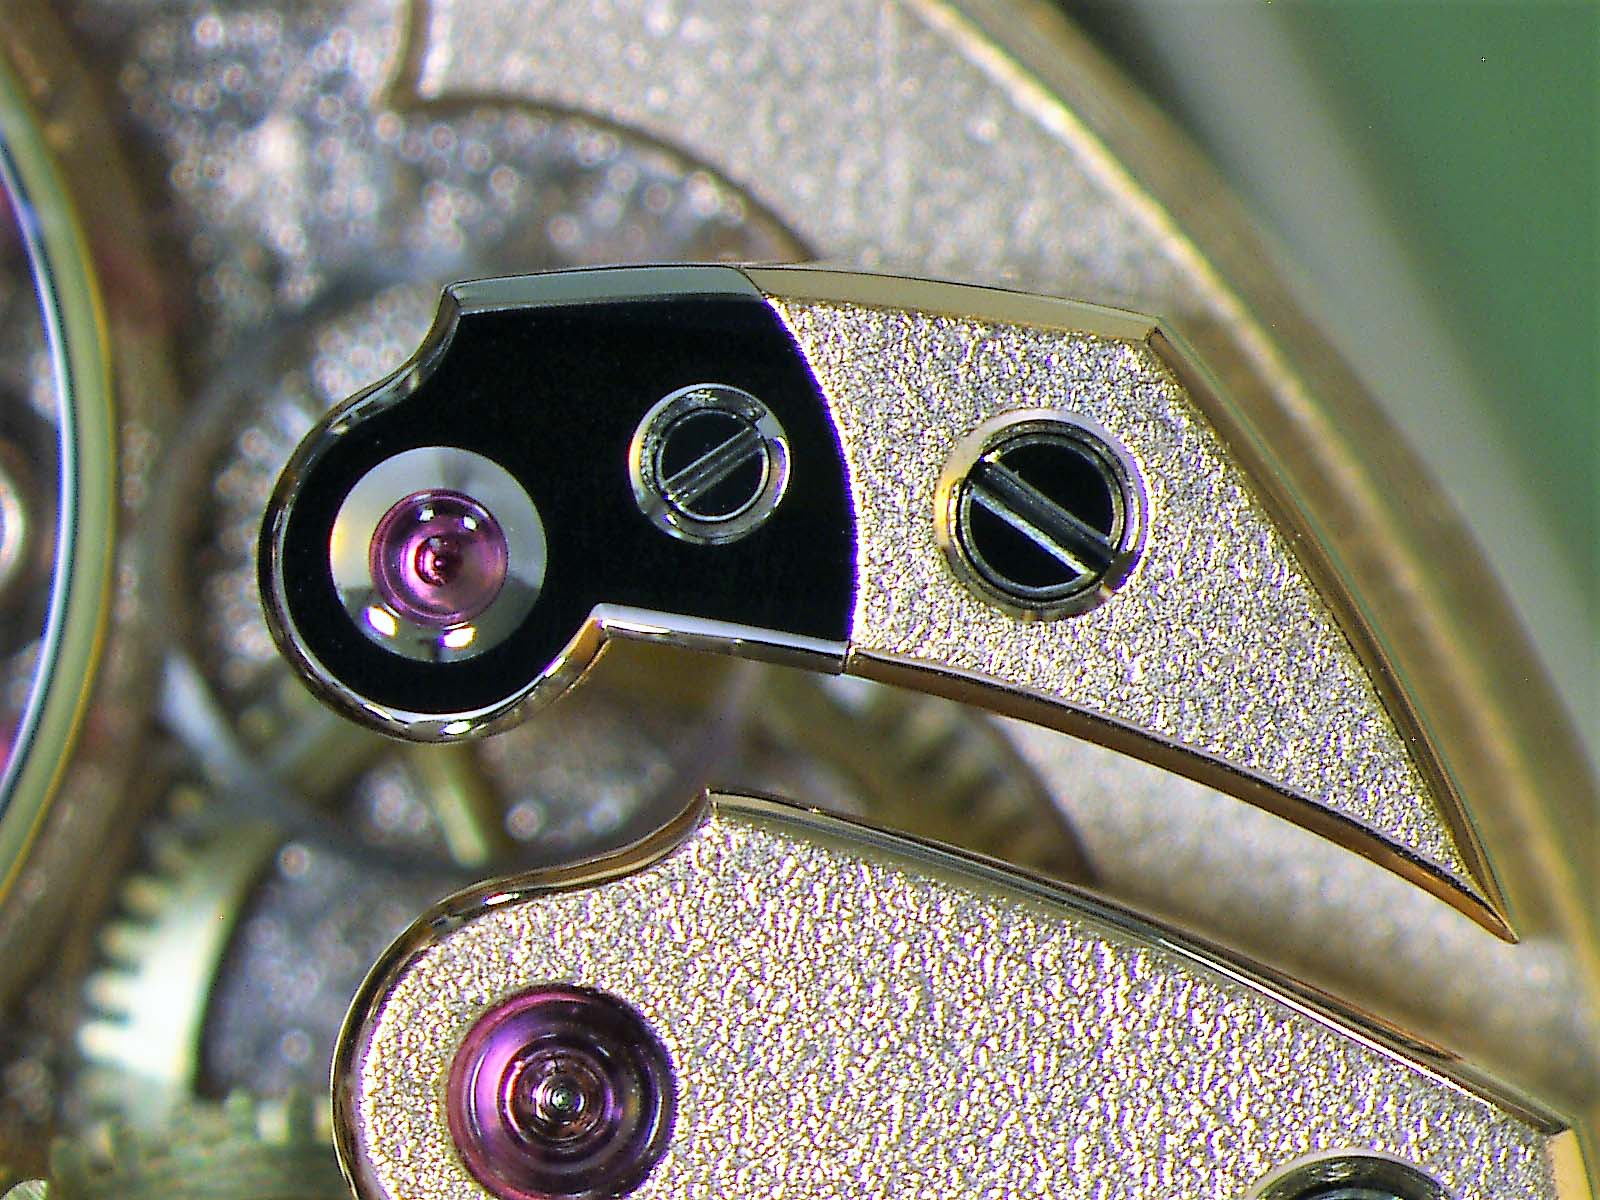
Escape wheel bridge after finishing, photographed straight-on from above – notice the black reflection
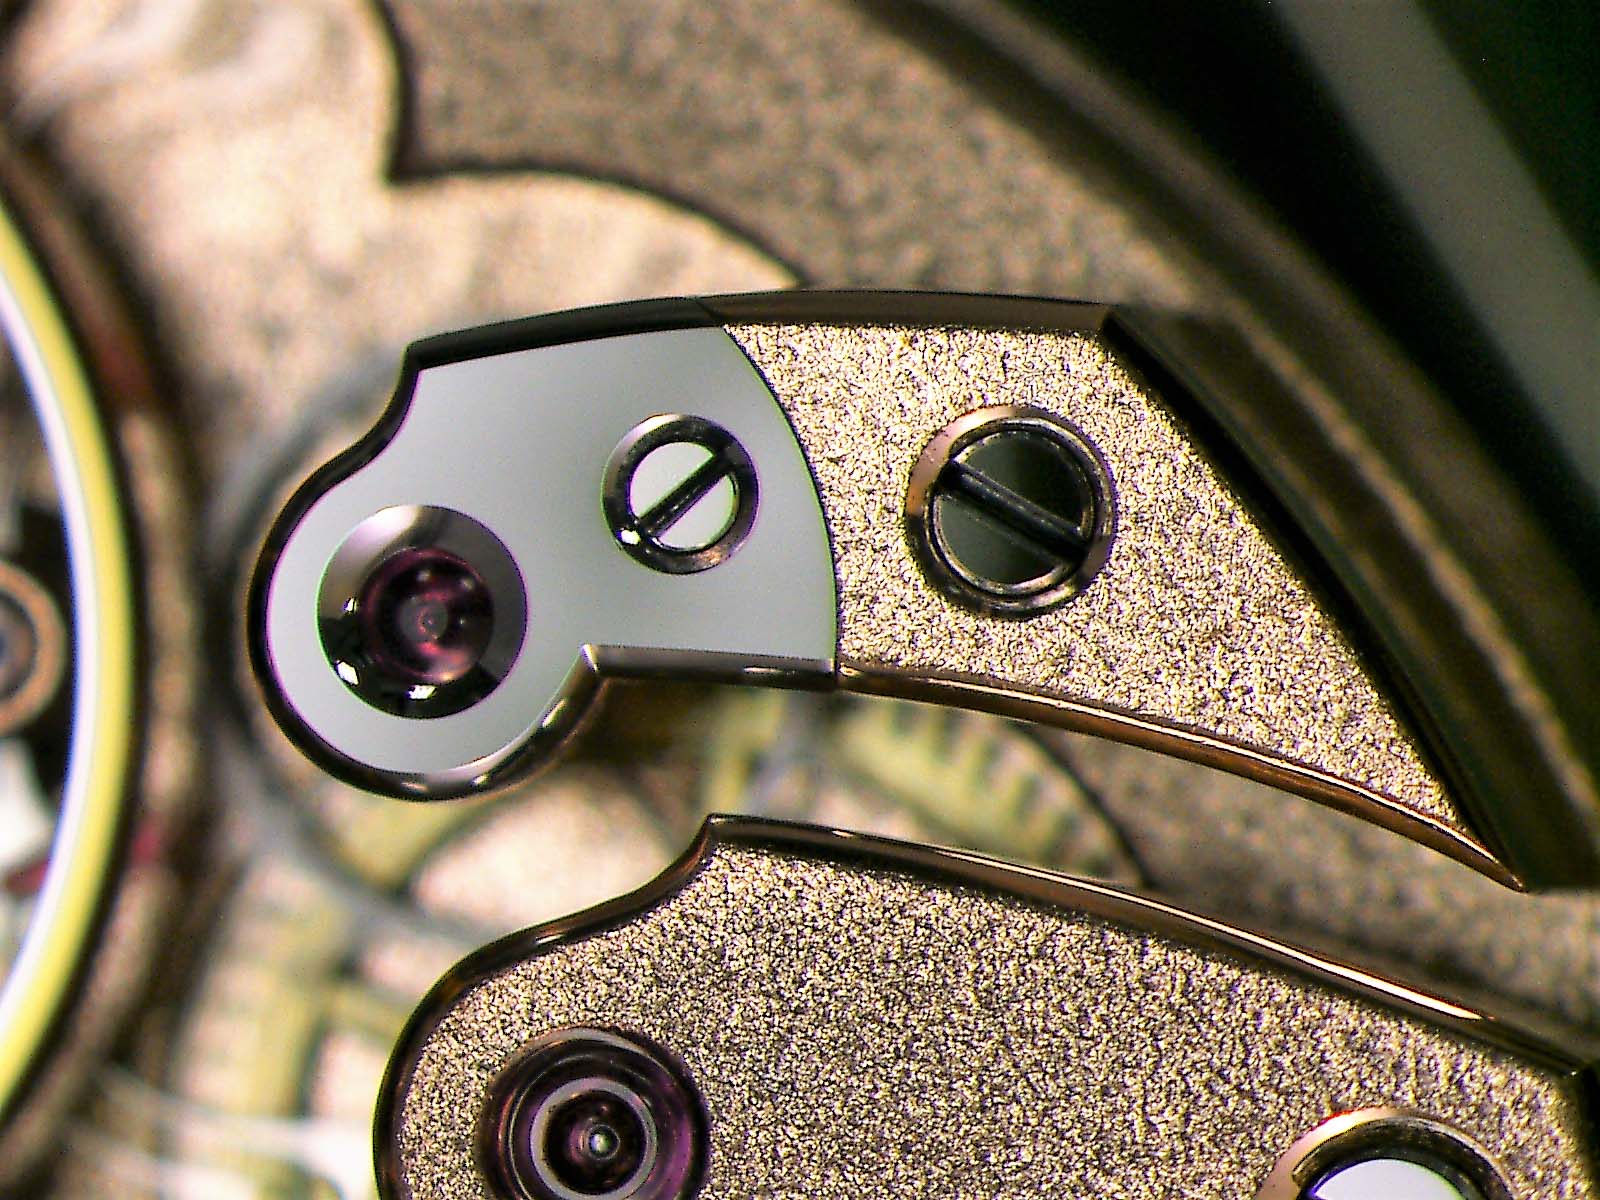
The same escape wheel bridge photographed at an angle to see the different colour of the black-polished steel cap
Dial side main plate before
Dial side main plate after

Bridge side before
Bridge side before, from above
Bridge side after, from above
Bridge side after, at an angle to show the finish on the sides of the parts
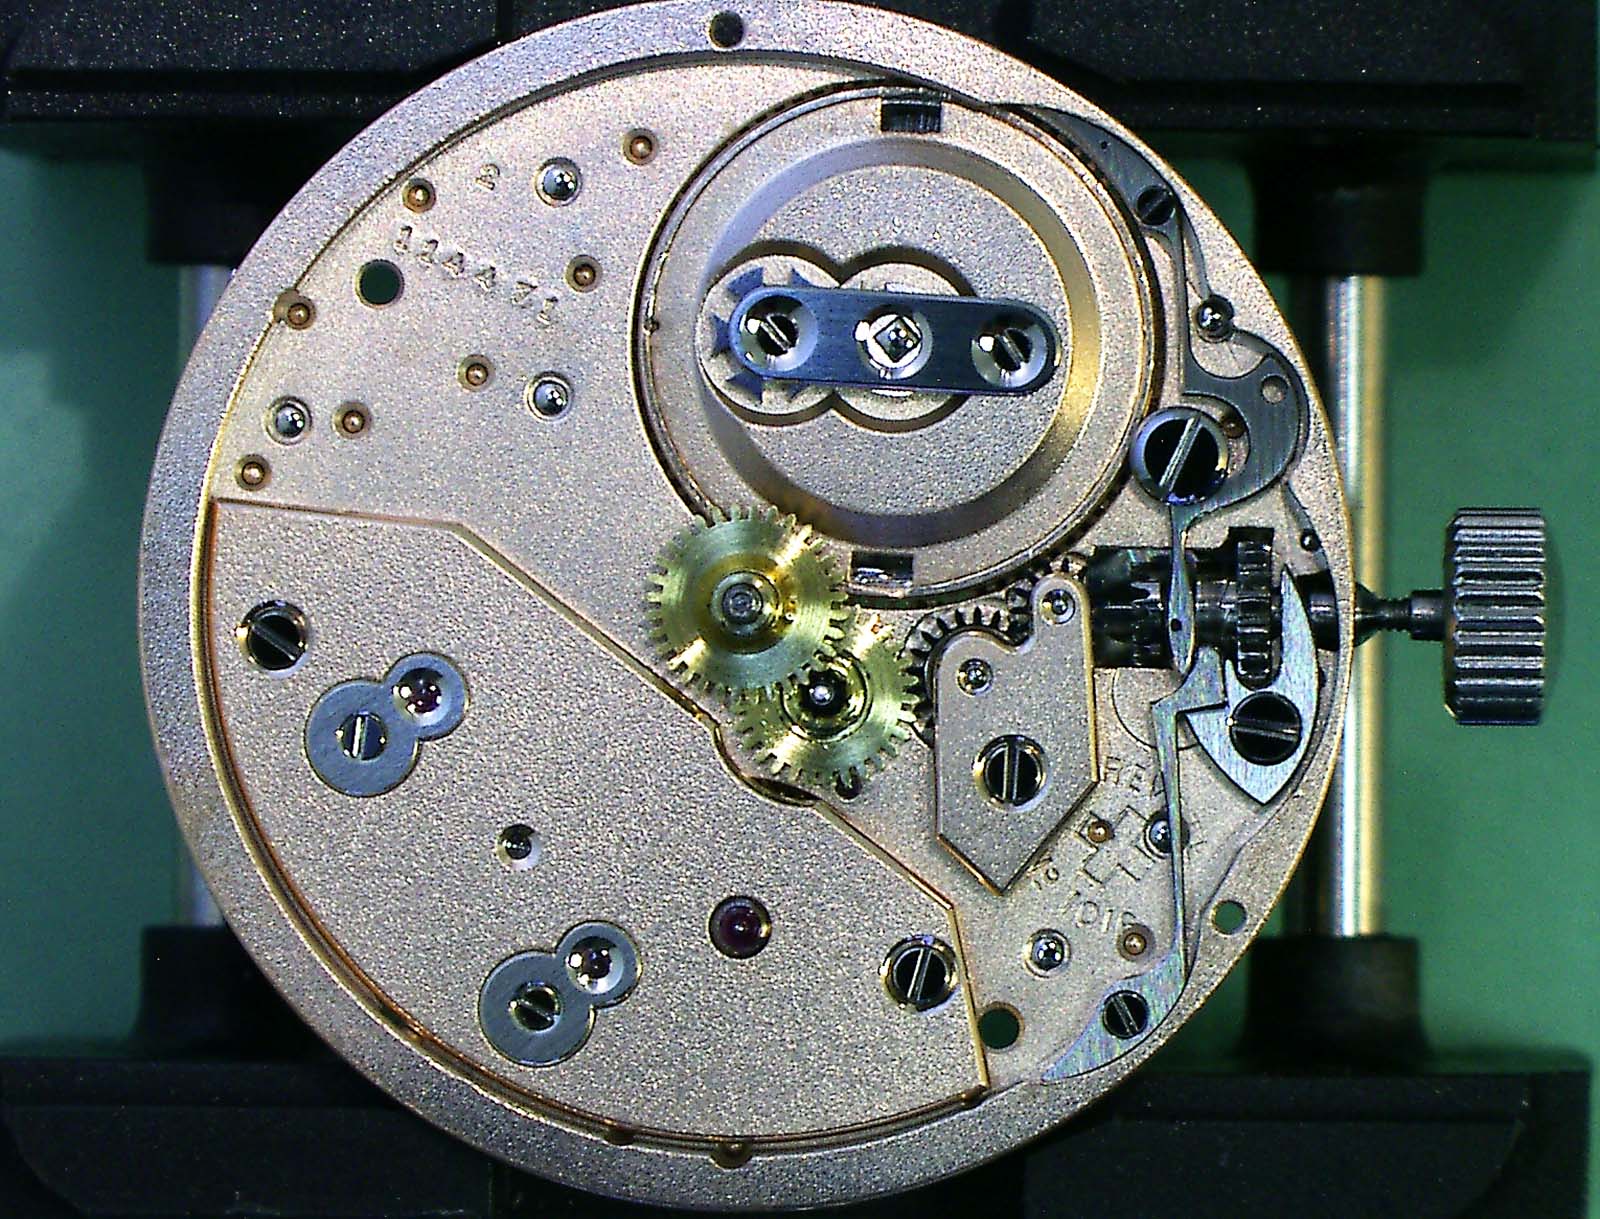
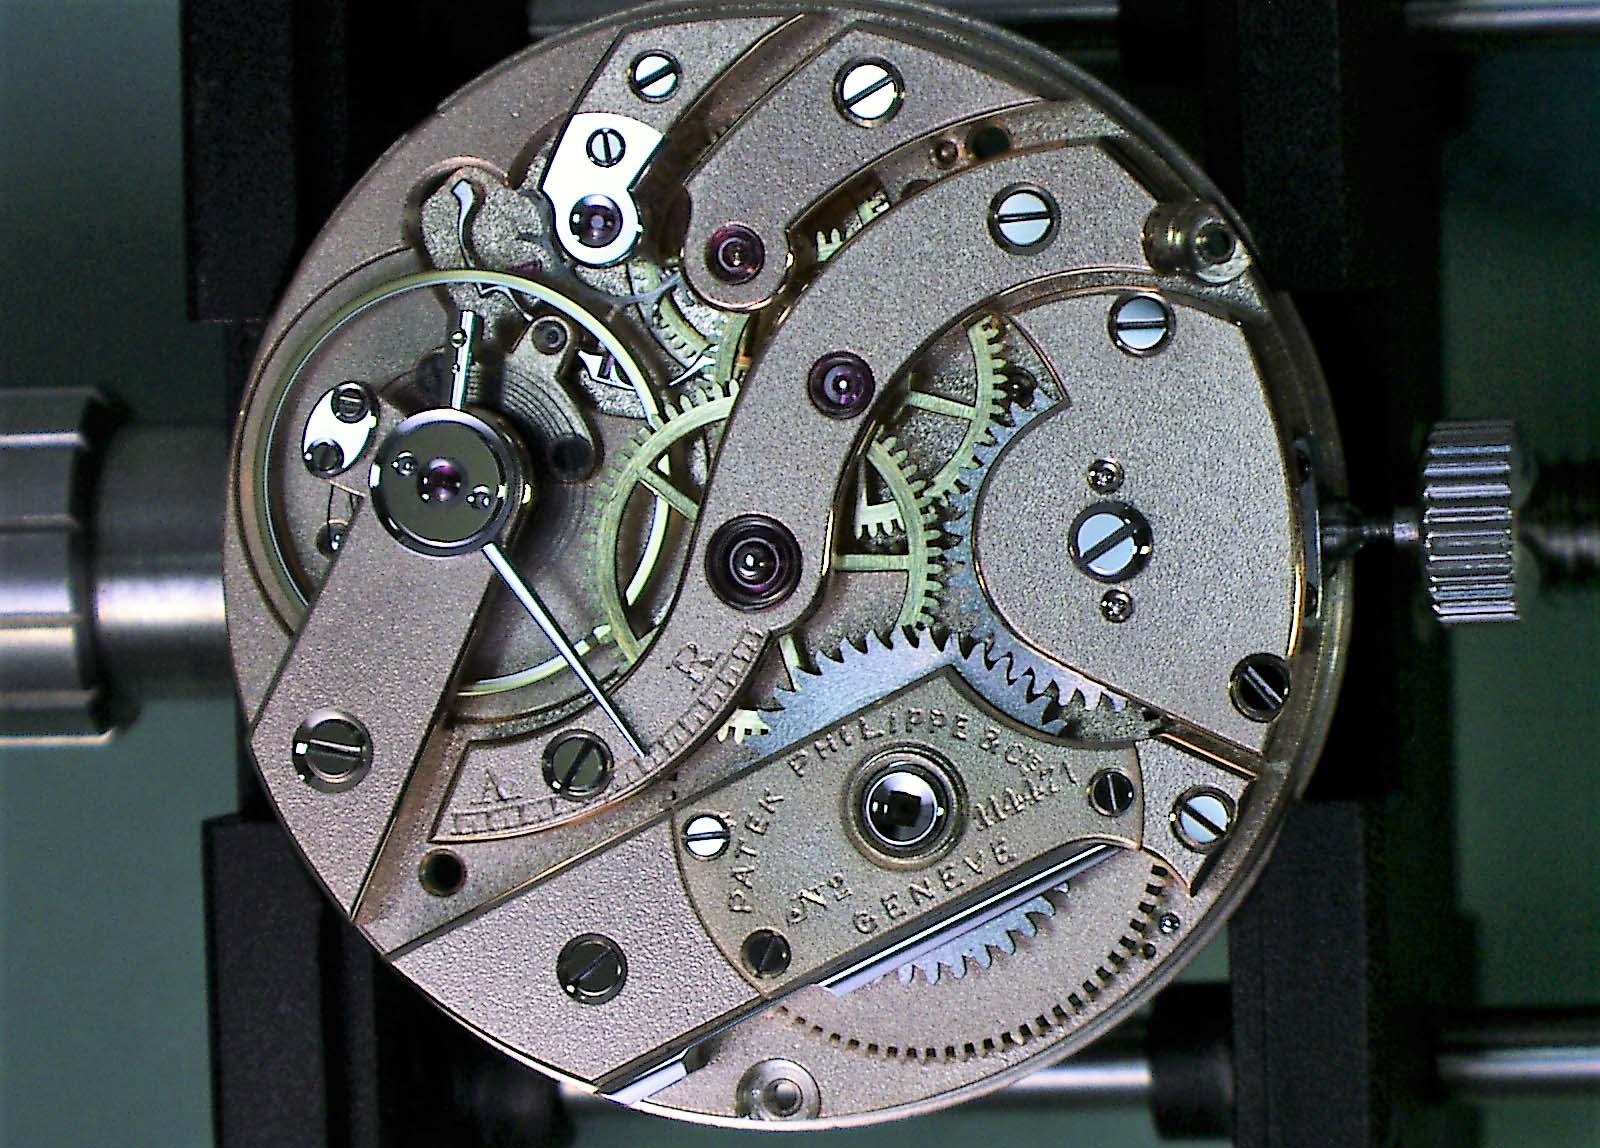
Once the various movement parts were finished, all were cleaned, lubricated, and assembled. Then the movement was regulated, and tested over a few days.
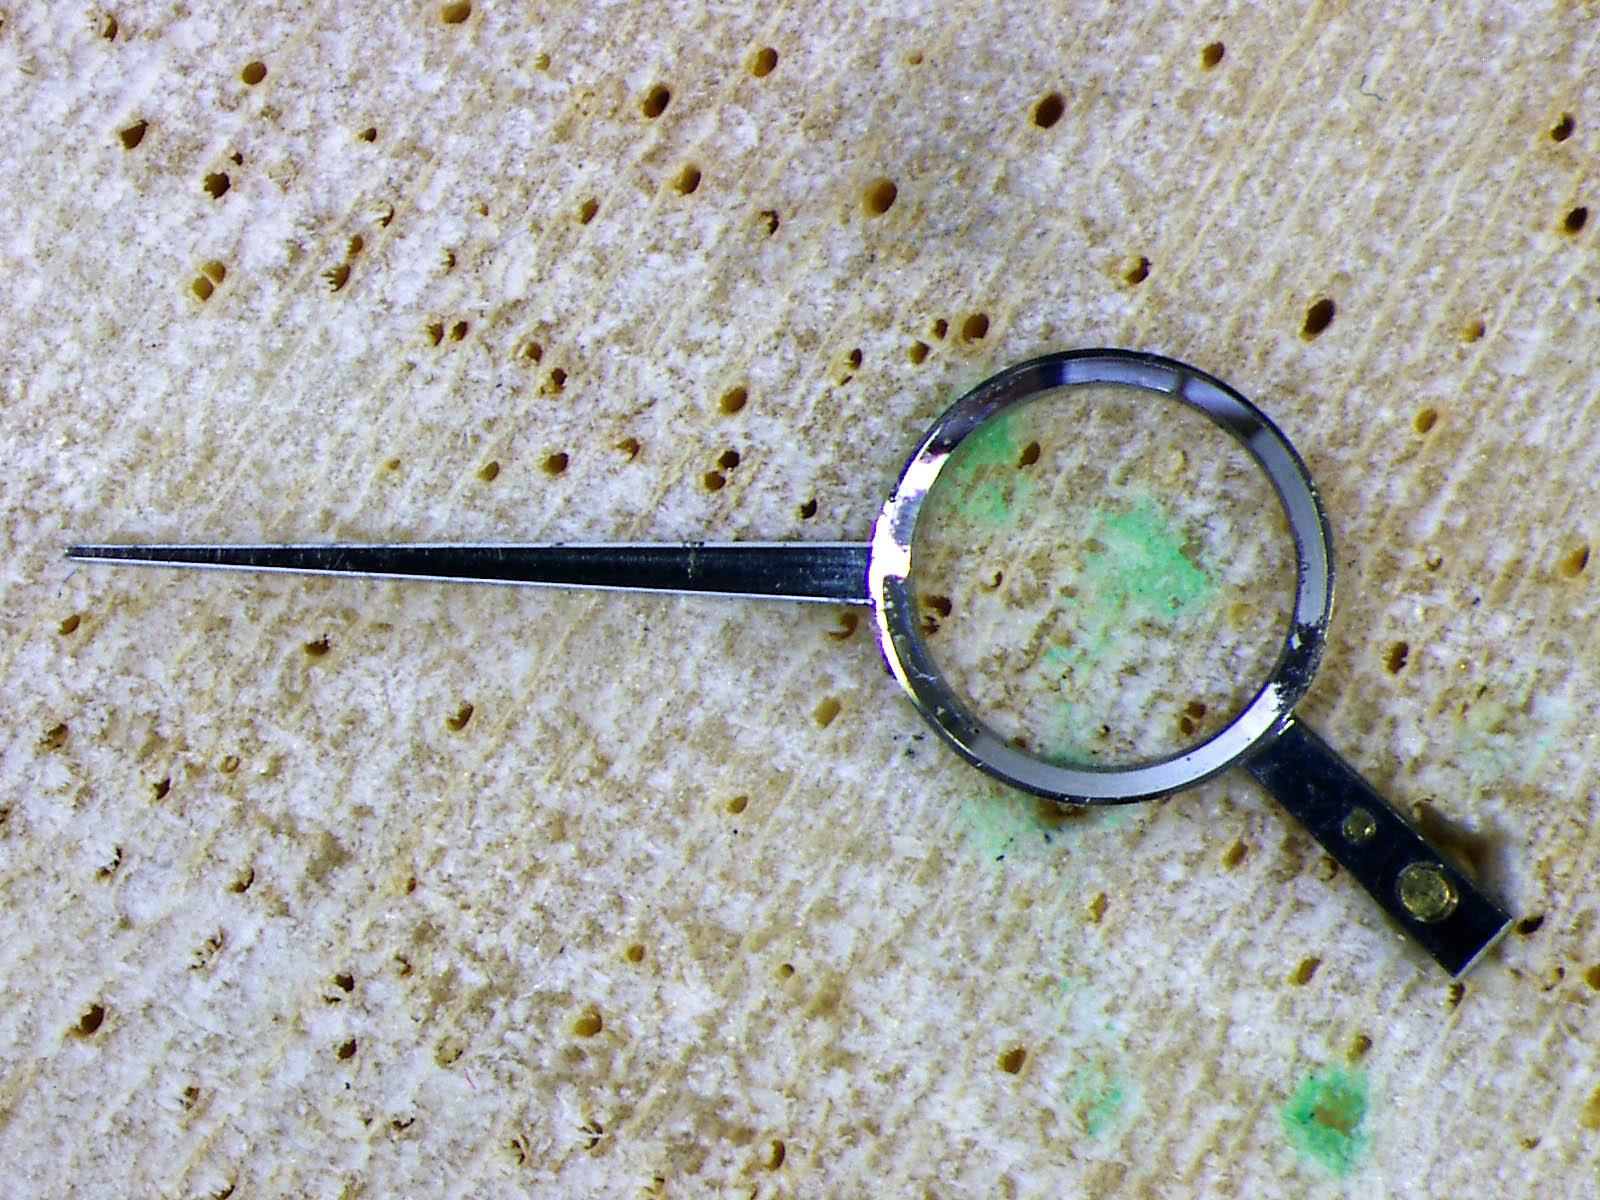
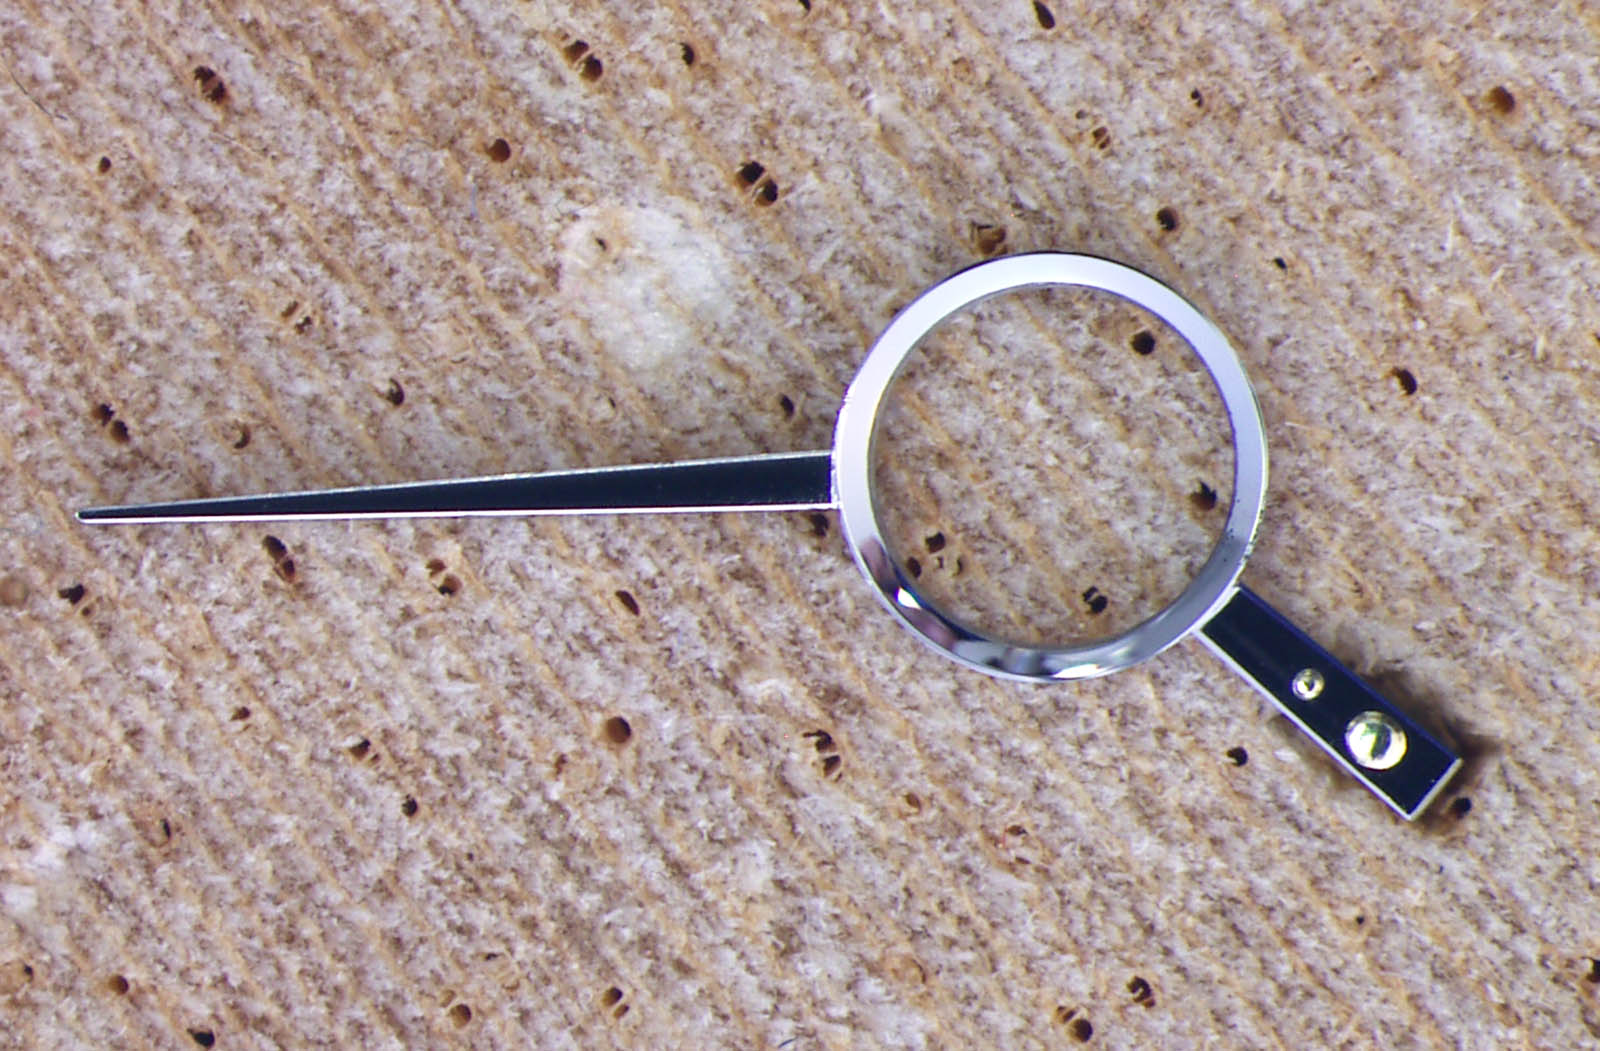
No problems were detected during testing, therefore, it was time to attach the dial and hands, and put the movement into the case. I had found suitable “new old stock” hands and modified them to have correct shape as well as adjusted them to fit the hour wheel and cannon pinion.
The sub-assembly, made up of the movement with the dial and hands and mounted in in the case band, was again tested for a few days to make sure there would be no unpredicted deviations due to the dial, hands or case band.
At the same time, the case back was also sent to an engraver in Zürich who engraved the client’s name and birthdate by hand.
Movement with the dial and hands, sitting in the case band

Case back engraved with the client’s birthday
No problems were found after the few days of testing, so both crystals were bonded to the bezel and case back. After applying the bonding agent and pressing in the crystals, both parts had to be “cooked” in a special oven, for the bonding agent – a special glue designed for watch crystals – to be cured with UV light.
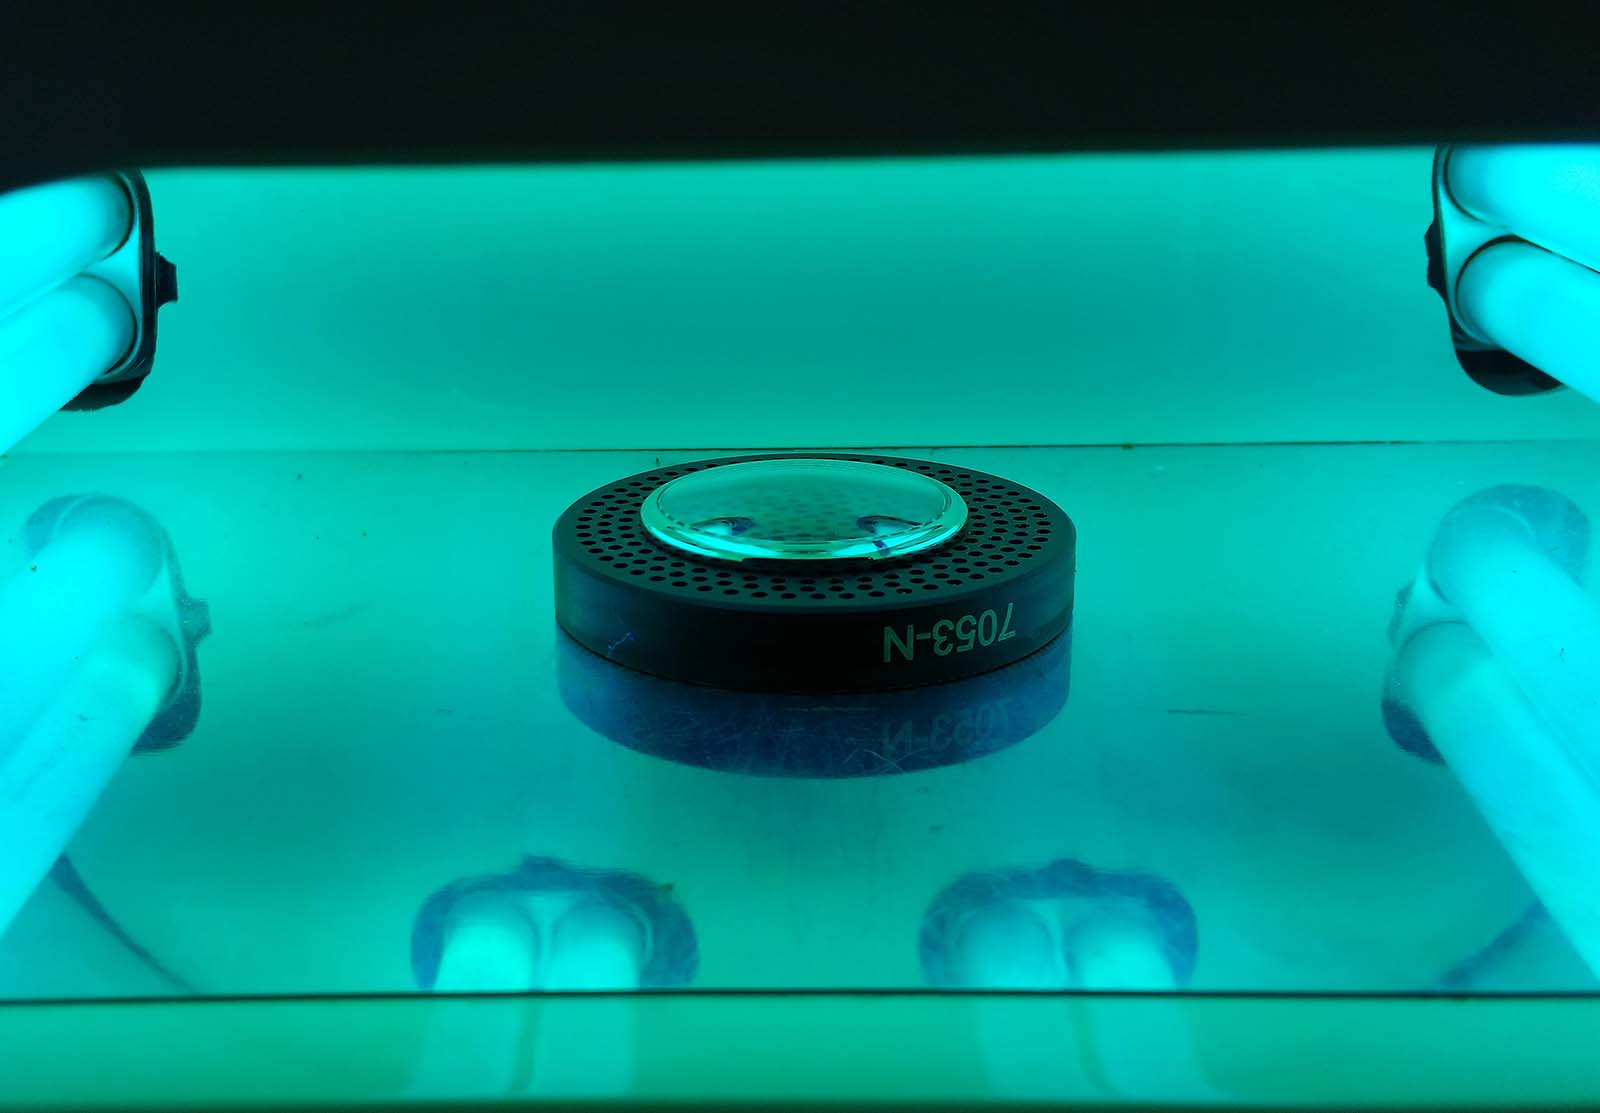
Bonding agent being cured
Once the crystal were completed, the case was closed for the first time.
Then came the water resistance test. Such a watch would not usually be expected to be water-resistant since it’s a hand-made, classical-style case, but the watch still passed the test at 2 bars, or the equivalent of 20m. Certainly good work by Jean-Luc.
The running of the watch was also tested for two weeks in various positions to make sure that everything was working correctly. Finally, the bracelet was attached and the client was notified that the watch was complete.
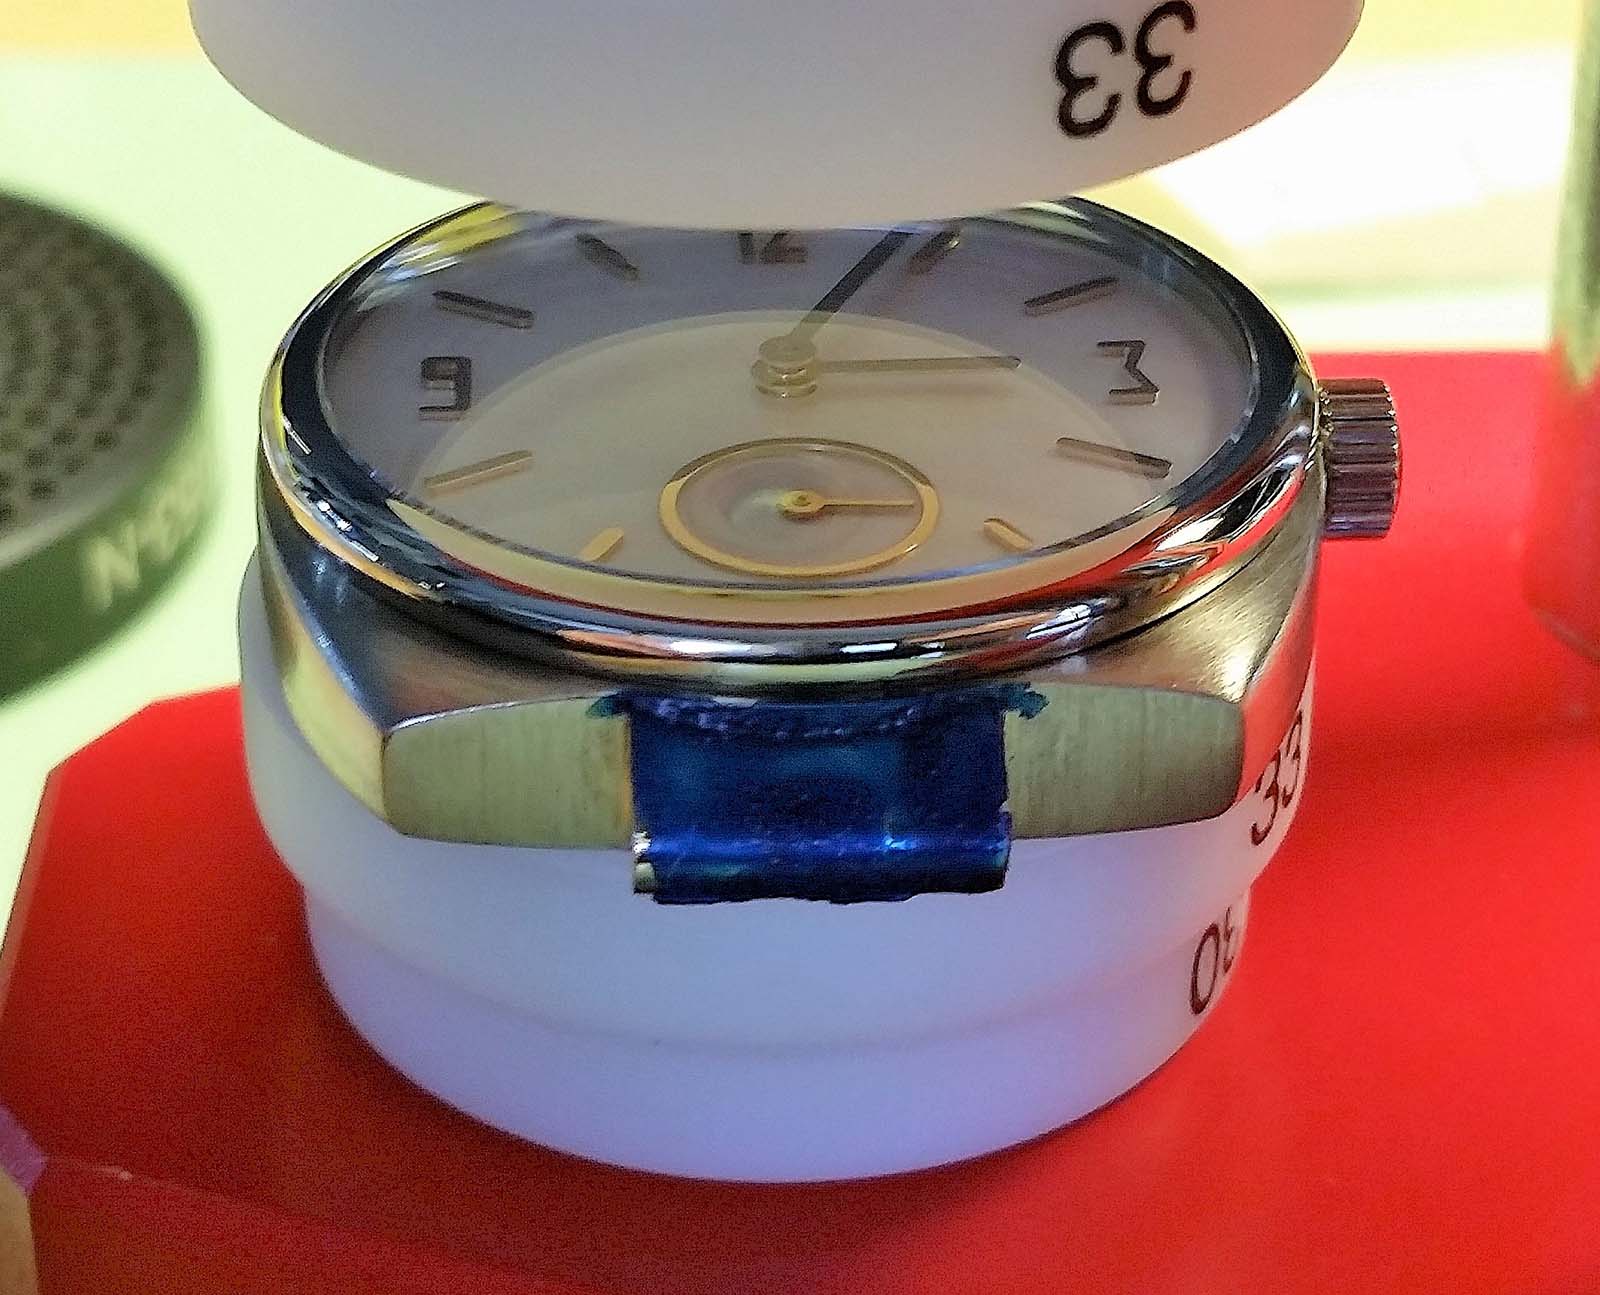
Closing the case
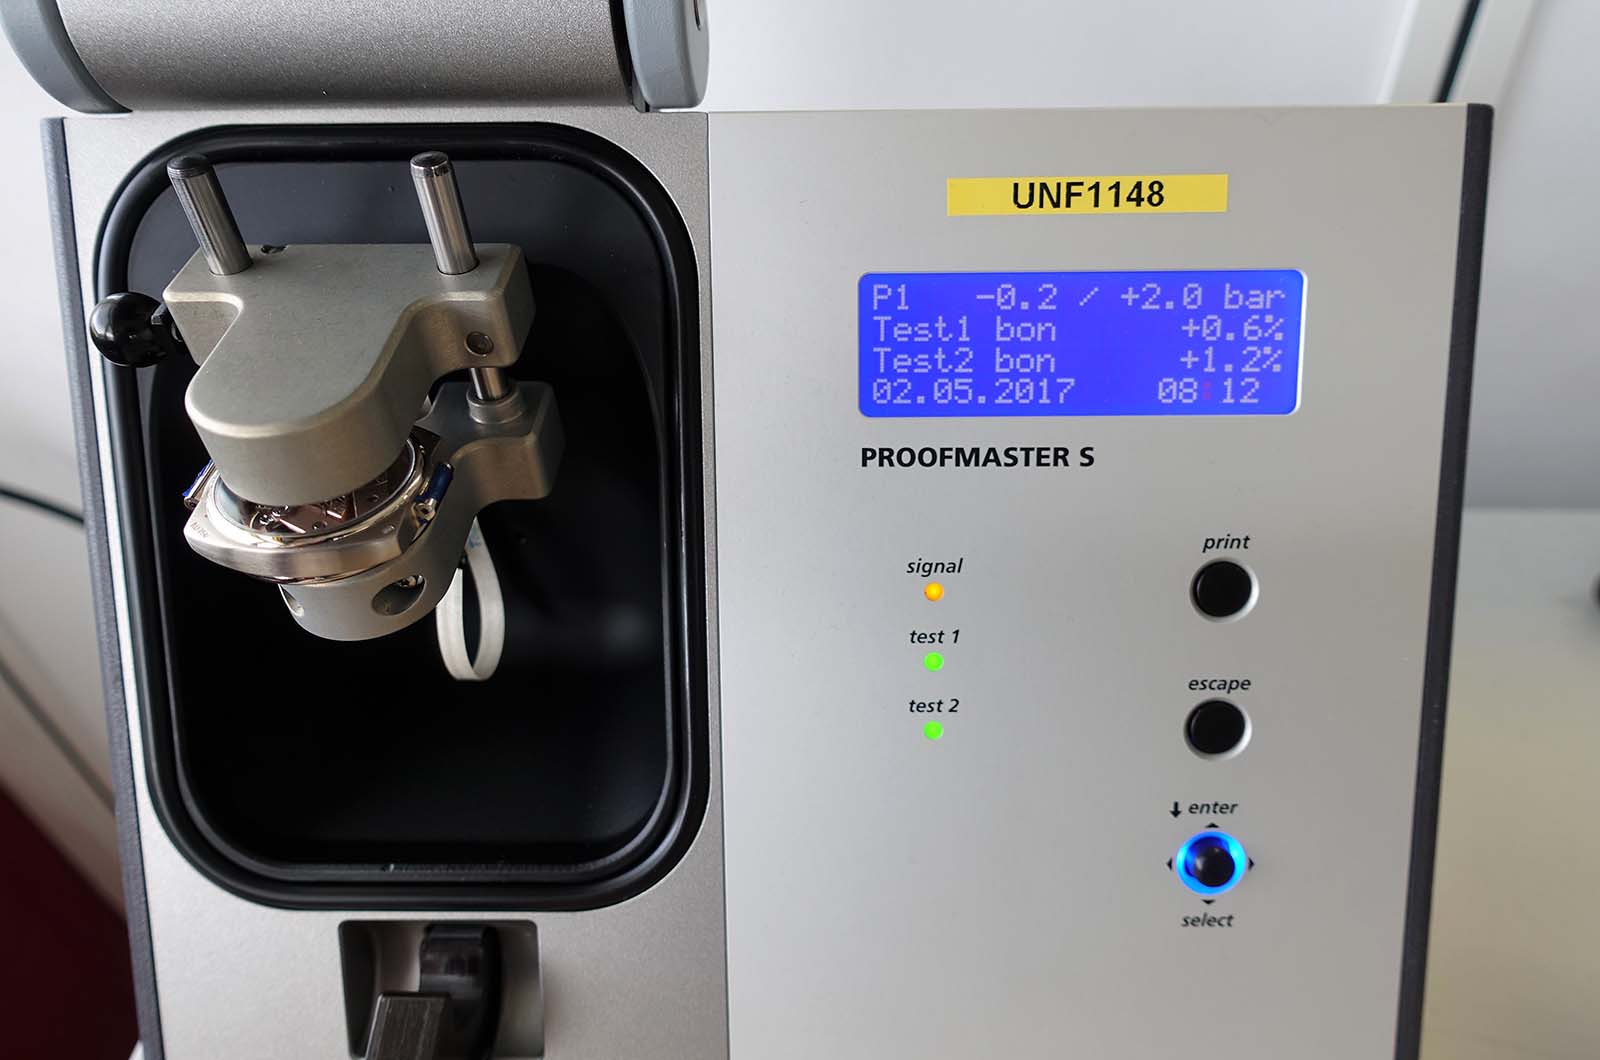
Water-resistance test on the Witschi Proofmaster machine
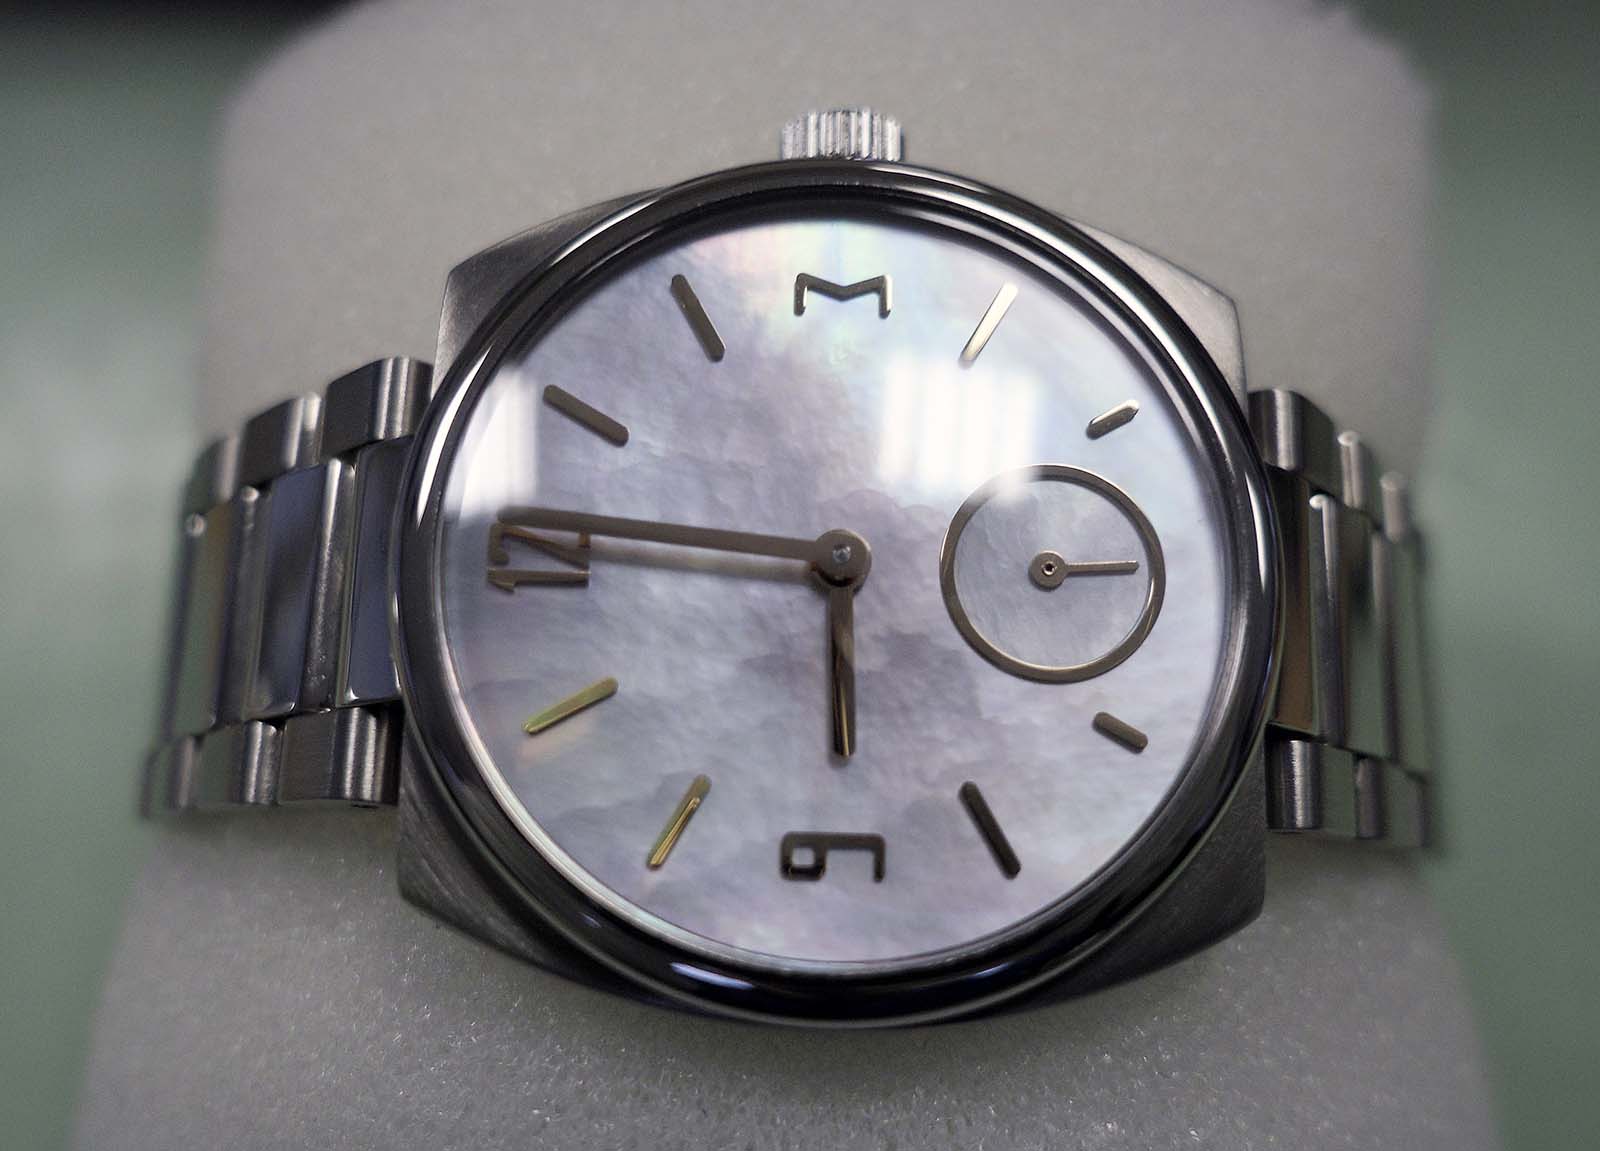
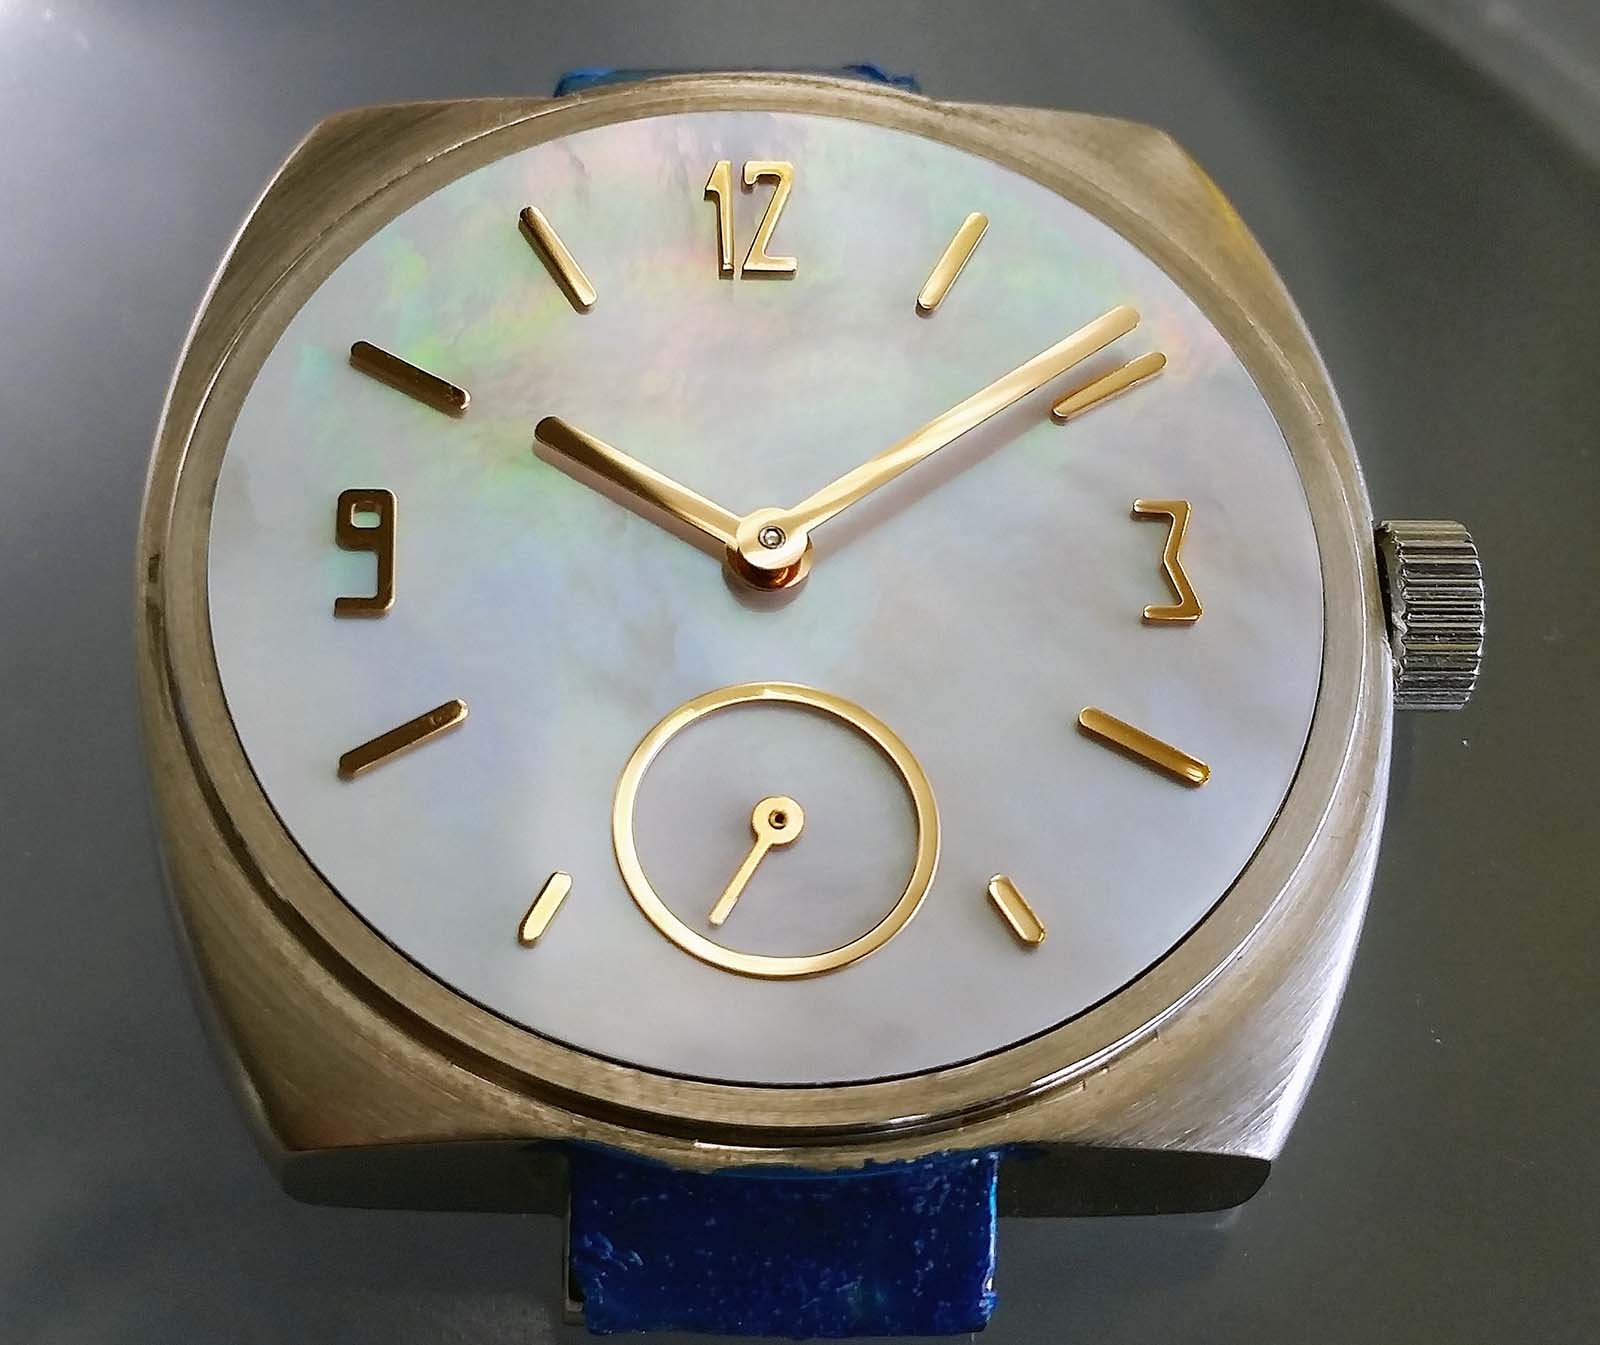
All assembled
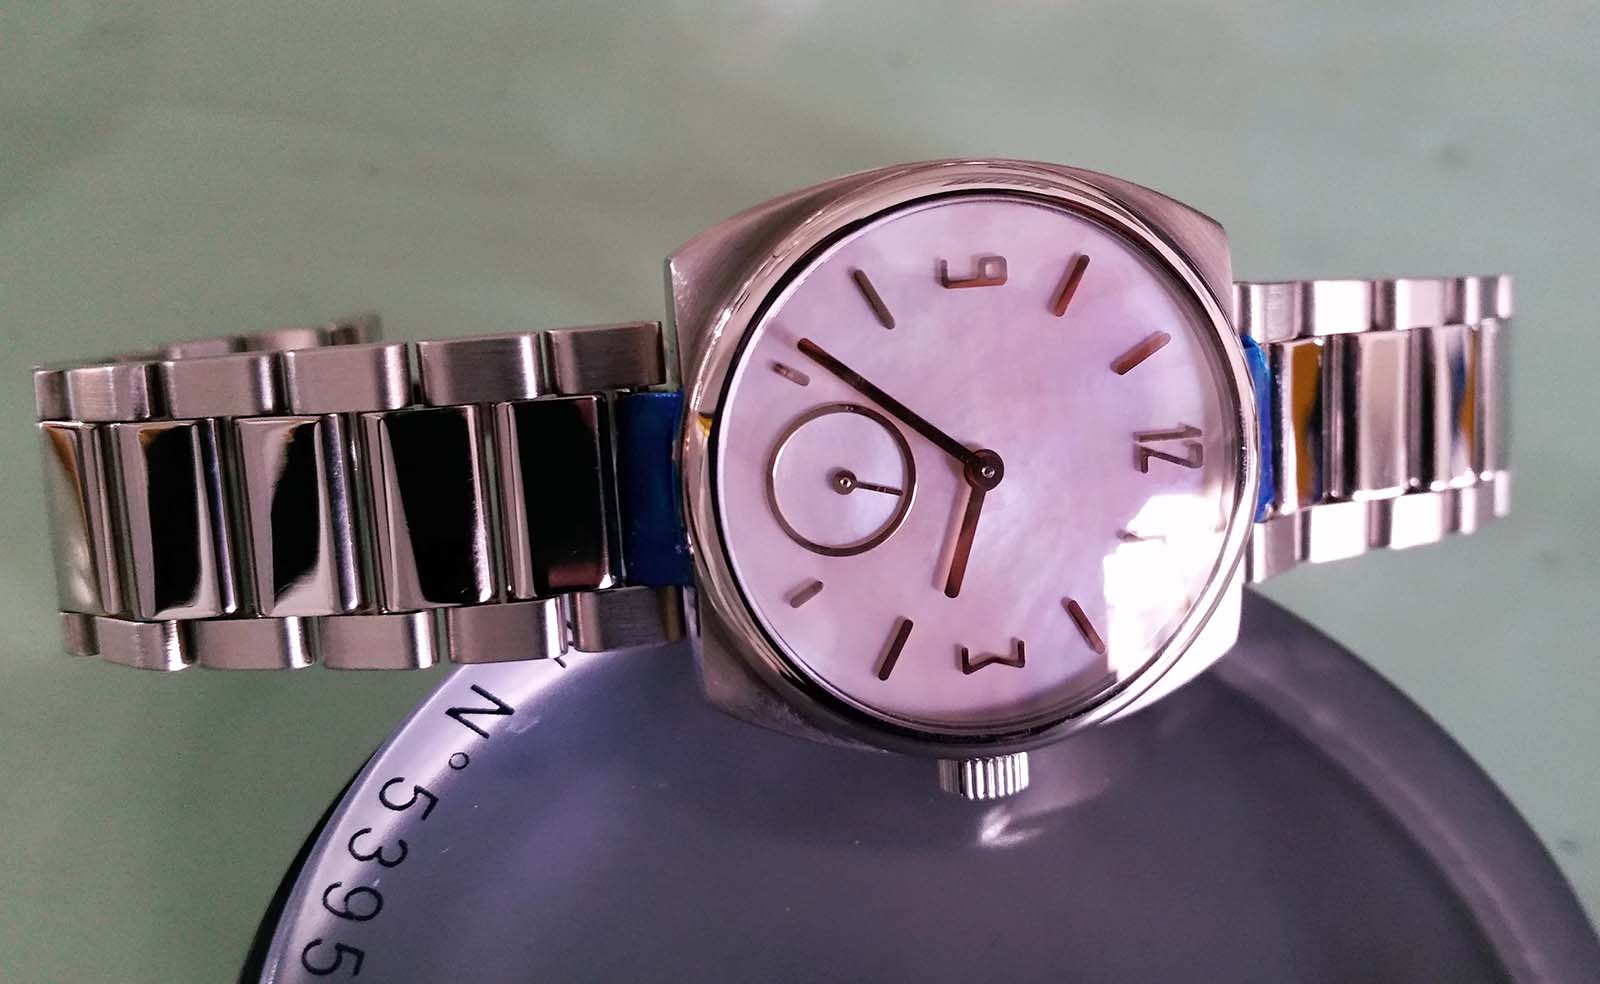
The dial colour changes with the light
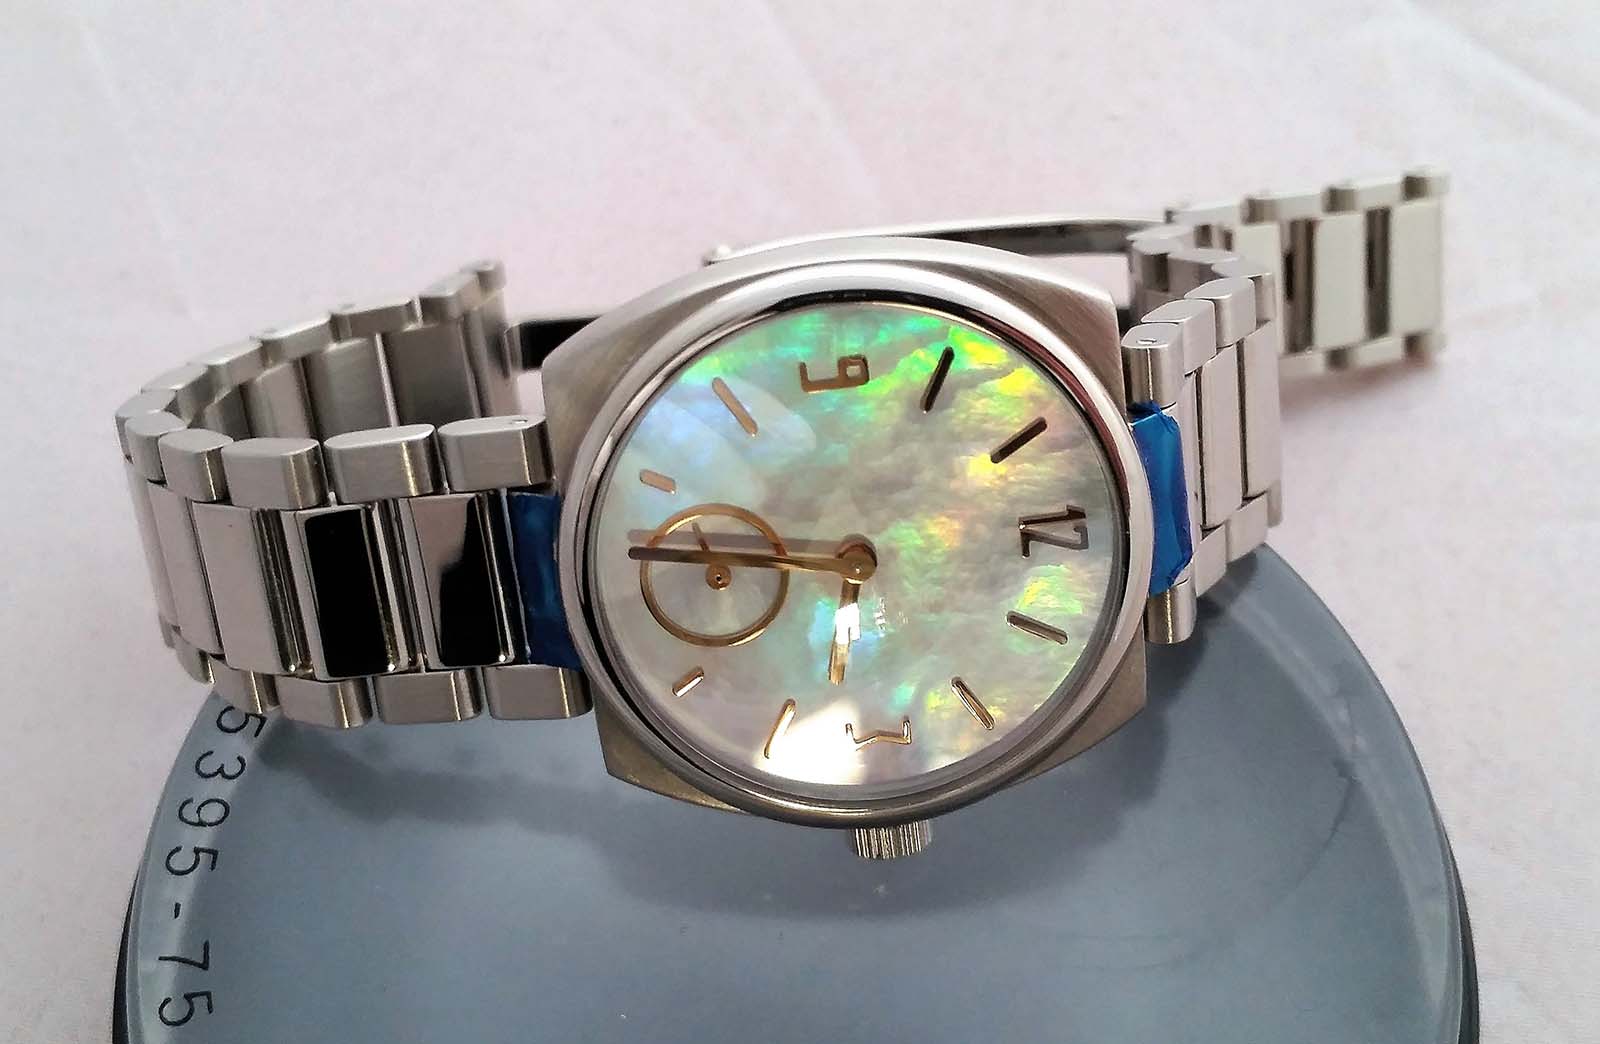
Direct sunlight brings out the colour and grain of the mother of pearl
I wish I had more time to capture better pictures of the completed watch, but I still think these pictures gives some idea how it looks in reality. I am very happy with the result, and so is the client.
Henrik Korpela is the principal of KHWCC. It is a fully equipped independent academy that offers a two-year, comprehensive programme in the classical techniques of watchmaking. Additional information on the school and its programme can be found on KHWCC.ch.
Back to top.